BMW E36 OE Keyless Entry Retrofit
Overview
In a quest to have a good keyless entry system on my 1998 E36 328i it recently dawned upon me that it would be possible to retrofit an OE keyless entry system to the E36. The keyless entry system people always think of in regard to the E36 is the Alpine system that was either dealer or customer installed. It consists of a separate module that plugs in to a prewired harness behind the glovebox along with a siren in the engine bay and two separate remote fobs. What most people in the US don’t know is that a keyless entry option was offered from the factory in the ROW market. It used the GMIV module as the keyless entry and alarm module, just like the 2001-2002 Z3 models with option SA305. When optioned from the factory the key had the remote built in. This post explains how I retrofitted this to my E36. The theory behind this retrofit can be applied to other BMW models as well.
Gathering The Parts
After studying the European E36 wiring diagram I figured out what I needed. The main thing was a remote control module. This receives the keyless entry signal and sends it to the general module. The remote control module that would work best for retrofitting is inside of the rearview mirror of E31, E34 and Z3 models optioned with keyless entry from the factory. I had originally removed the remote control module from an E31 mirror I had and was going to mount it behind the glovebox while extending the antenna along the passenger A pillar. The module worked, but I think I accidentally fried it as it quit working. After checking eBay, I discovered that remote control mirrors from Z3s are now fairly cheap considering their age now. I ended up buying one of these mirrors and left the module inside of it.
The parts I used consisted of the following:
- 1 Z3 mirror containing a remote control module – $50
- 1 uncut key shell – $11
- 1 key remote circuit board – $FREE from old 1999 E39 key I had
- 1 virgin transponder chip – $FREE from key parts I already had
- 10 fan connectors (BMW part 61131387142) – $1.90 I only used 6, but it is good to have spares.
- 1 comb connector (BMW part 61131387150) – $4.45
- 2 five position comb connector housings (BMW part 61131393719) – $2.24
- correct color coded TXL wire – $33.05
- MQS pins for mirror plug – $FREE samples from TE Connectivity
- 10 position male plug for mirror – $FREE sample from TE Connectivity
- rearview mirror wiring grommet (BMW part 61138365522) – $FREE from parts I already had
$102.64 total retrofit parts cost
Wiring Information
This is the diagram I used to determine how to wire the remote control module.
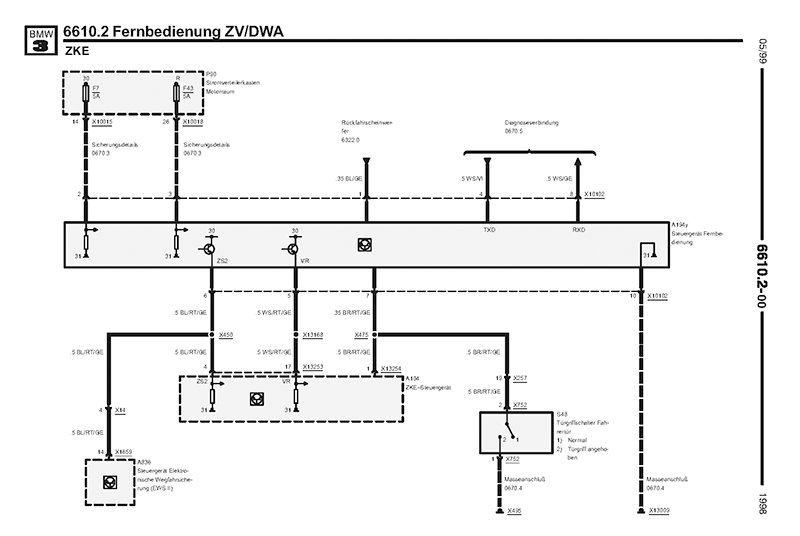
The remote control module is in the middle marked as module A194y. The pins I used for the retrofit were 2, 3, 5, 6, 7 and 10
Pin 2 on the module goes to switched ignition power. This is necessary for entering the remote control module into programming mode so a keyless remote can be synced with the module.
Pin 3 goes to power hot at all times.
Pin 5 is the lock signal.
Pin 6 is the unlock signal.
Pin 7 is the door contact signal.
Pin 10 is ground.
Pins not used include 1, 4 and 8. Pin 1 is for an autodimming rearview mirror. The ’01-’02 Z3s with keyless entry do not have this wire. This just undims the mirror when the car is in reverse. Pins 4 and 8 are for module communication through the 22 pin connector. I did not see a reason to connect these wires, but if I find out they have a good purpose I will update this in the future.
In theory this information could also be used to retrofit keyless entry on other BMW models. The main things that would need to be wired are the constant power, ignition switched power, ground and the lock and unlock signals.
Procedure
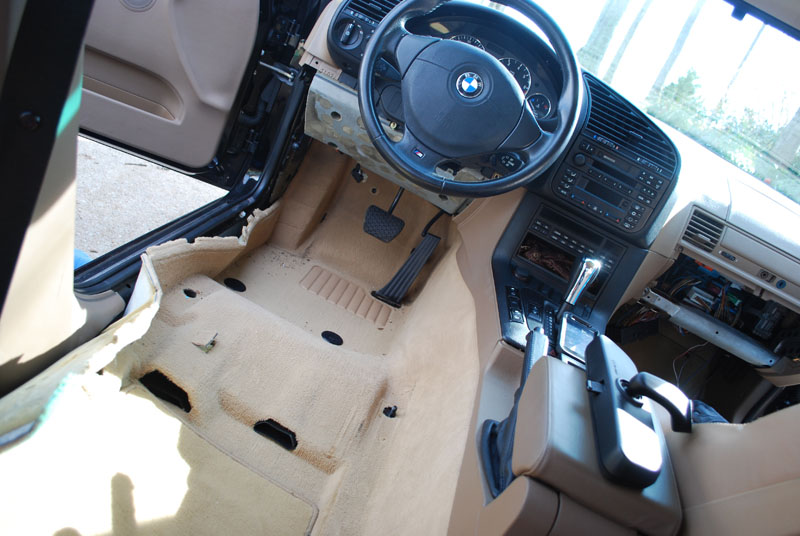
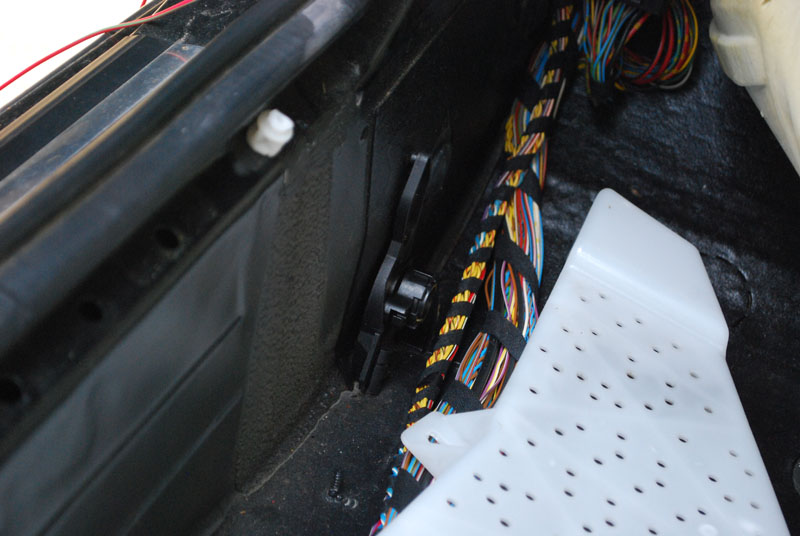
Besides having a perfectly functioning OE equivalent keyless entry system I wanted to perform this retrofit without splicing into any wires or using any wire taps. After studying the wiring diagrams for the E36 I figured out that every wire I would need to connect to had a junction somewhere in the car. 5 out of 6 of them were located in the large black splice block behind the glovebox where the majority of the splice panels are located. The other wire is the switched ignition power wire and that splice panel is located under the driver’s seat underneath the carpet.
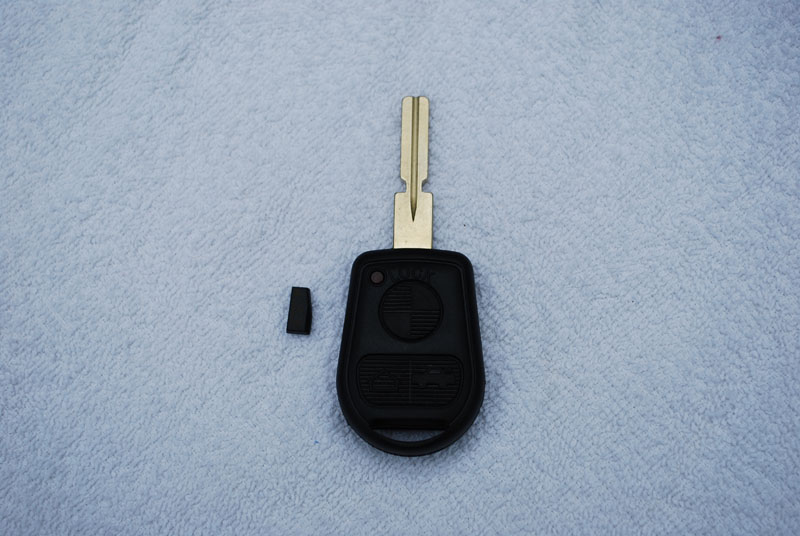
This is the key I purchased along with the transponder chip that I programmed. I have never been able to find an uncut key with the light button in place of the trunk button, similar to the E31, ROW E36 and Z3 keys. For those who are wondering, a diamond shape BMW key will work. I chose this style key because it is period correct.
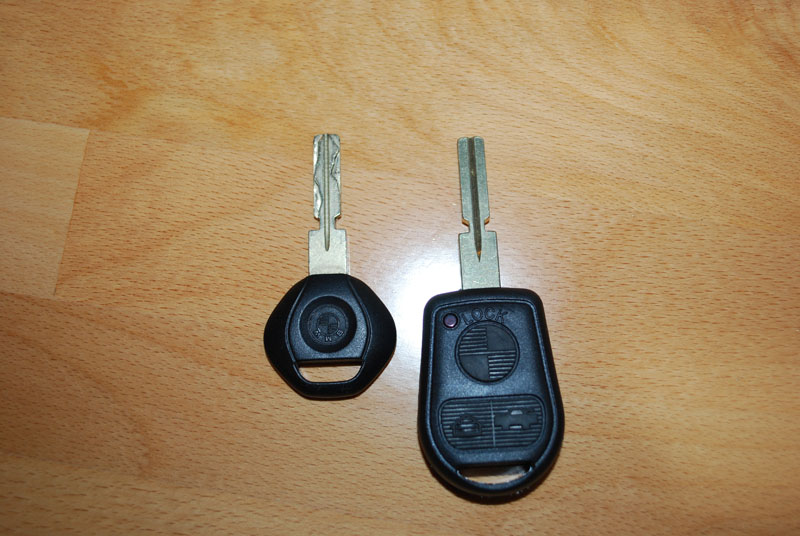
This is before I cut the key.
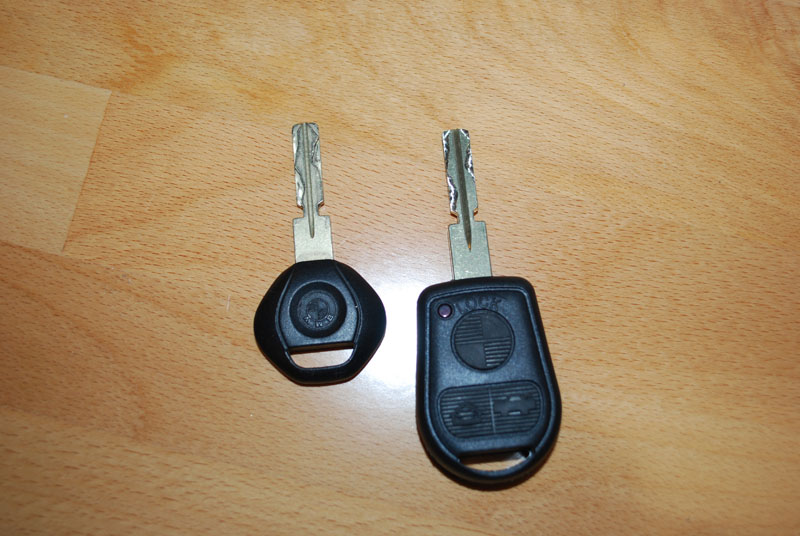
This is after I cut and polished the key. Note that I have a key cutting machine so I was able to do this. If you do not have a machine that can cut keys you can find a local locksmith that will be able to cut a key for you. I also programmed a new transponder for this key, but if you are unable to do this you can just swap a transponder from a current key that you have.
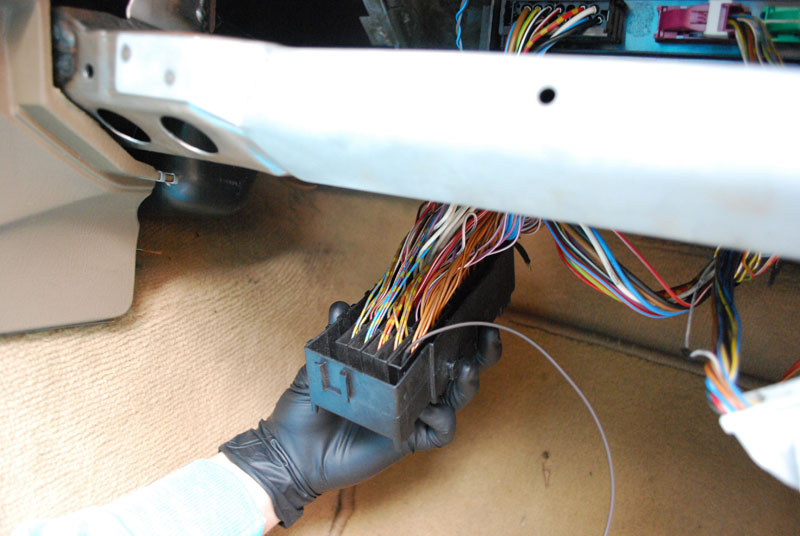
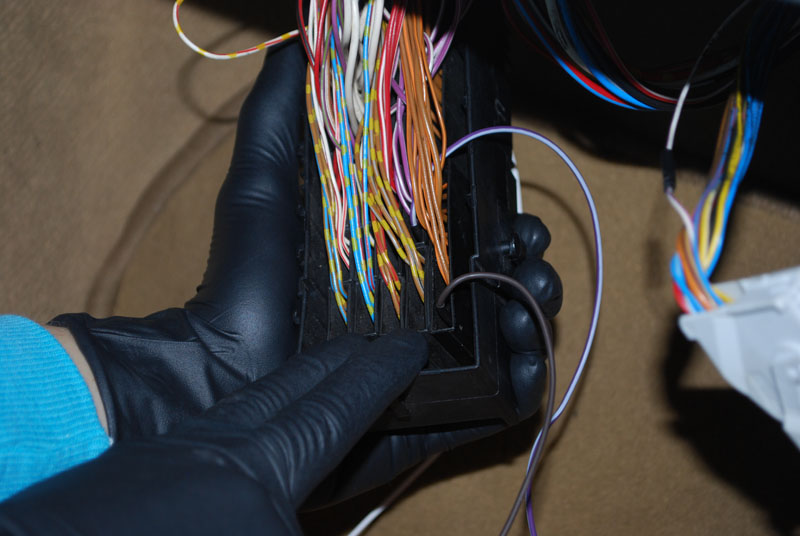
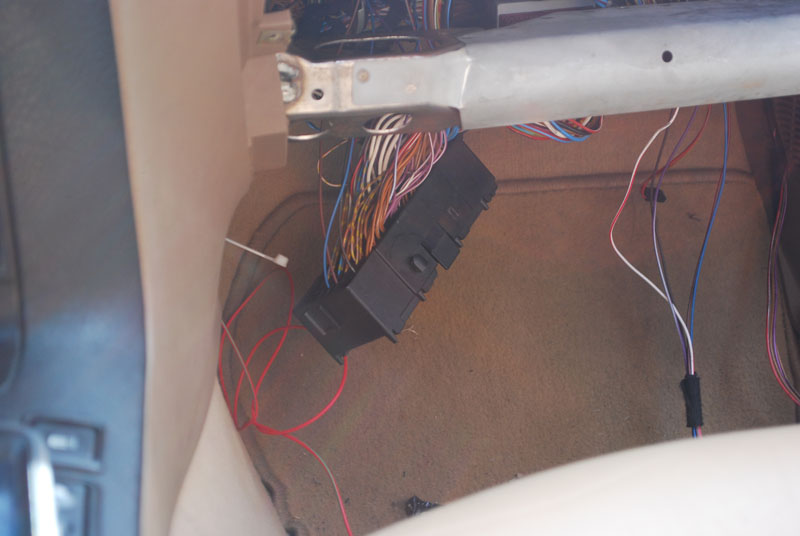
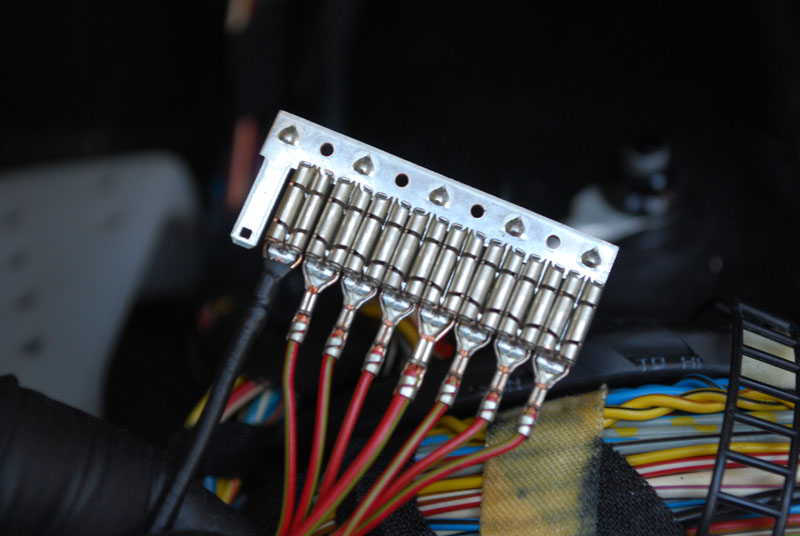
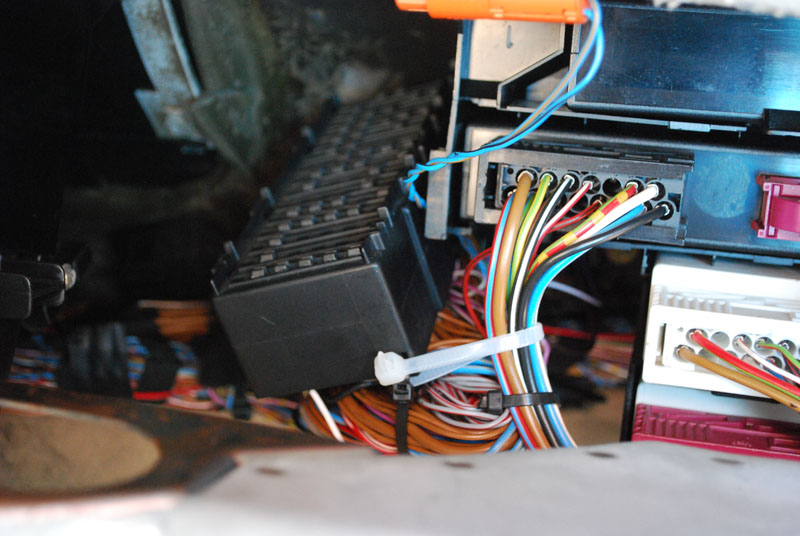
This is what the splice block looks like behind the glovebox.
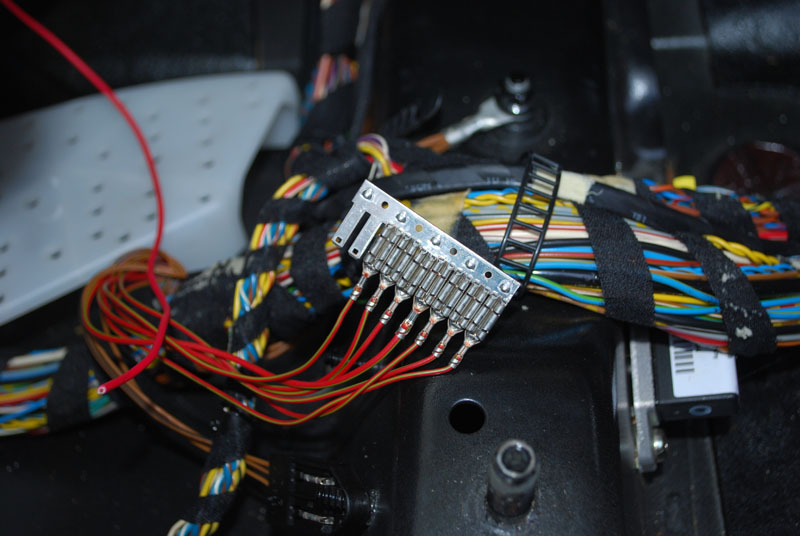
Here I attached a comb connector to the splice panel for the ground. There was one space left.

Crimping on a fan connector. I ended up returning this crimping tool as it performed horribly. If you see one like it do not purchase it.

Applying heat shrink to the end. This is probably not necessary, but I felt like adding it was extra insurance in case the crimp began to fail.
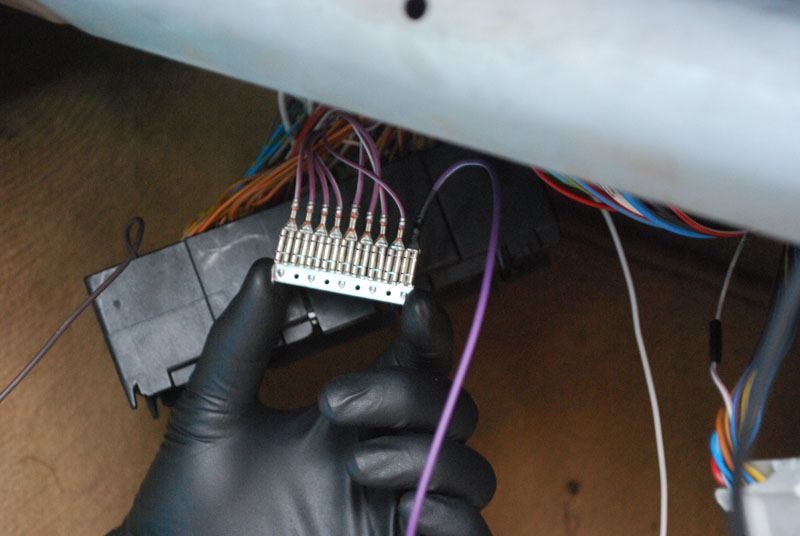
Attaching the fan connector to the lock signal splice panel.
Completely pressed on taking up the last spot. Once the fan connector is pressed all of the way down it locks on to the comb connector. They are not meant to be pulled off which I unfortunately realized.
Attaching the fan connector for terminal 30 constant power.

The installed fan connector took up the last available spot.
Here I am pointing at the two comb connectors, the unlock signal and door contact signal, that do not have an extra space for another wire. This can easily be resolved.
This is what a 3 position housing looks like. The next largest size is a 5 position housing.
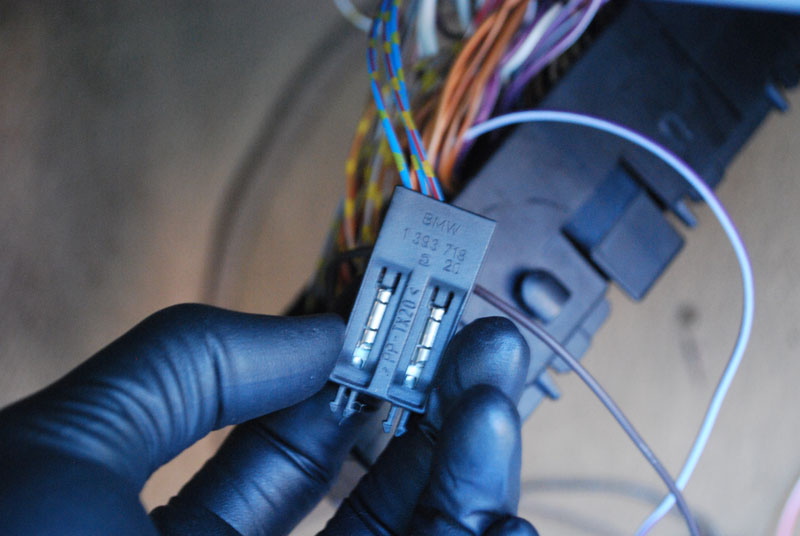
No space left.

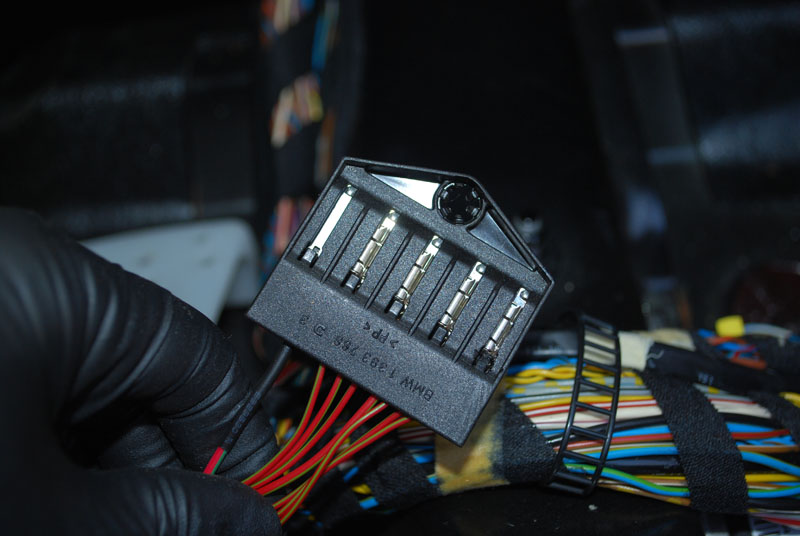
This is a 5 position housing next to a 3 position housing.
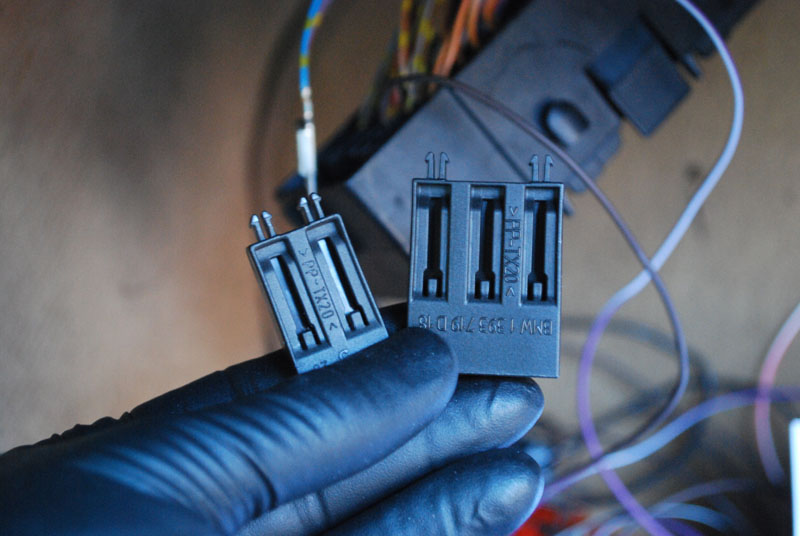
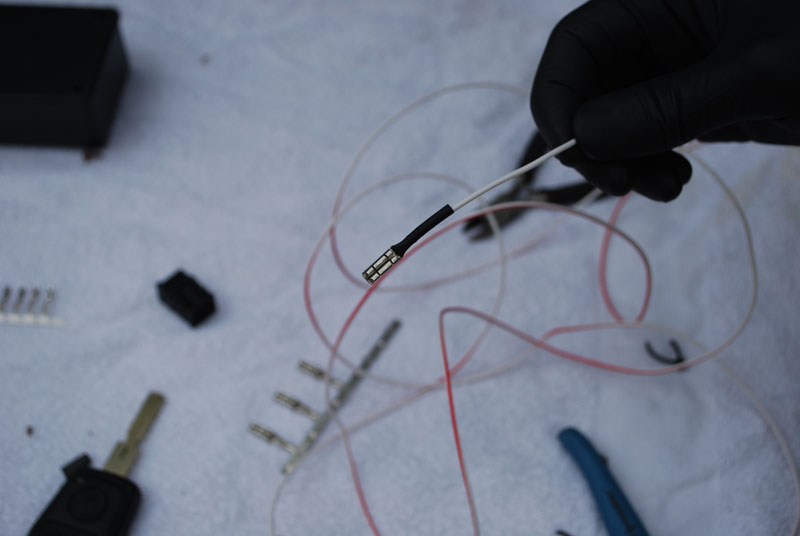
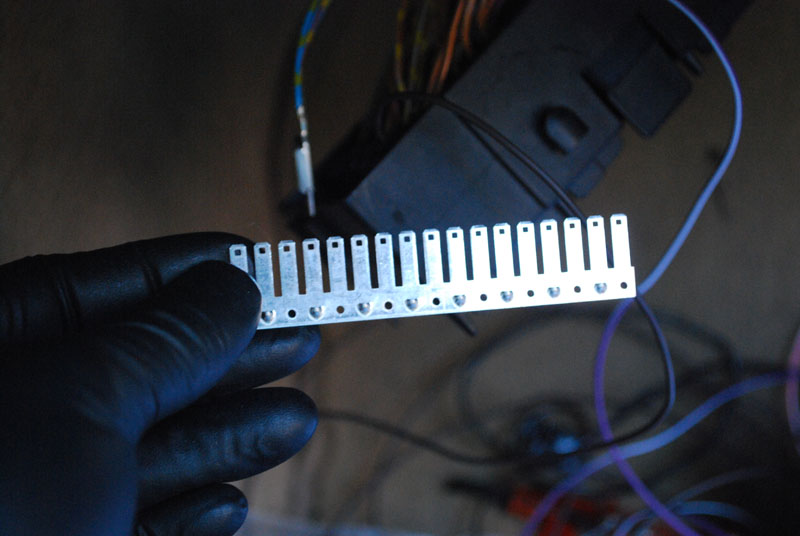
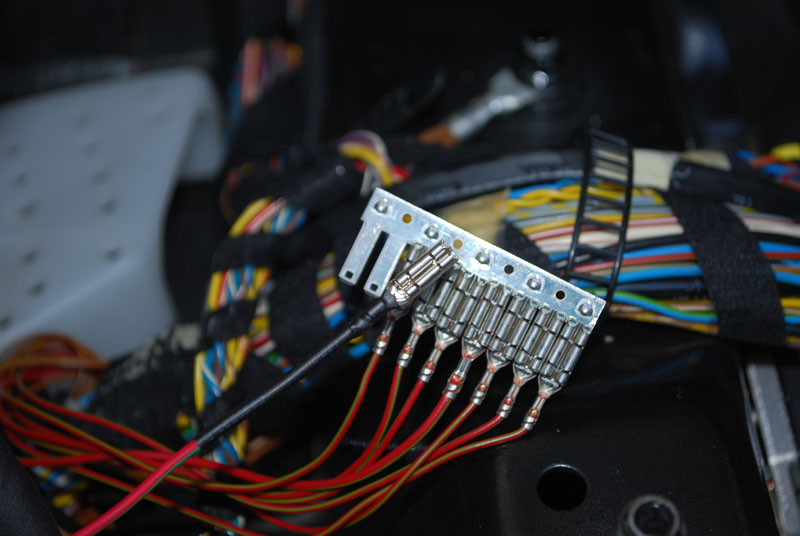
A new comb connector from BMW contains 17 positions. It is made to cut to the size needed.
I had to crimp new fan connectors to all of these wires after destroying all three of them trying to remove them. This is how I found out they lock into place.
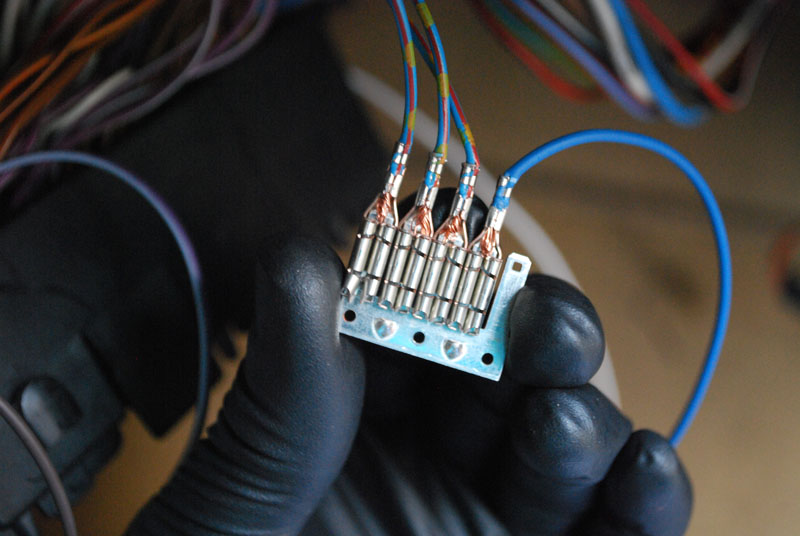

Inserted in to the new five position housing.

The large splice block had one extra space to hold a five position comb connector. All of these one extra positions made me think that this is how the OE keyless is actually wired.

I realized that if a small jeweler’s flat head screwdriver or a pick is used, the fan connectors can be “unlocked” and carefully pulled of the the comb connector with minimal damage by carefully bending these end tabs up.
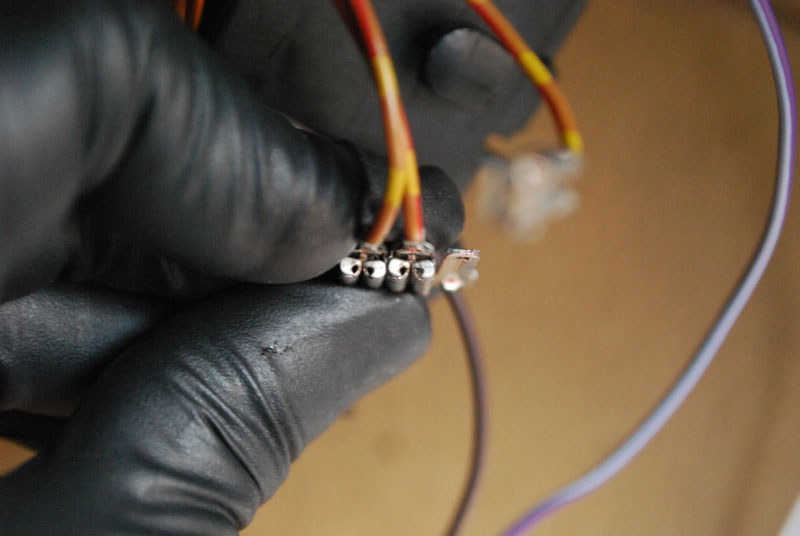
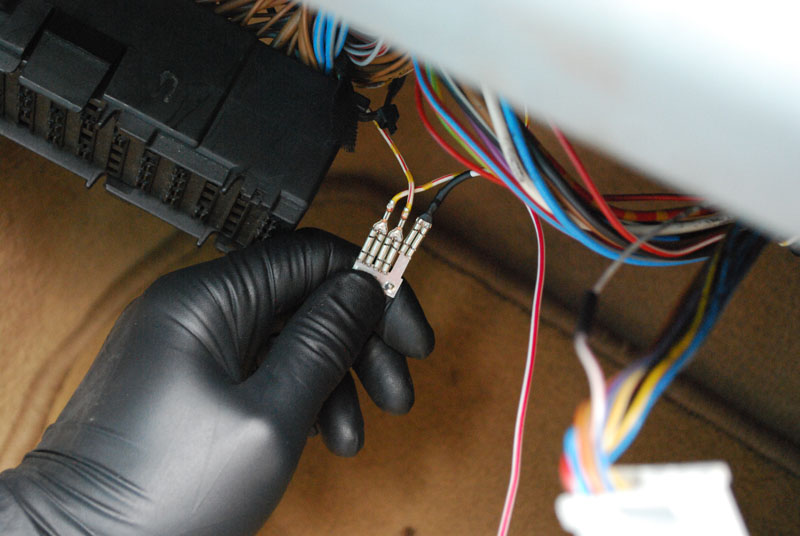
Door contact signal wire along with new five position comb connector and housing.

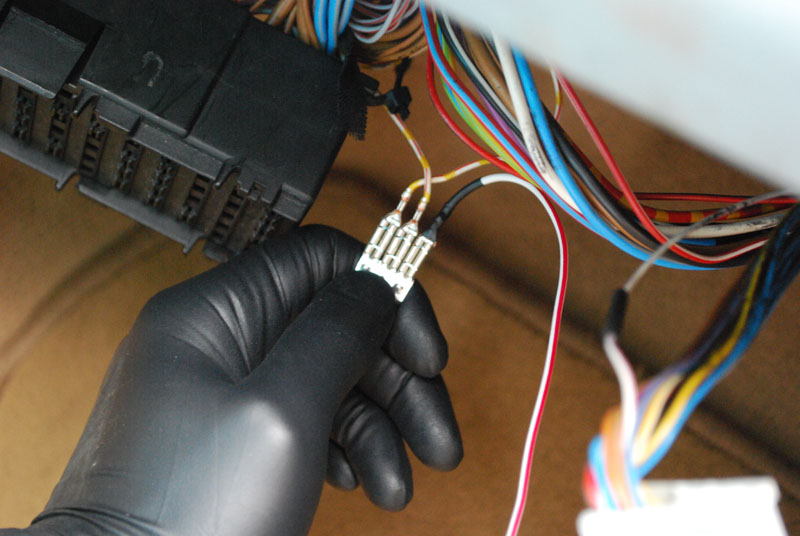
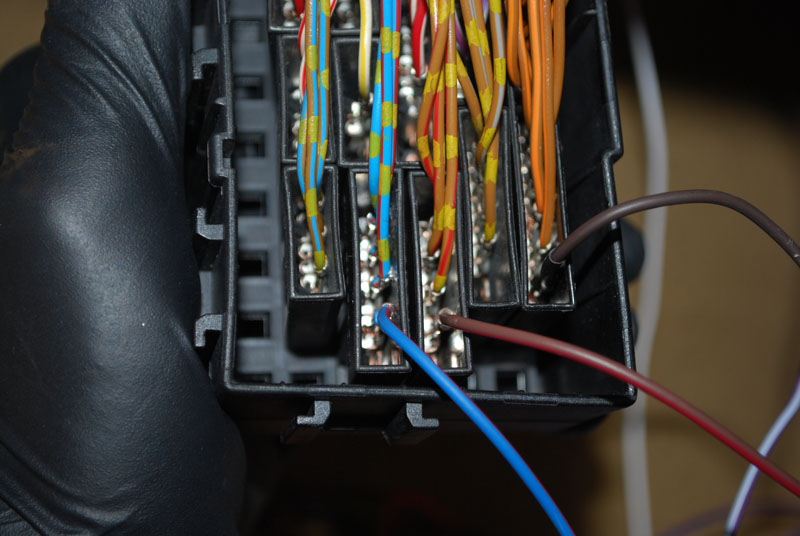
Both comb connectors side by side in the splice block.
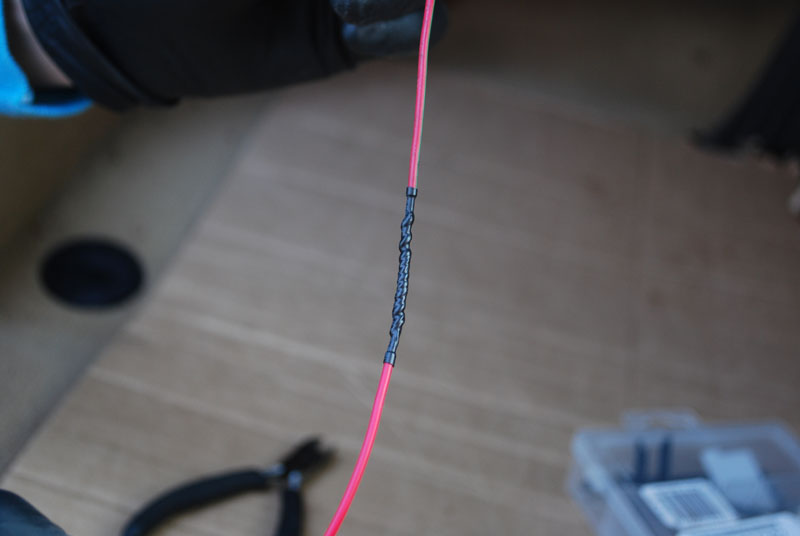
The last wire to be tapped in was the terminal R ignition switched power under the driver’s seat. The driver’s seat, driver’s kick panel and door seal trim had to be removed for this.
Using a long zip tie, I fished the wire behind the dashboard.

My original wire was too short and I had to splice in an extra 10 feet. I used a lineman’s splice for this.
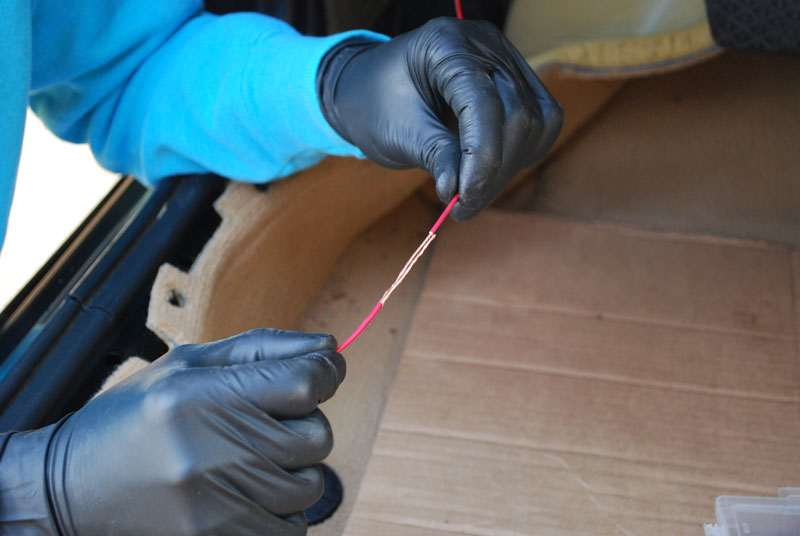
Twisting together.

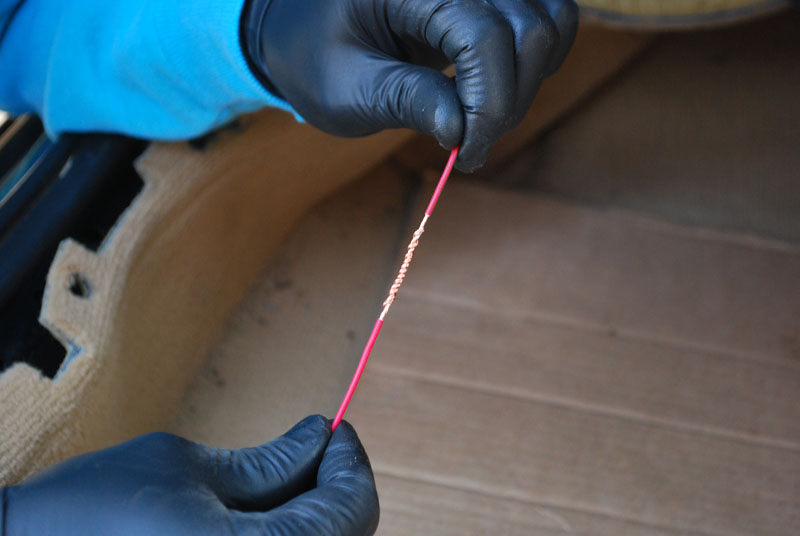
Adding heatshrink.

Interesting side note. There was a spare hood release handle underneath the carpet. It must have been dropped there at the factory. It was pretty interesting to see it there, so I left it.
Adding the extra fan connector to the comb connector. This was the only comb connector with an extra spot left after adding another wire to it.
Comb connector back in its housing.
I then ran wire harness tape (non-adhesive tape) around the wire bundle to keep it secure.
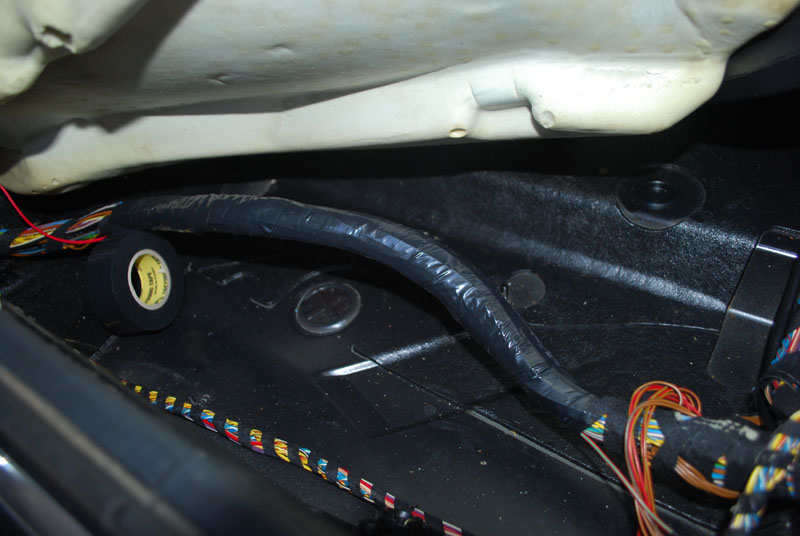
Carpet vacuumed and ready to reinstall everything.

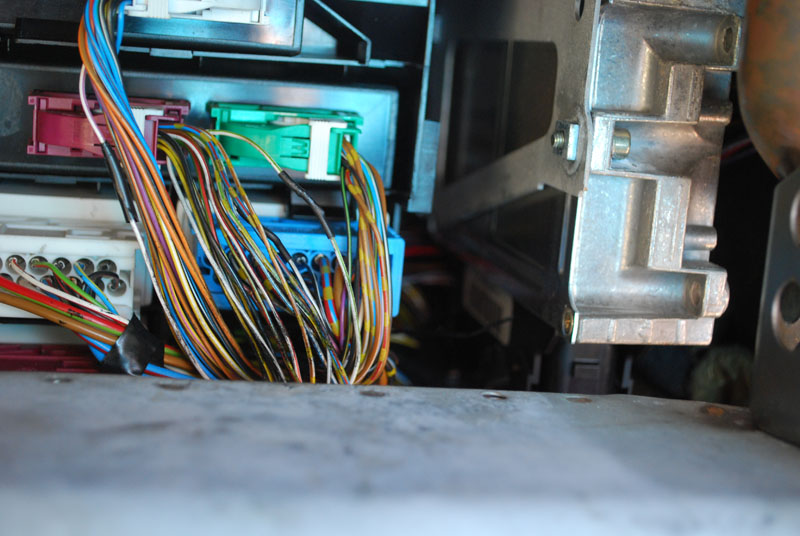
I ran the wires across the wire loom behind the glovebox and up along the passenger A pillar.

I used wire harness tape in several places to secure it. I had to remove the front visors, visor holders and passenger grip handle to drop the front portion of the headliner so I had access to run the wires over to the mirror.
After the wires were completely ran and secured I buttoned everything back up behind the glovebox and reinstalled the glovebox and lower kick panel.
I do my best to always run wires under any zip ties or wire holders that the factory wiring is held by.

Up to the left of the harness in the middle are the wires for the remote control module.

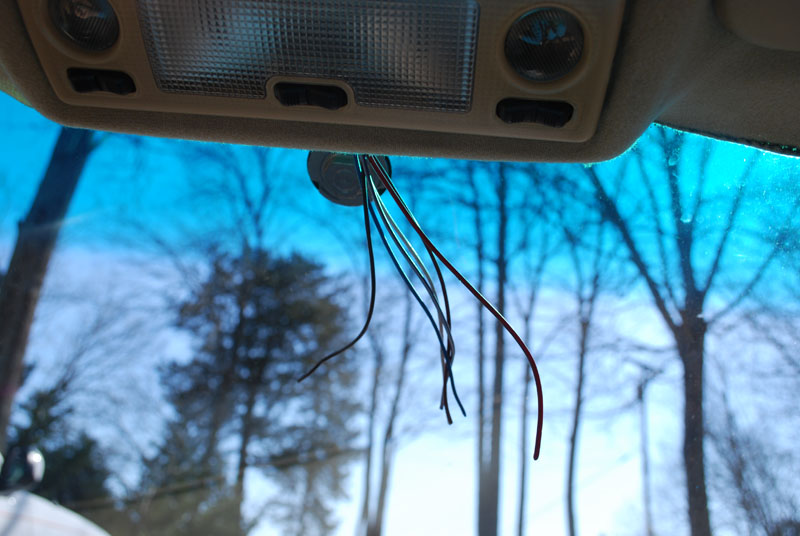
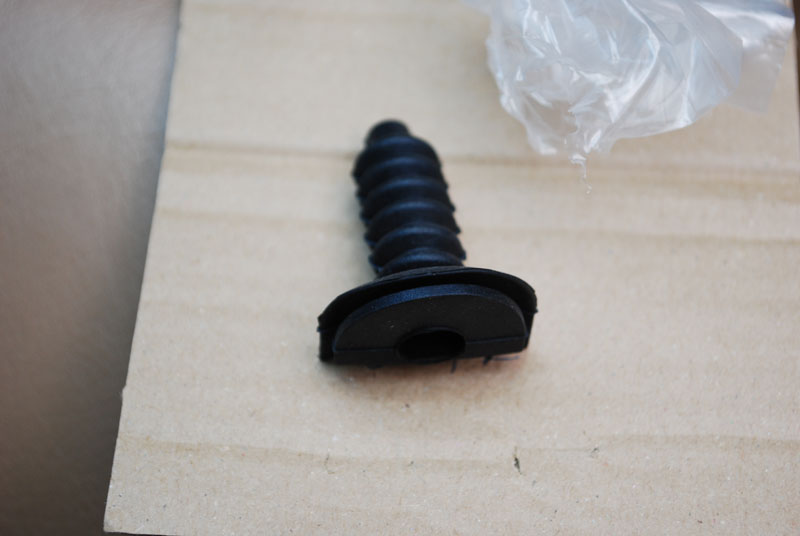
I found a new grommet for a rearview mirror wiring harness that I had and decided to use it.

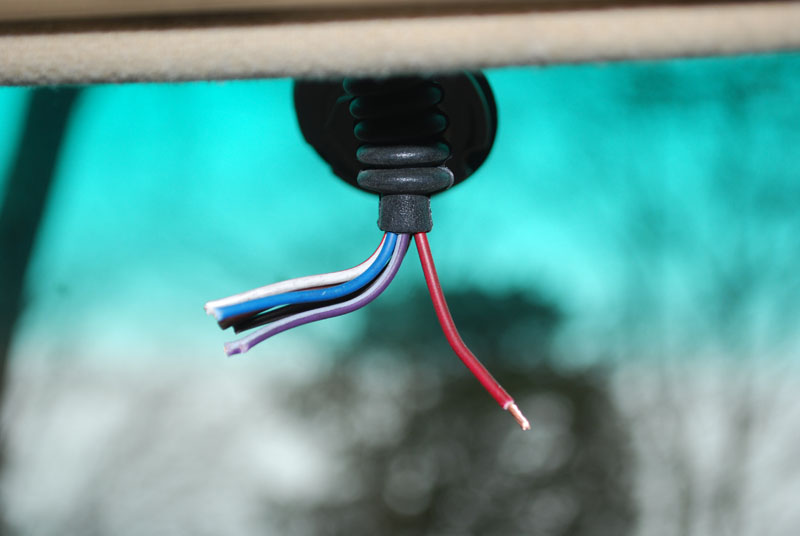
I ran the wires through the grommet and shortened them by about three more inches and then began crimping on the MQS pins.
After the wires were installed into their respective positions on the rearview mirror connector.
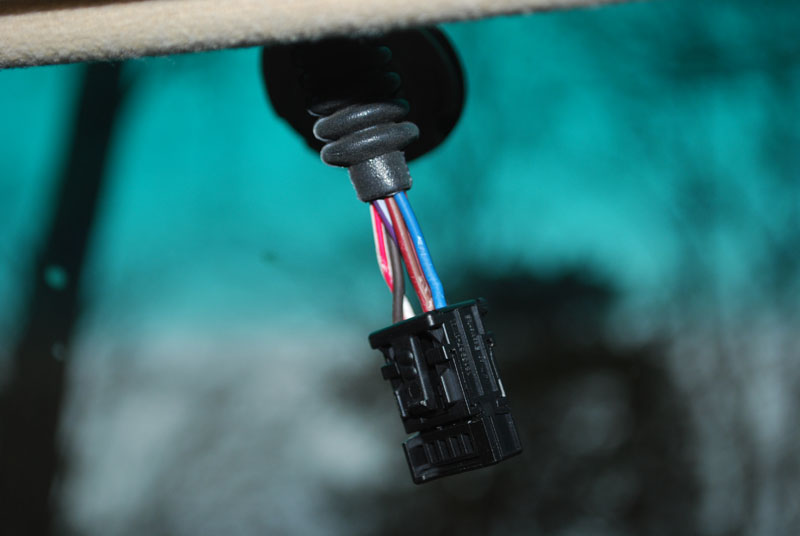
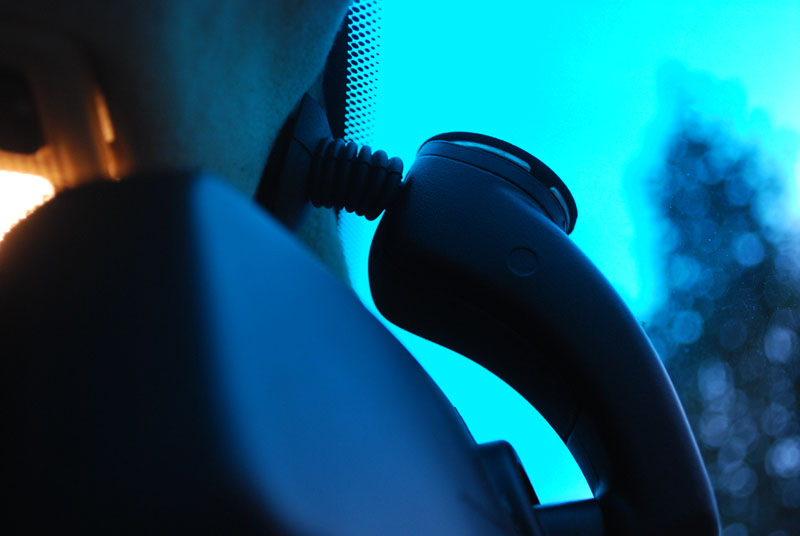
Plugged into the mirror with a near factory appearance.
 bmw
bmw,
e36,
electrical,
keyless entry,
keys


 Απάντηση με παράθεση