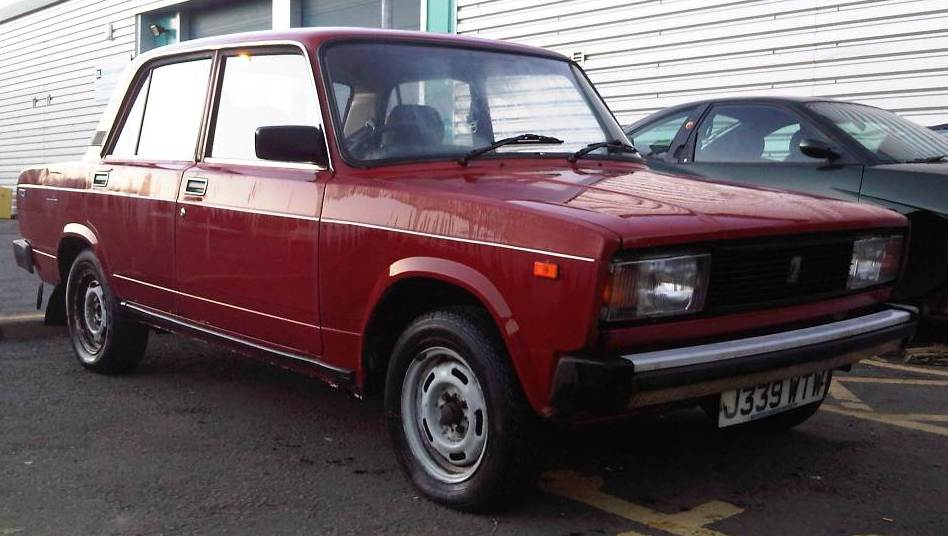
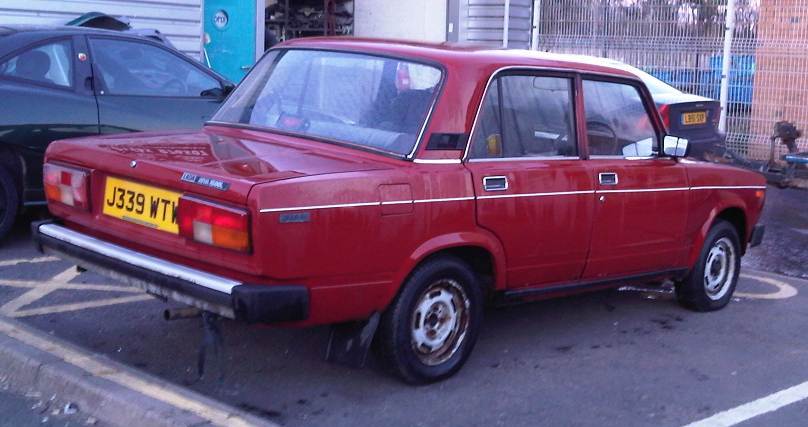
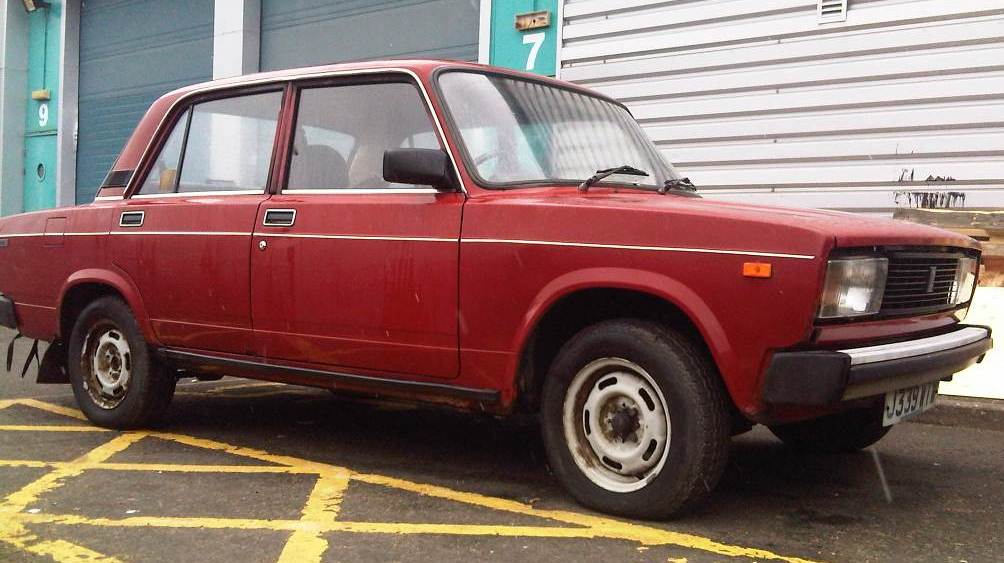
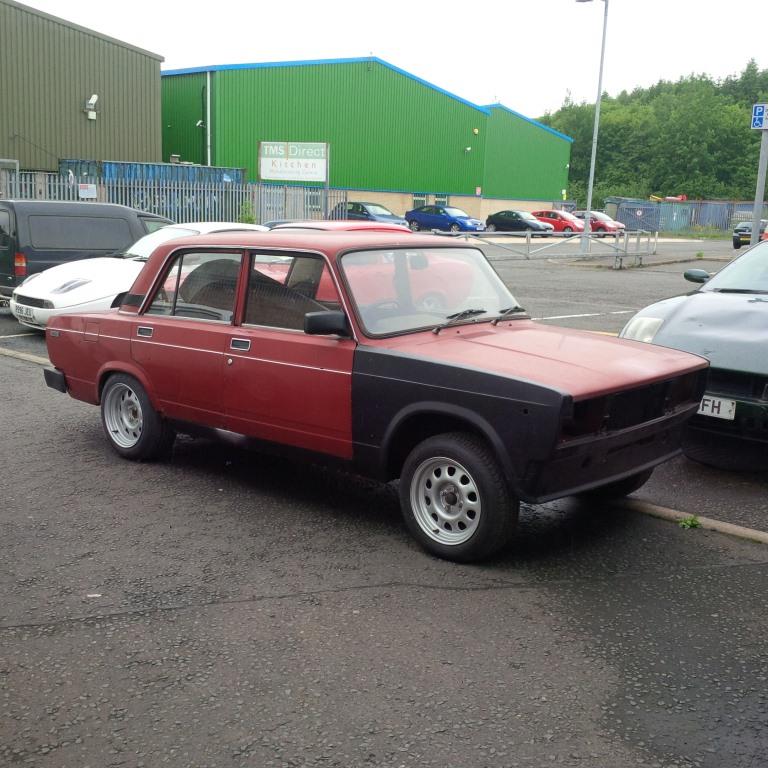
Since Retro Rides 2015 was the (unrealistic) target that provided the inspiration to keep this making progress as more and more rot was found I thought I'd put in on these pages. It did technically make it to the gathering, it's first real outing in eight years and my first real drive in a Lada, but was hardly a show stopper. With this years camping tickets already bought the 2016 Gathering is now the aim to actually have it finished. I was put off posting here after looking through so many amazing technical builds but looking back it's come a long way and having it on here should help keep it on track. I have a welder, grinder, some air tools and most importantly access to a ramp so pretty much anything should be saveable. :-) After reading through stuff on here I now want a bead roller, lathe, metal folder, shrinker, press............ but one step at a time!
I've copied this over from a Lada forum so hopefully it works. Fingers crossed!
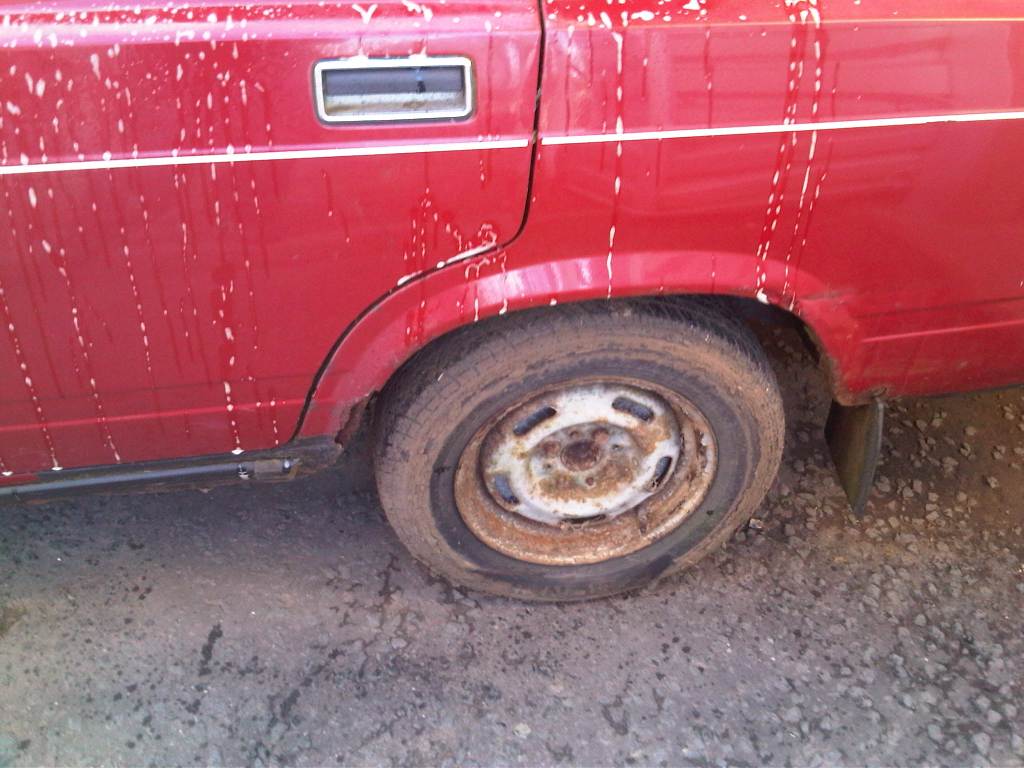
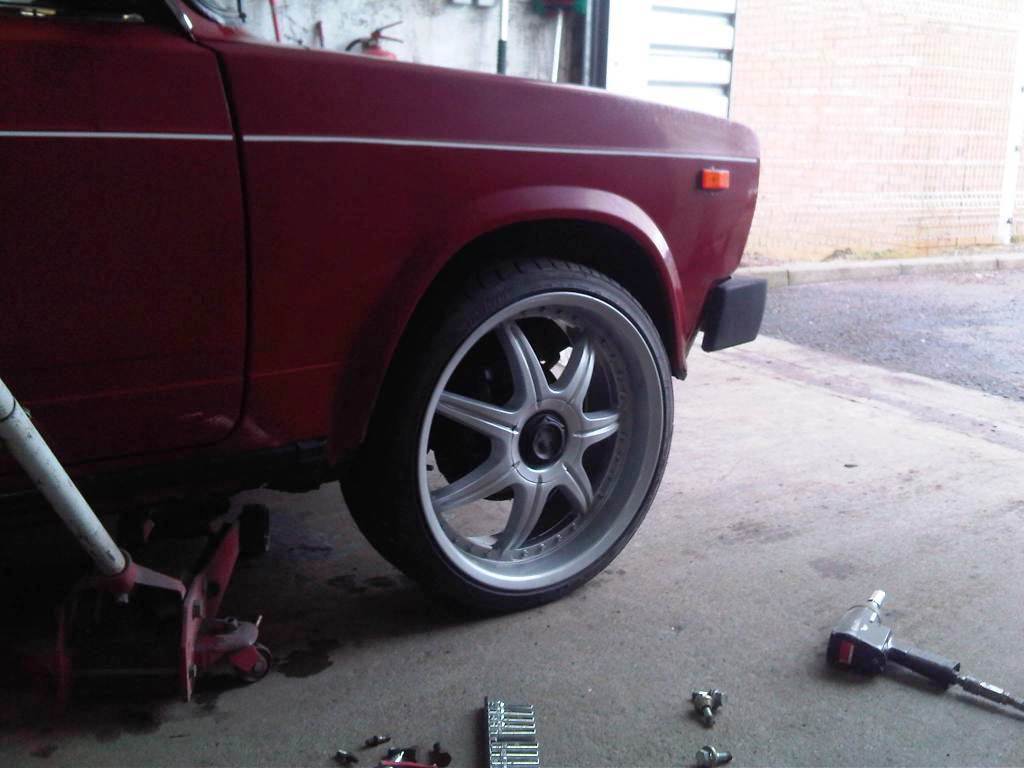
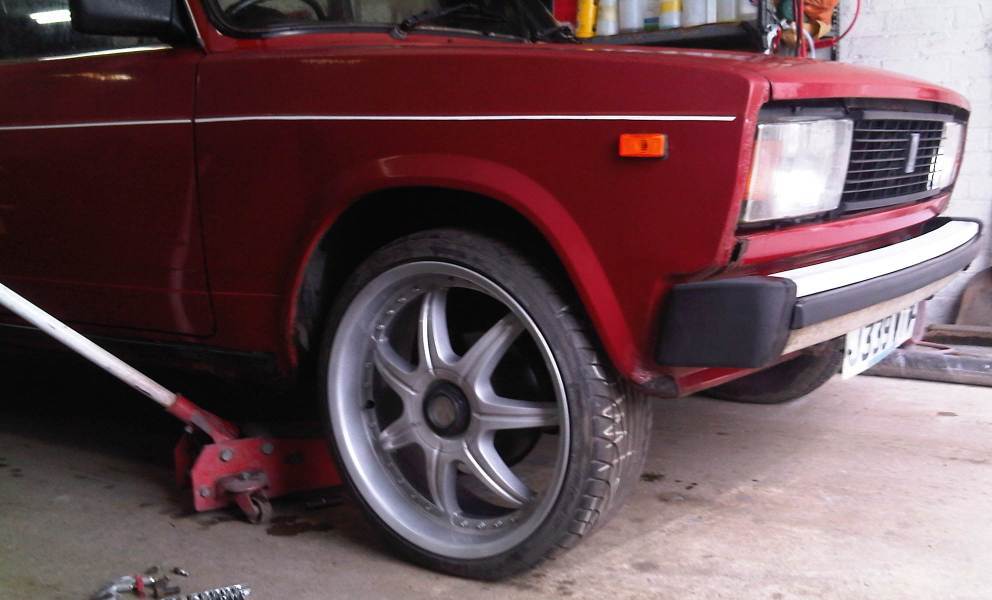
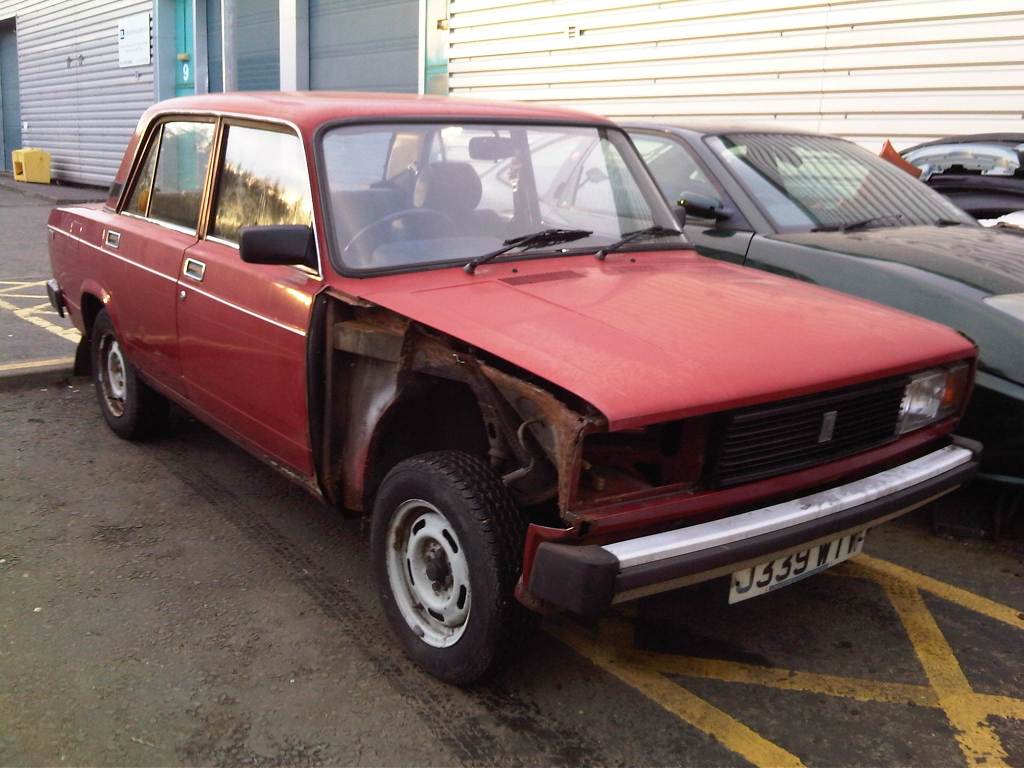
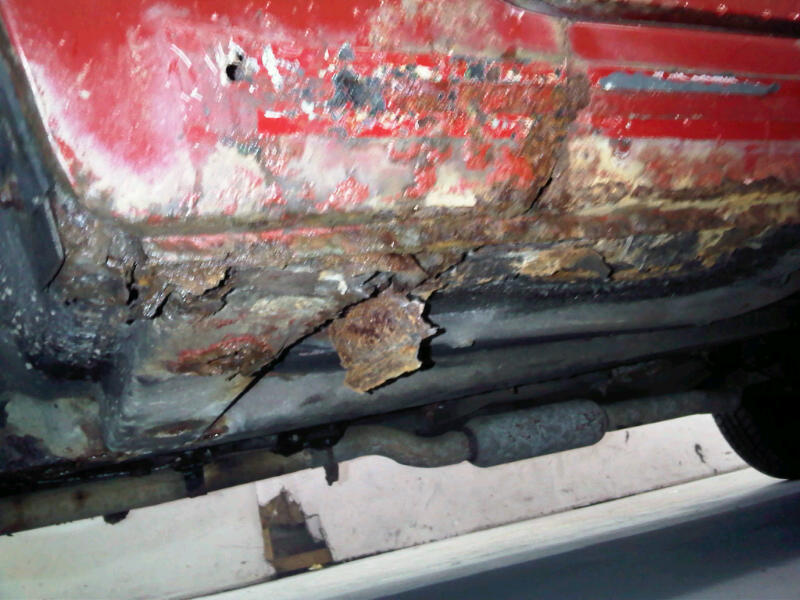
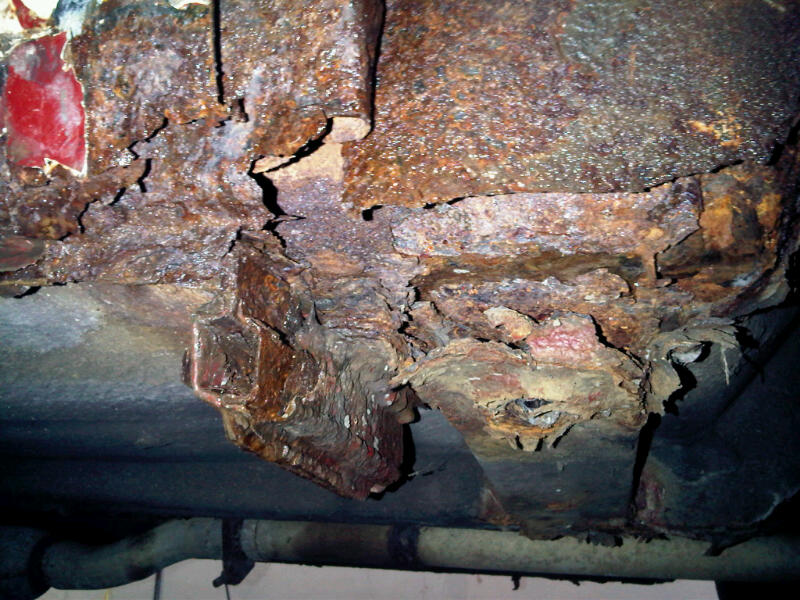
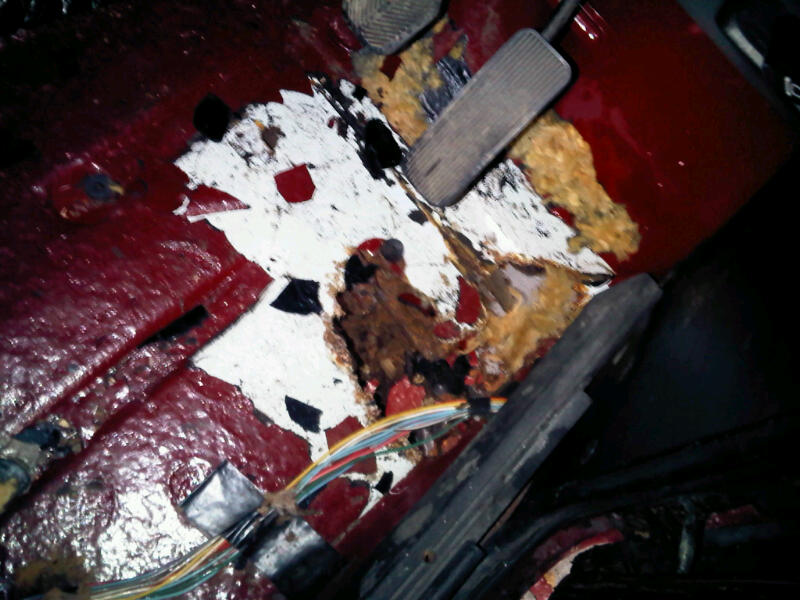
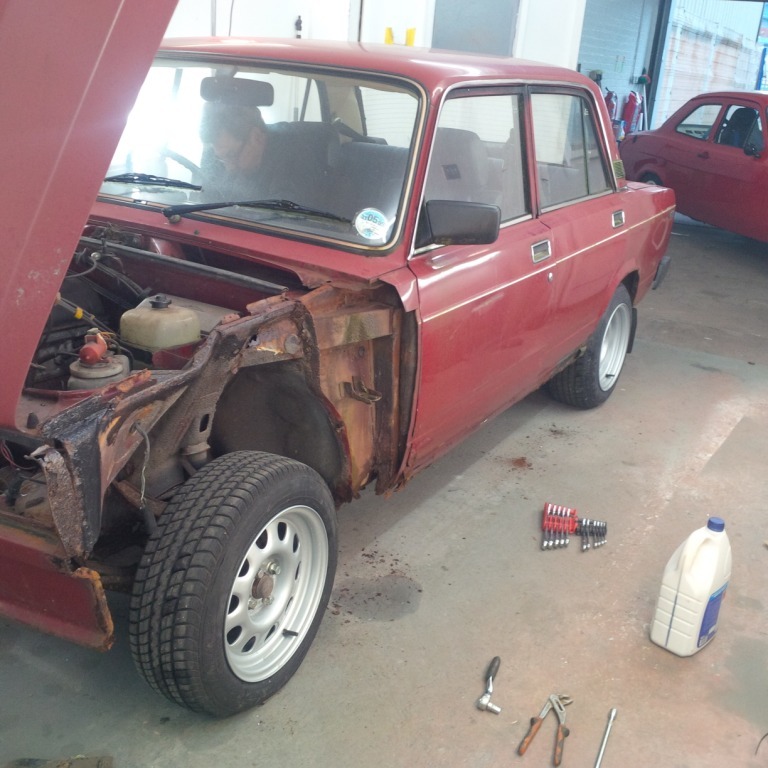
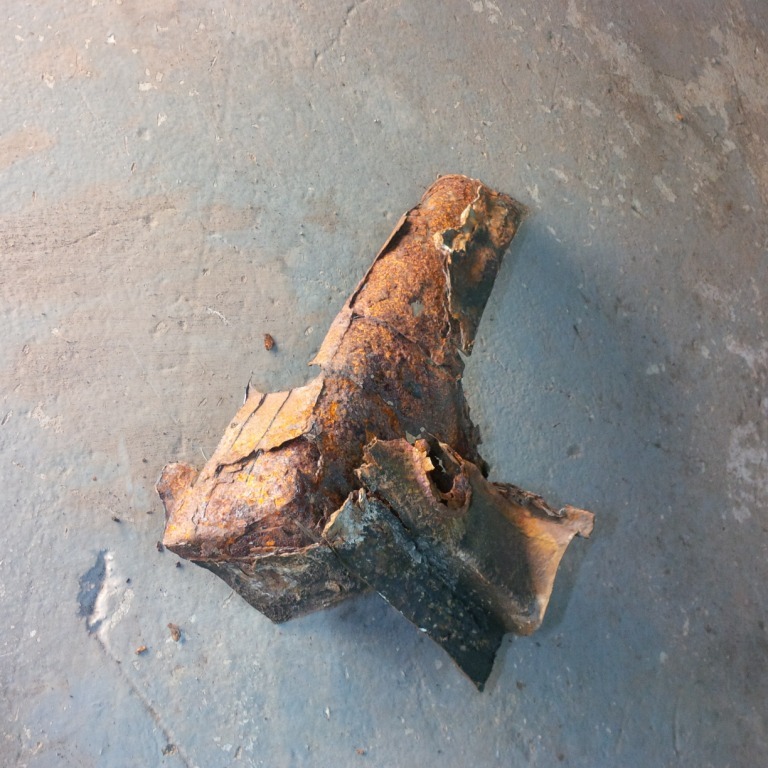
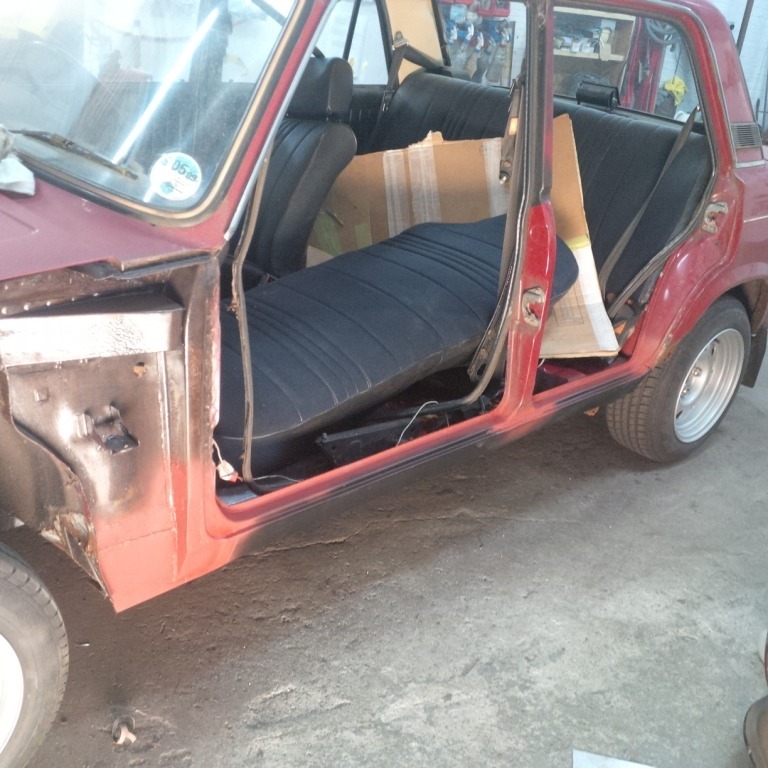
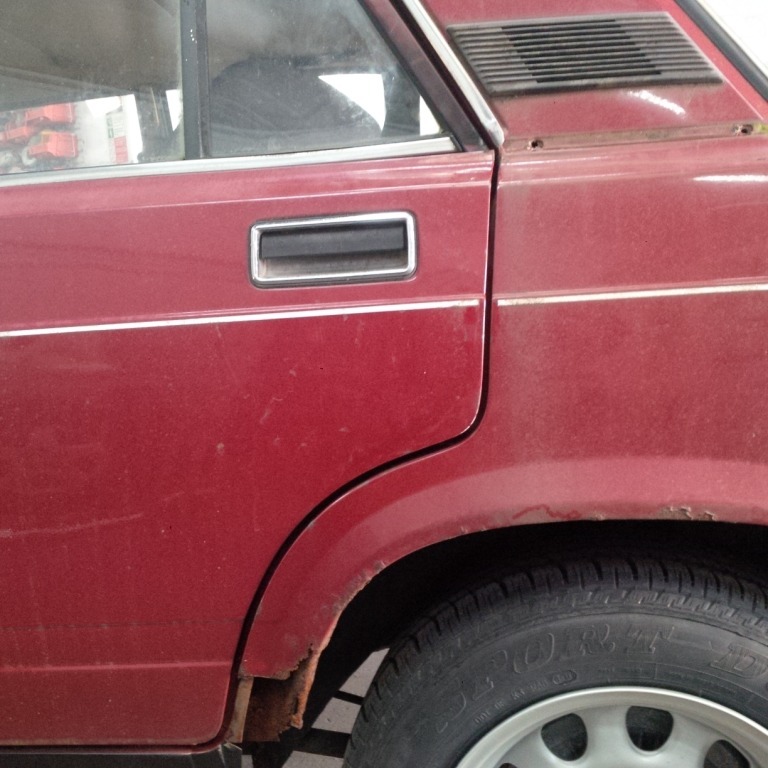
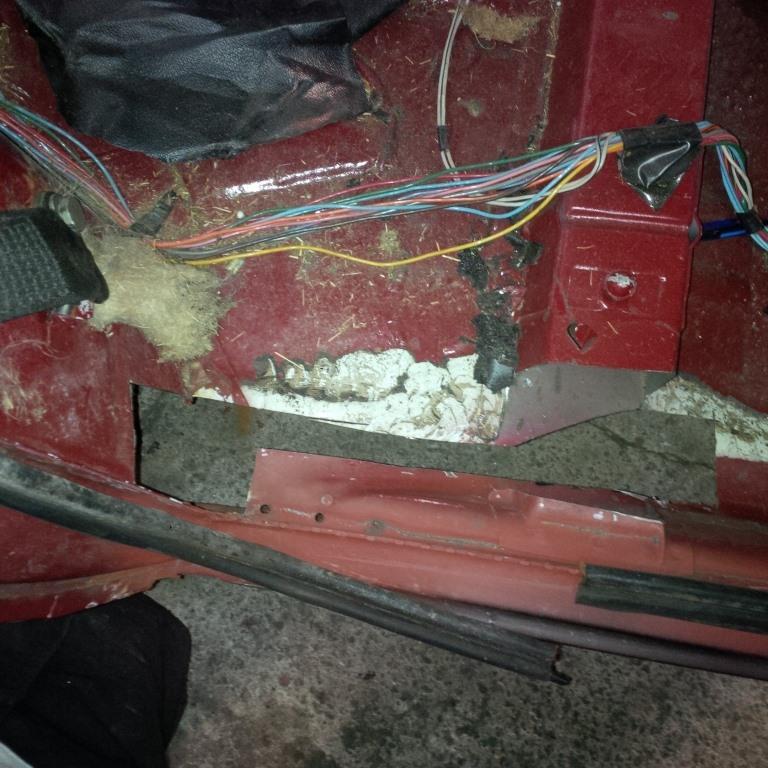
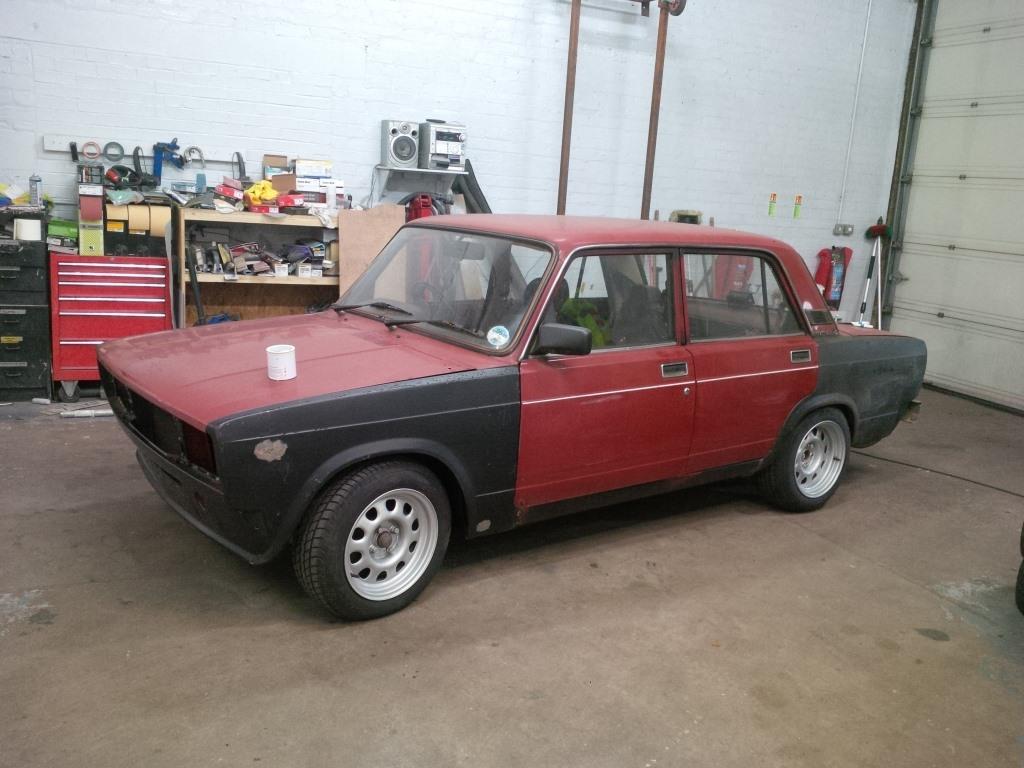
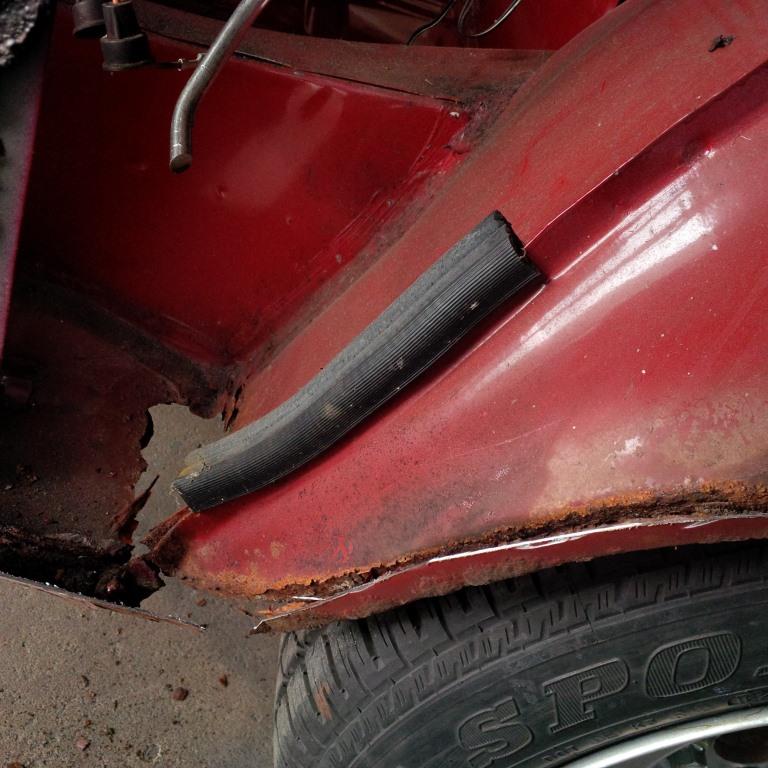
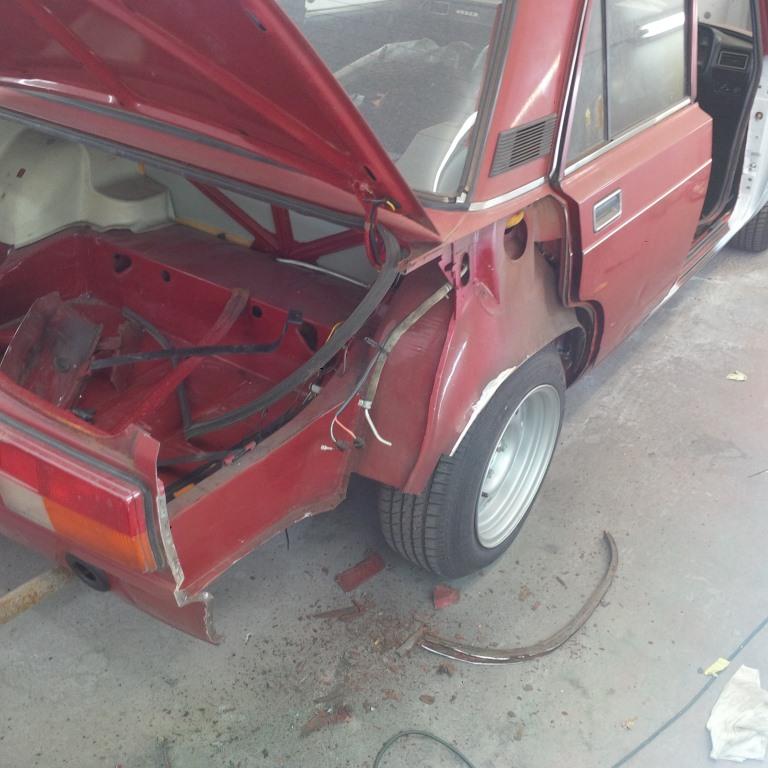
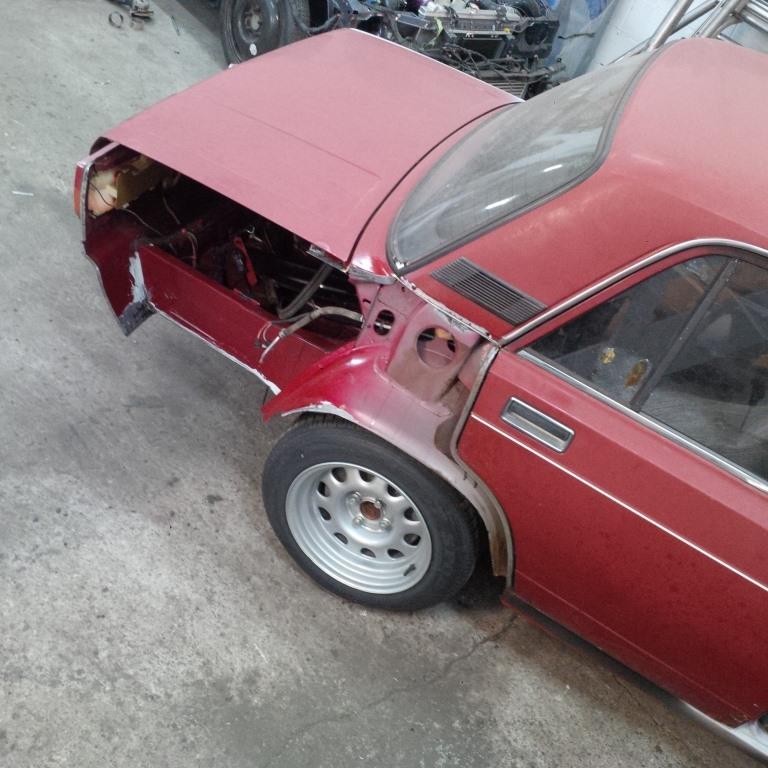
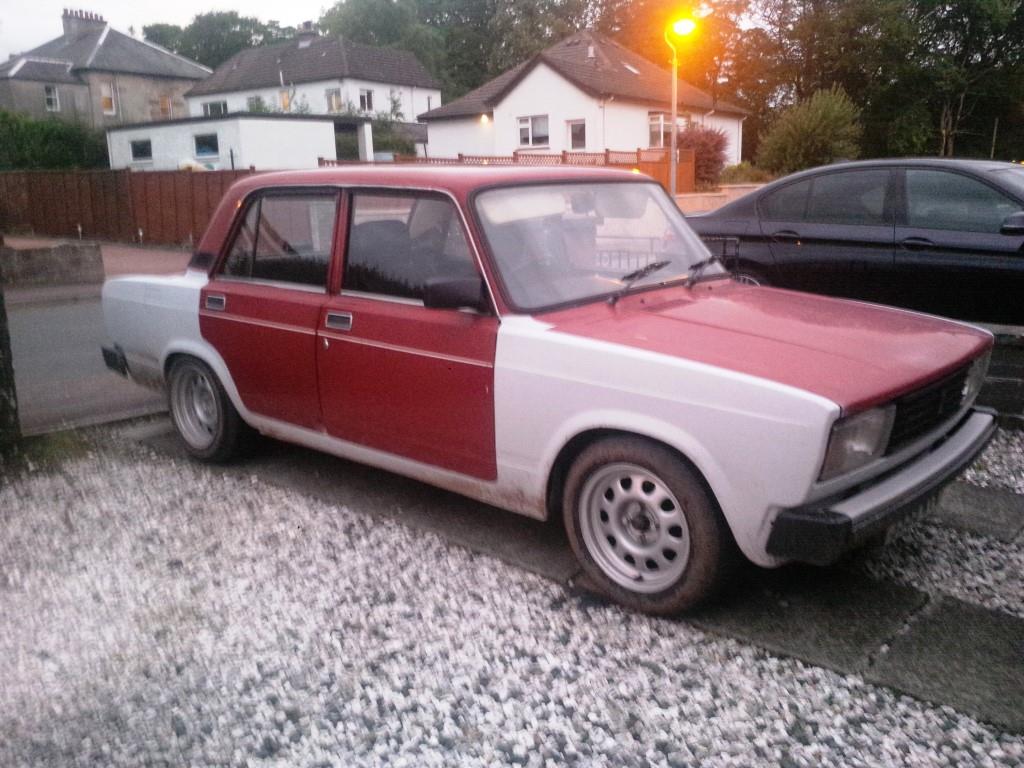
A few pictures of the wreck at the start. There's a bit more work than planned. I didn't take any when it was all covered in green stuff. Gave it a good pressure wash to help with enthusiasm and wasted some time considering pointless wheels!

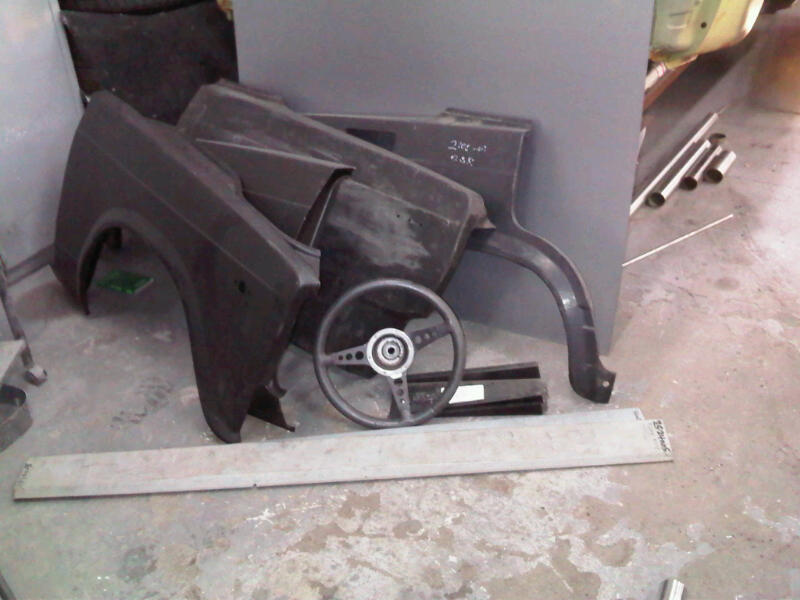
Some new bits:
Projet rotbox actually makes some progress: (March 25th 2015, 2 years after purchase)

Some more progress (after moving mole grips :lol: ):

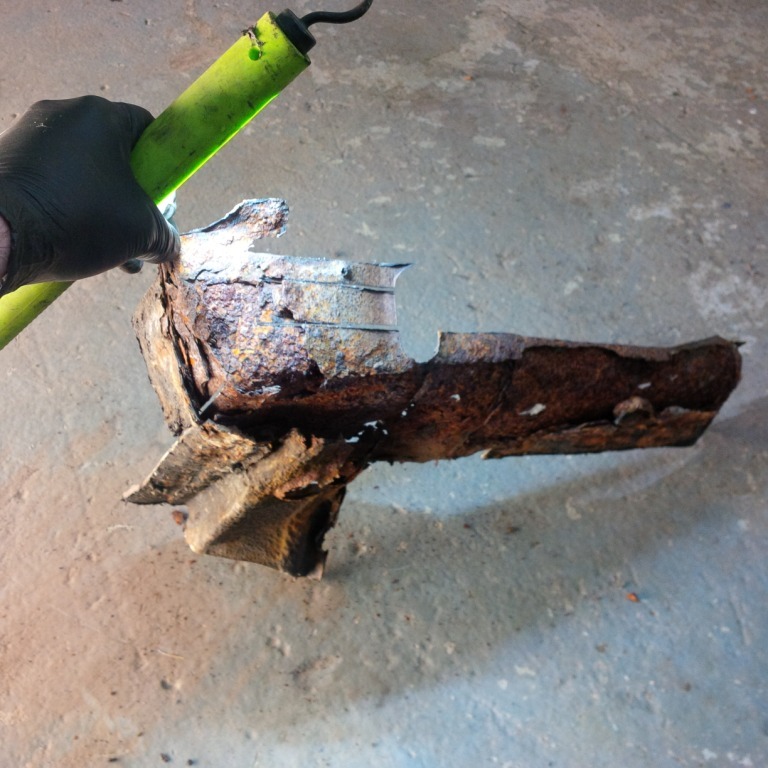

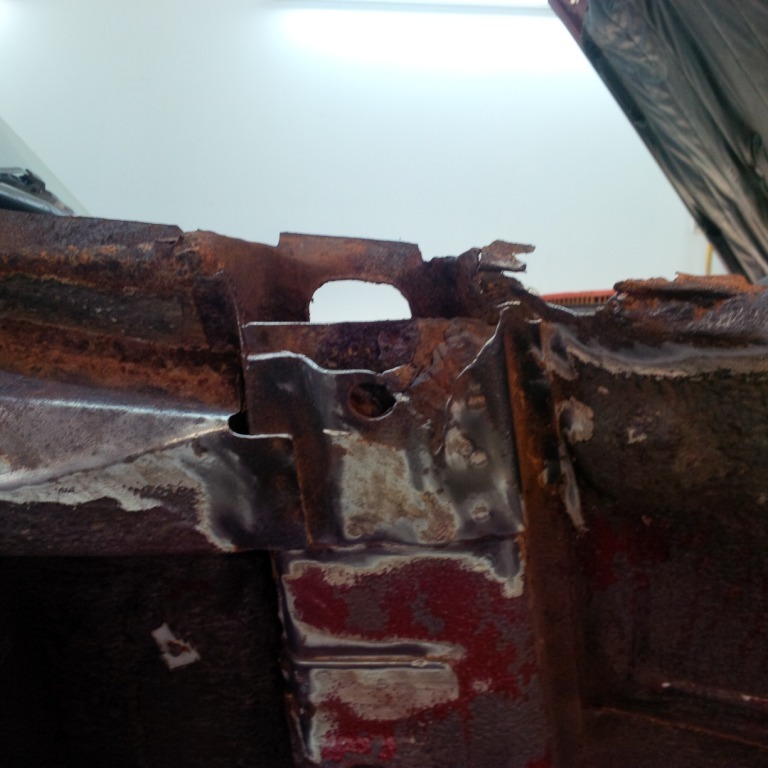
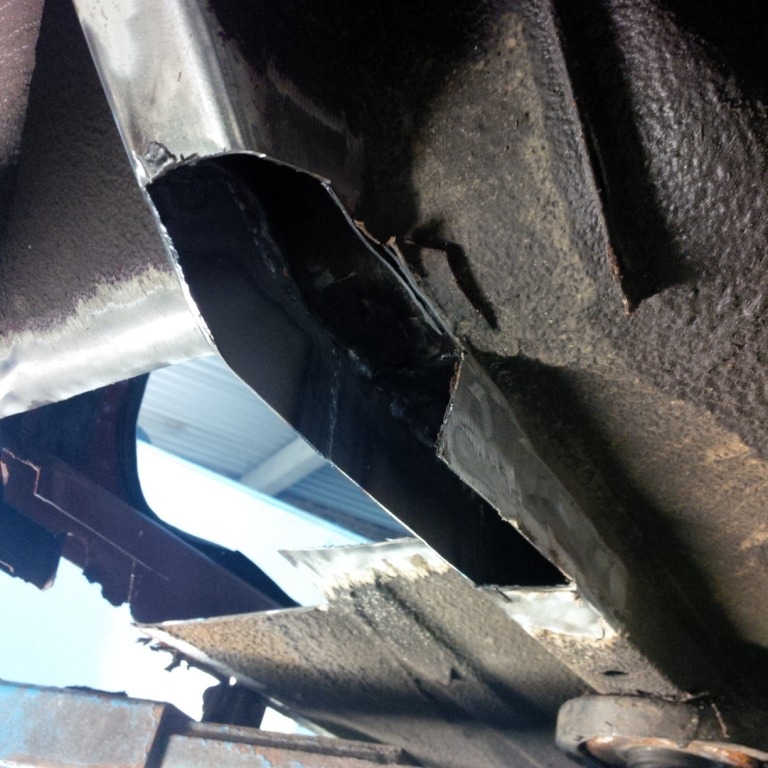
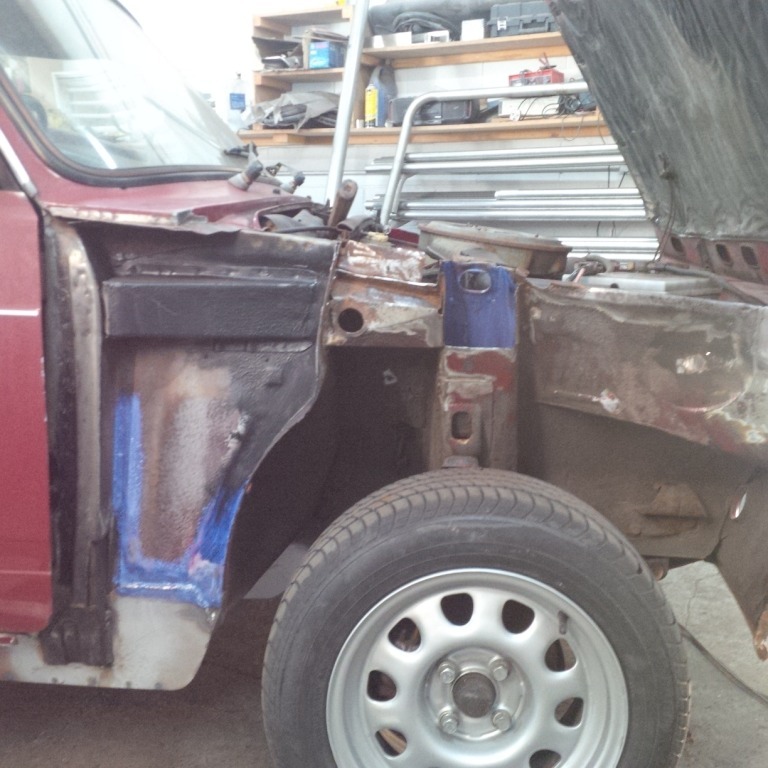
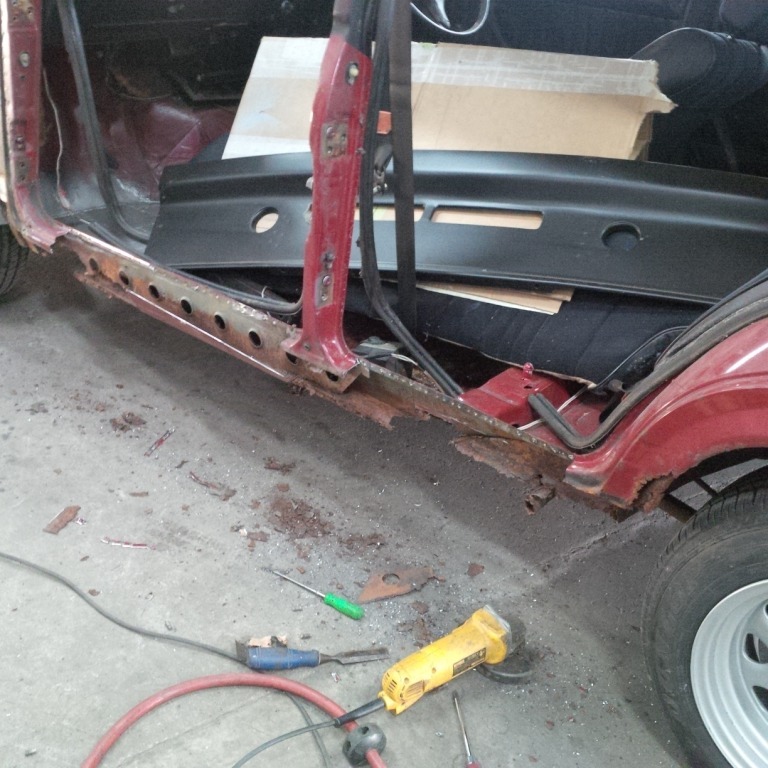
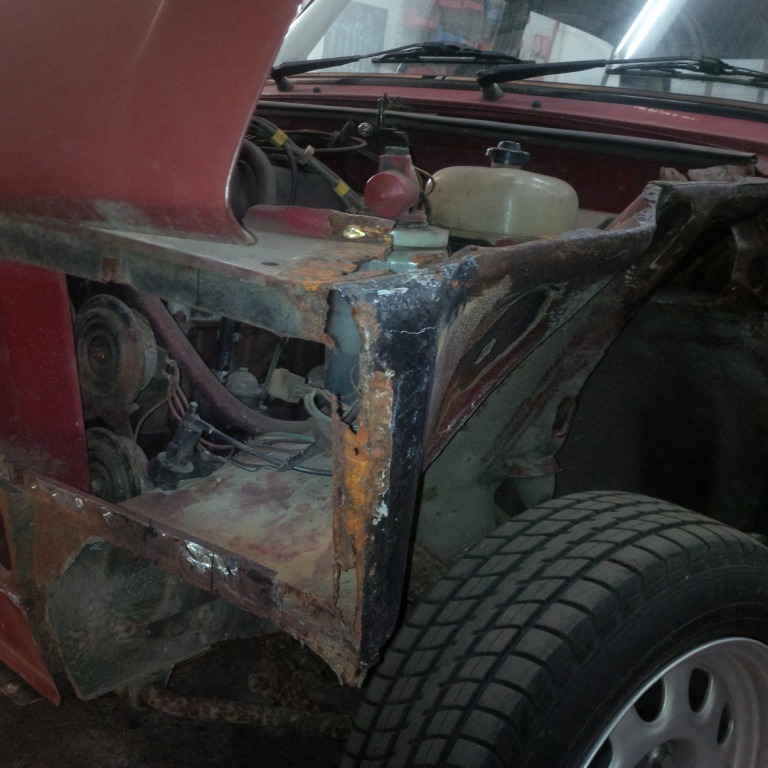
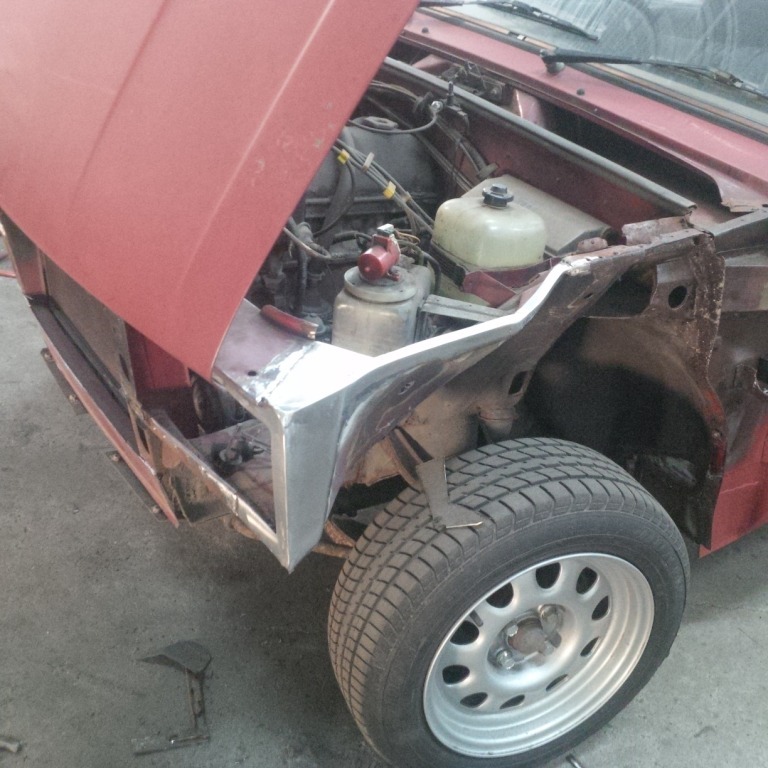
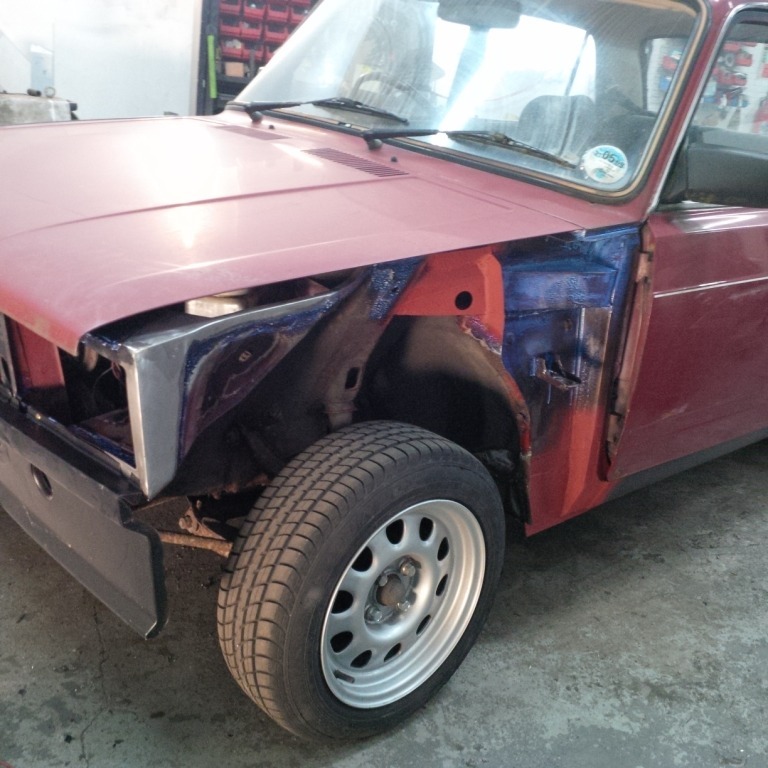
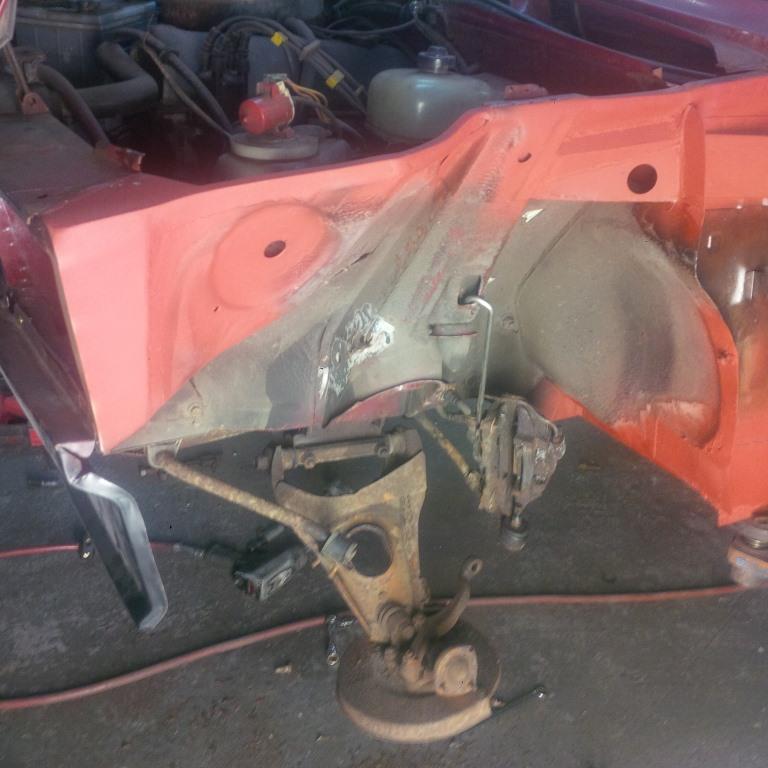
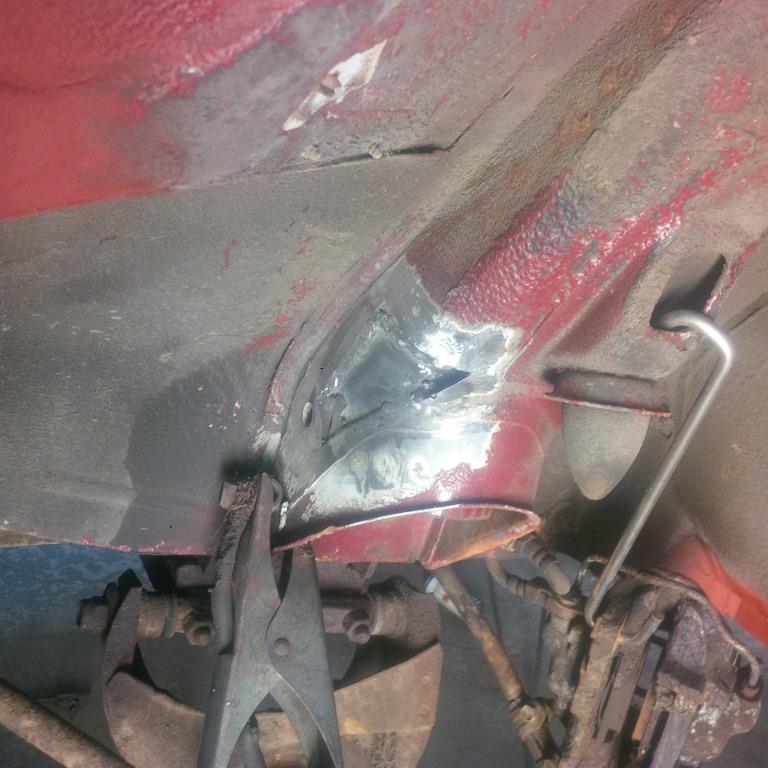
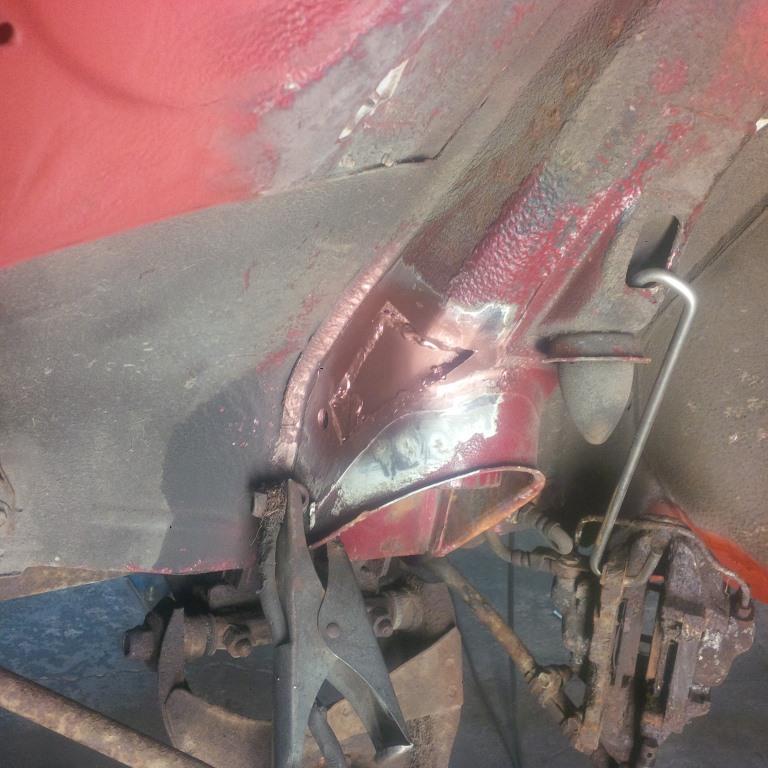
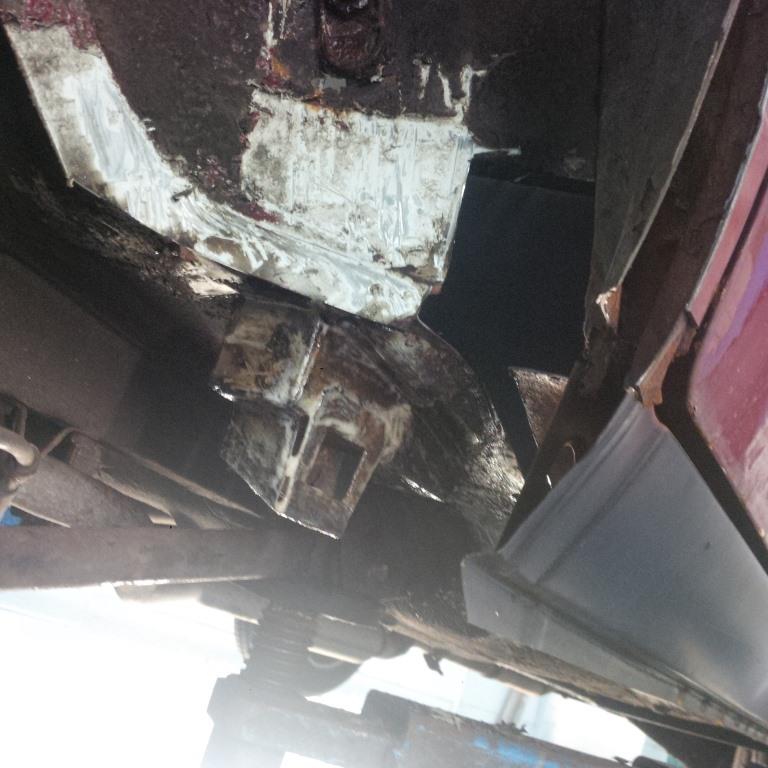
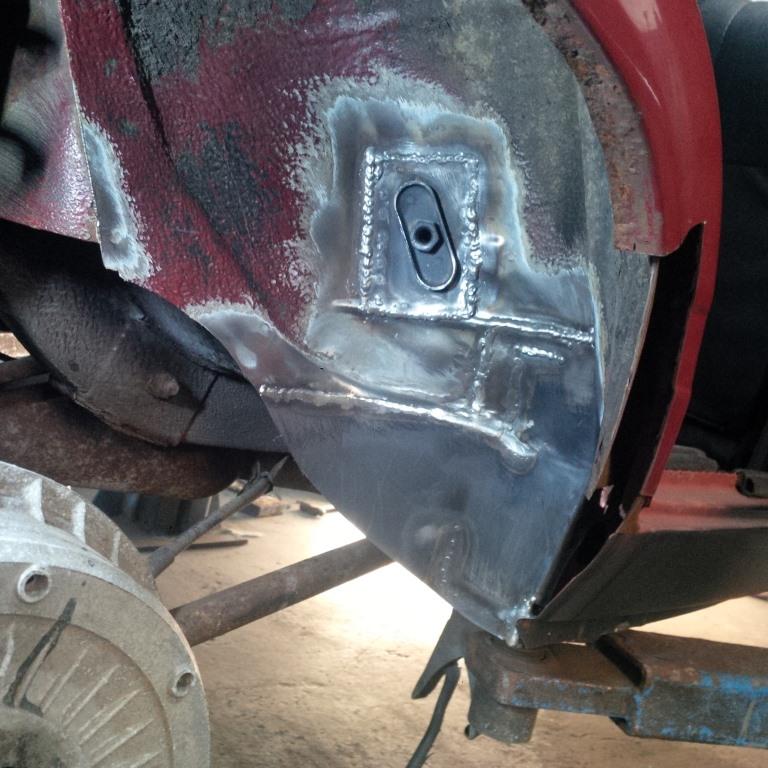
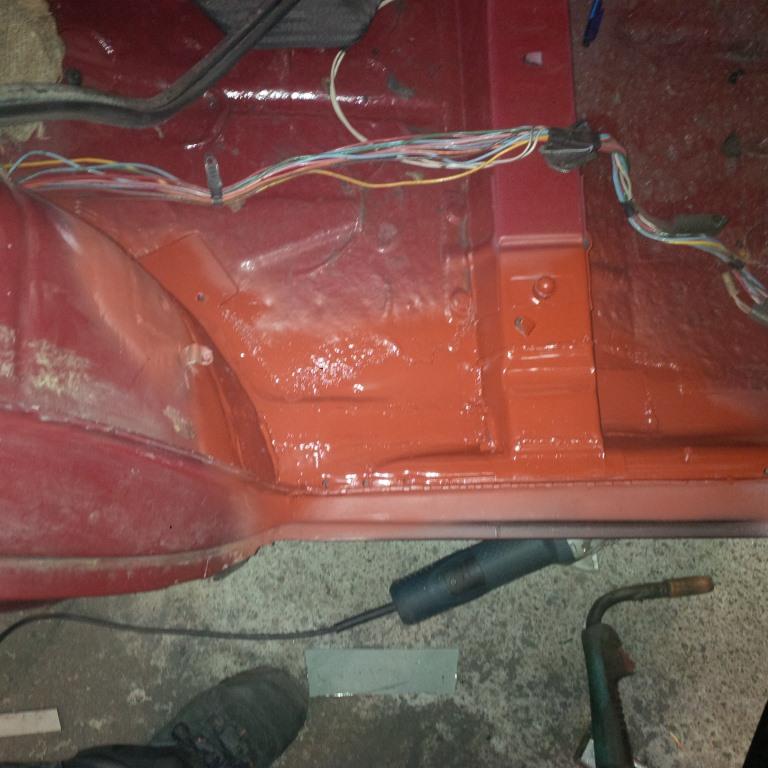
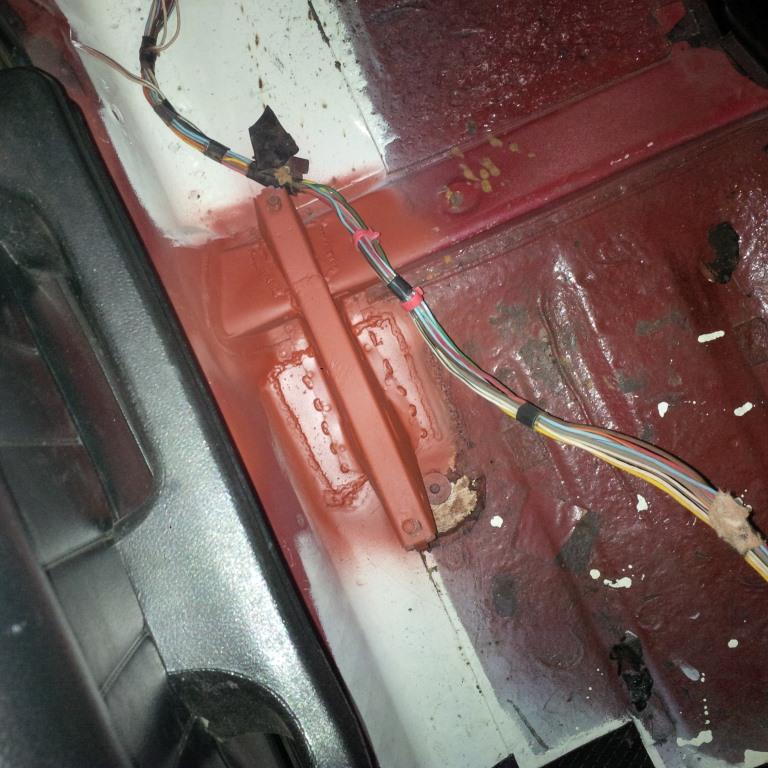
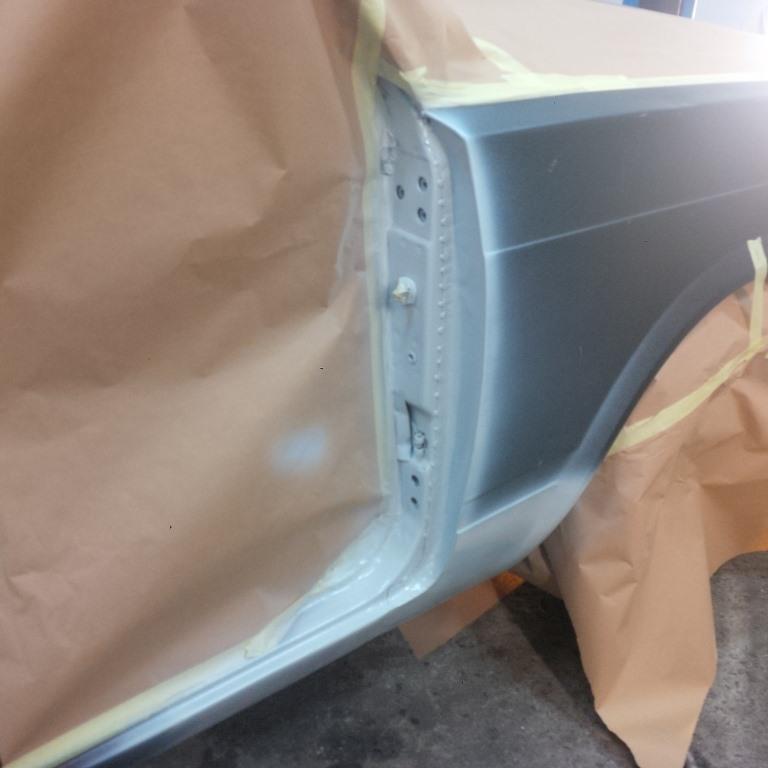
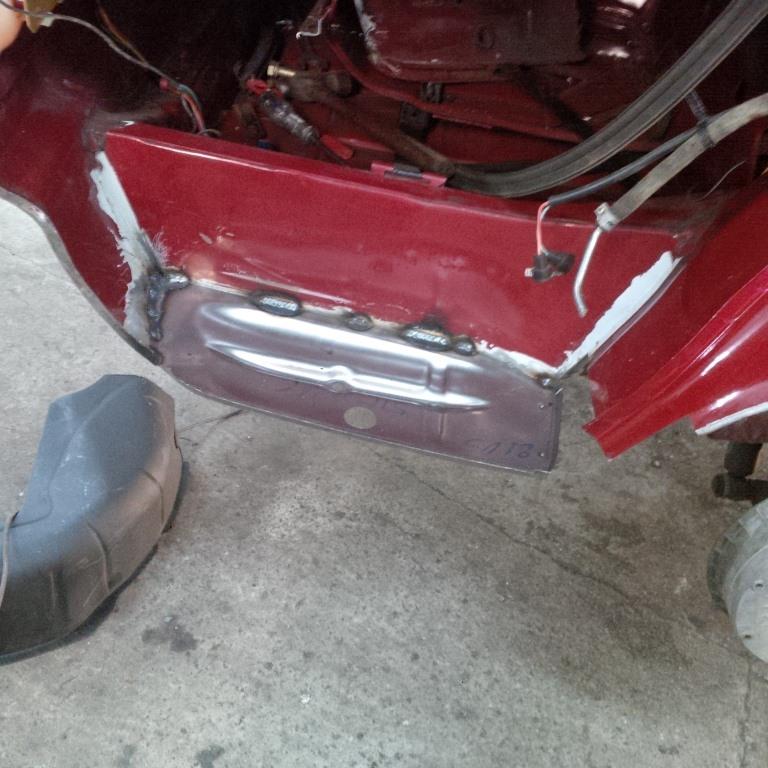
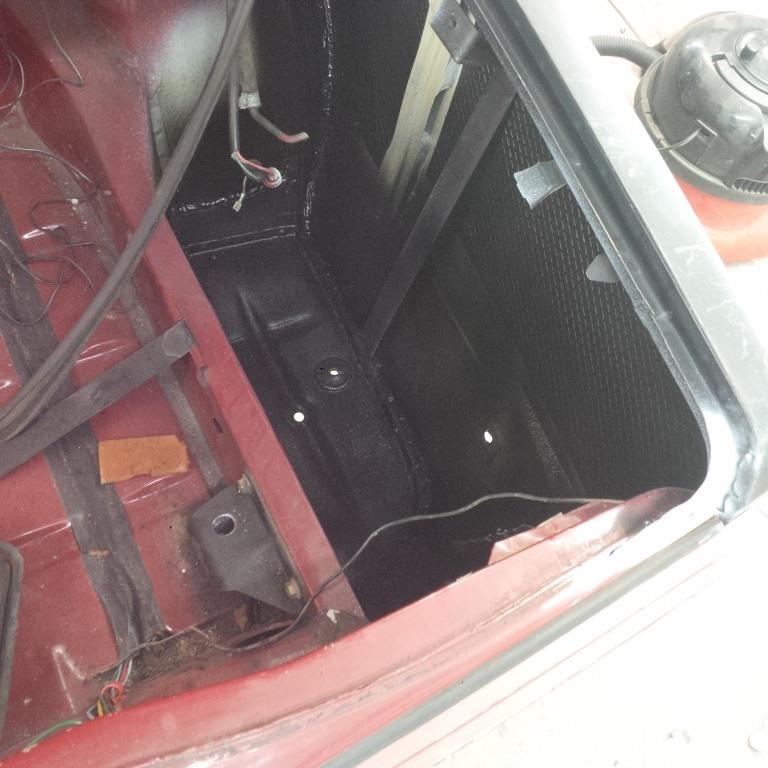
Moving onto the passenger side now. I had thought it was the better side but apparently not. In an attempt to beat future rust any areas that even have a hint of surface rust that I can't get off are treated with a rust converter before getting a coat of construction primer (strong etch and really good salt spray resistance) Any areas that aren't directly next to welding get a coat of construction primer too and any completely clean or areas being welded are coated with a copper weld through primer. I don't think there's much else can be done. All cavities will be coated with dinitrol or kent cavity wax once all the welding's finished.
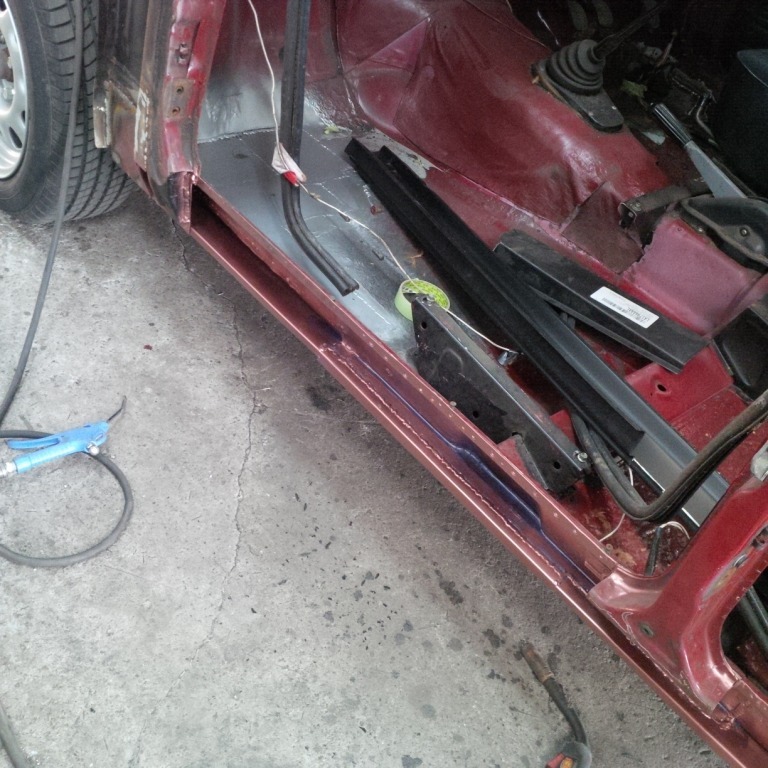
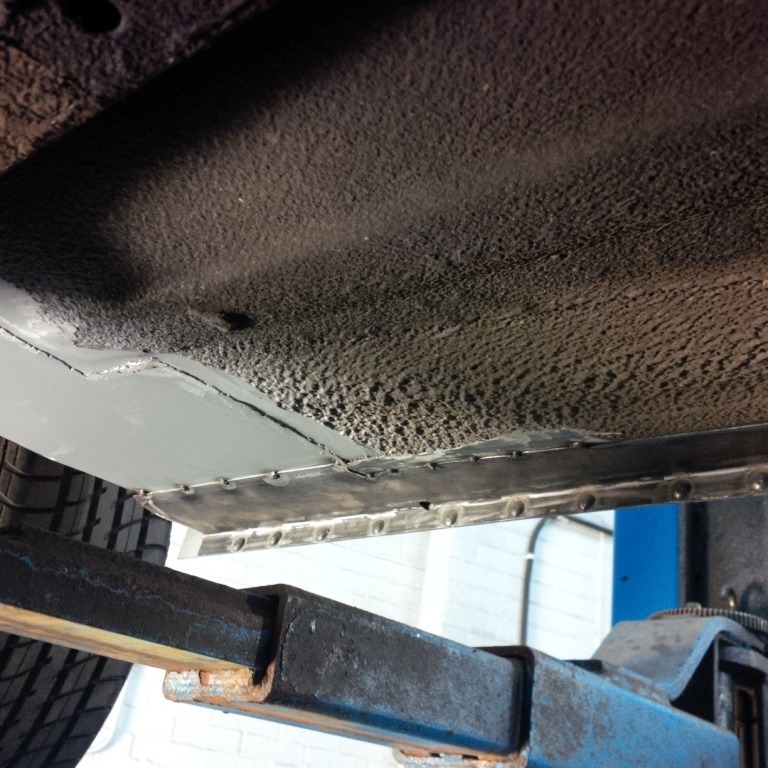
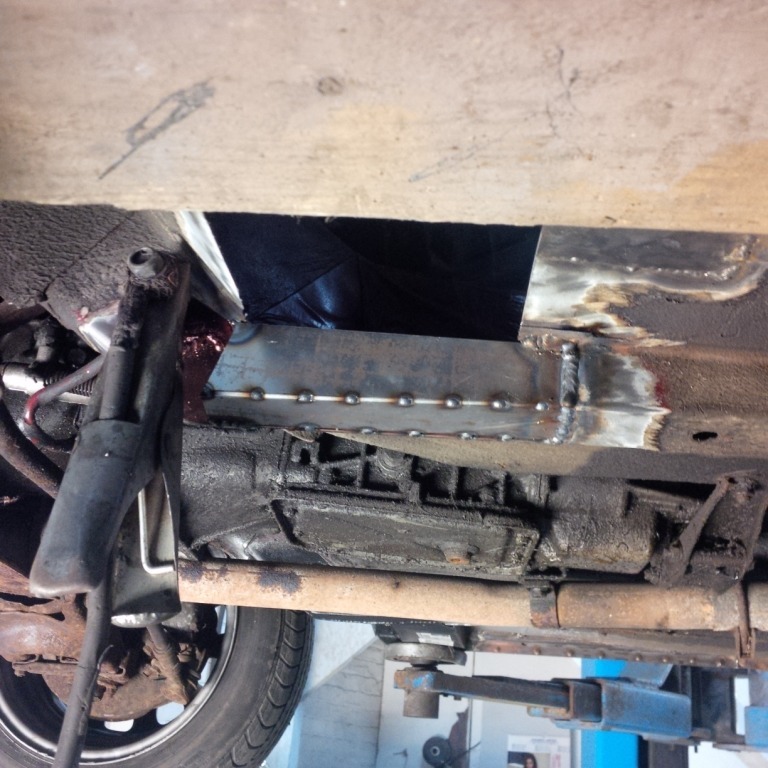
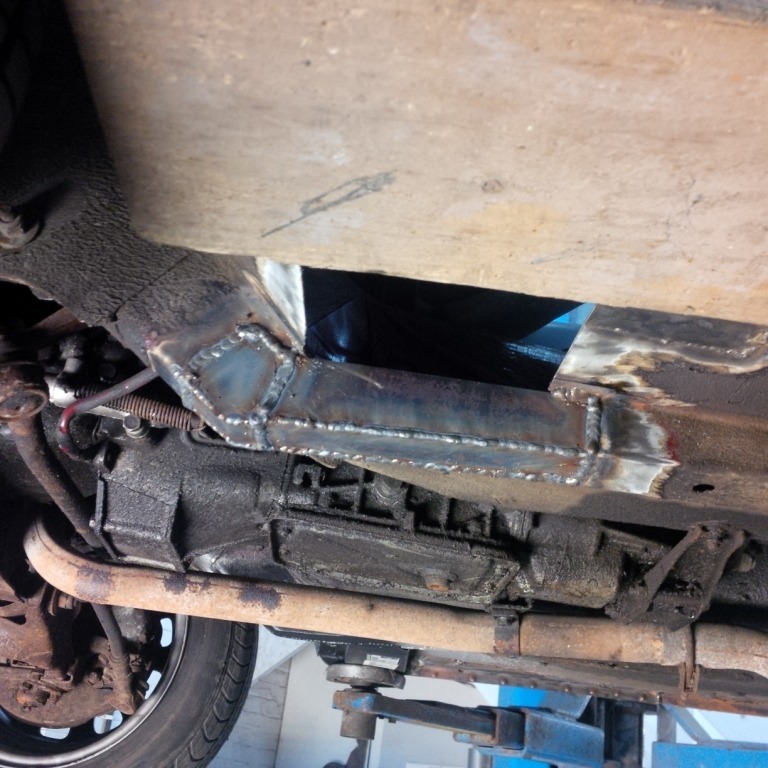
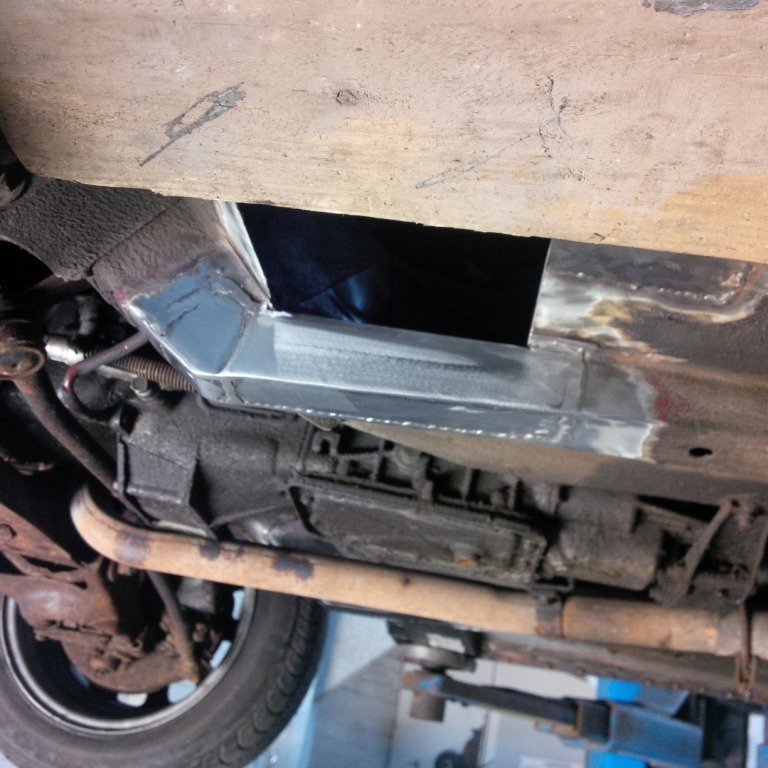
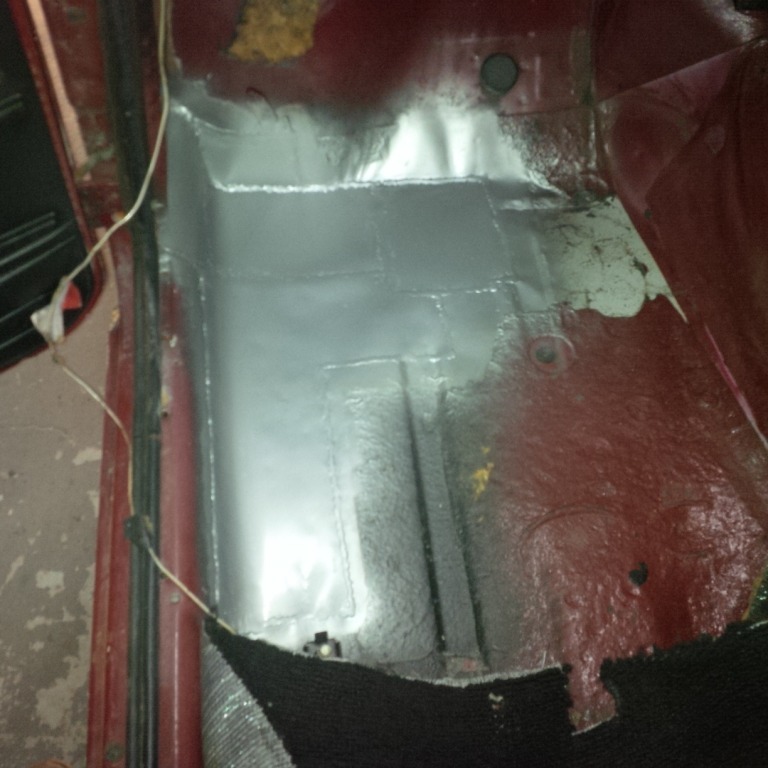
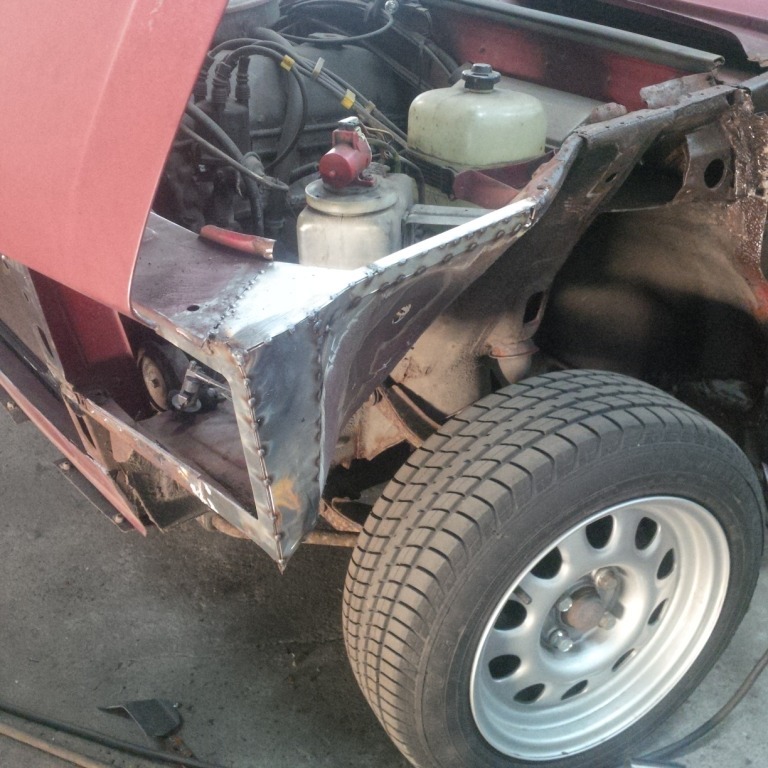
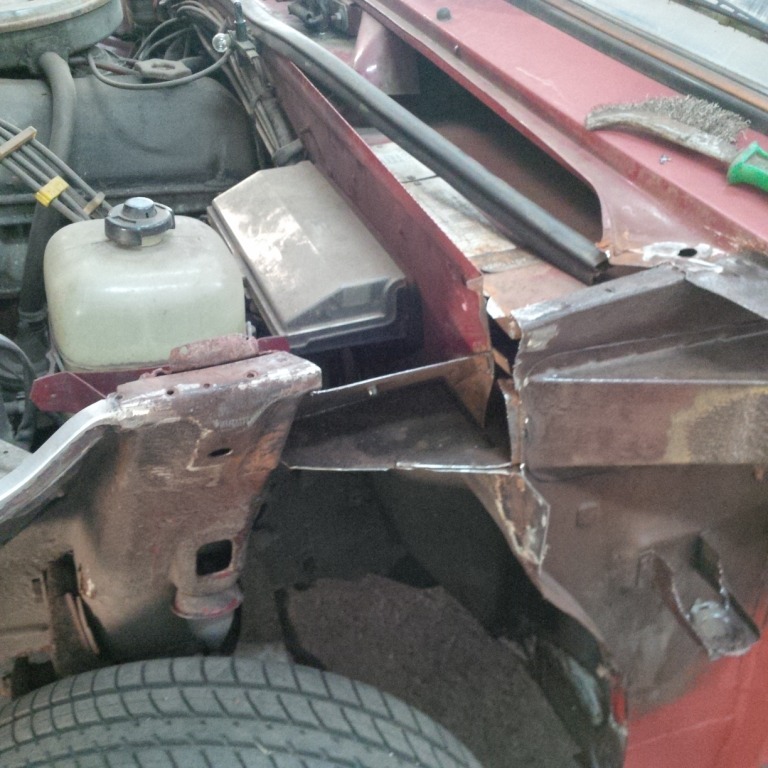
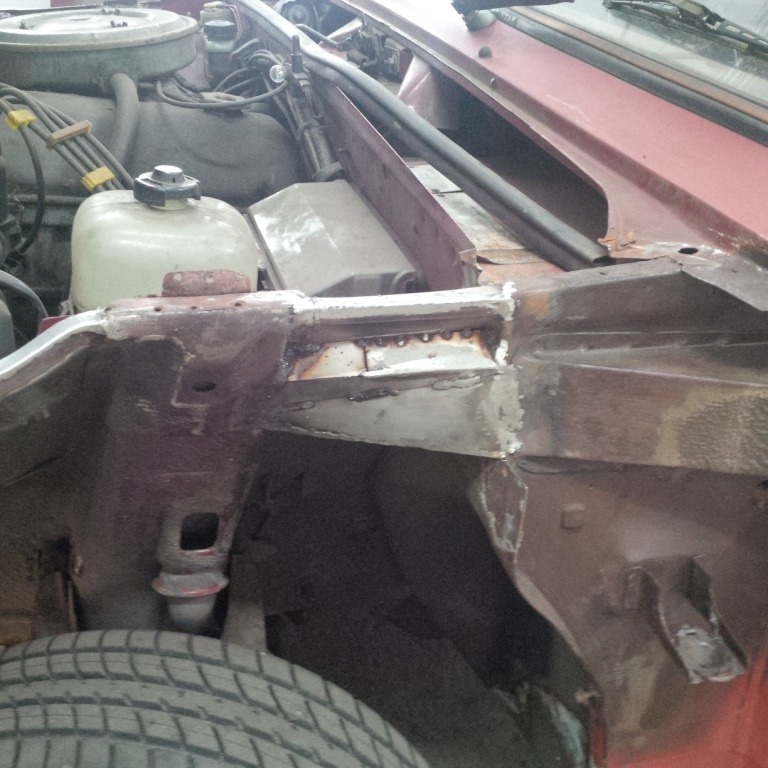
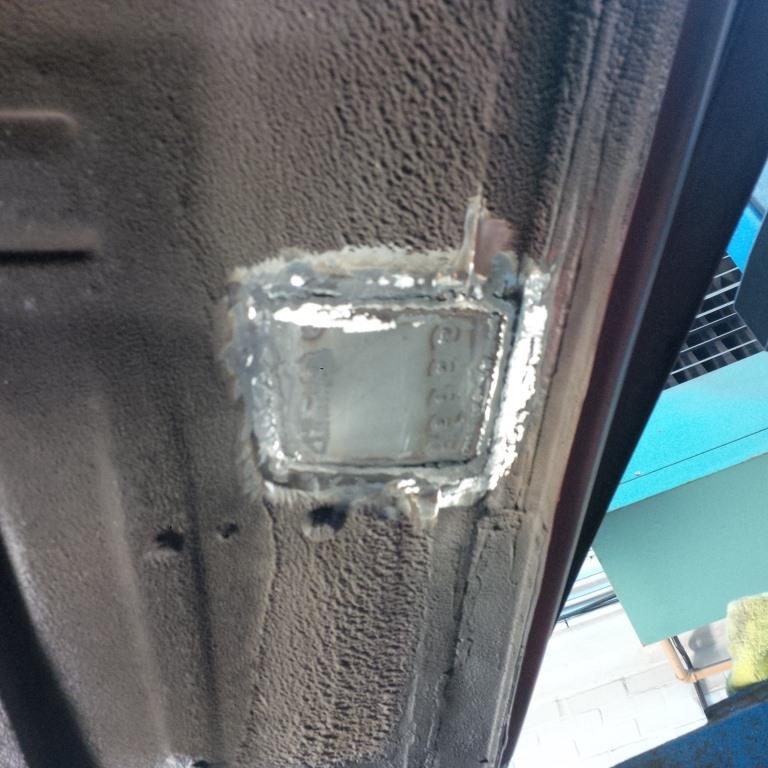
New sections from Lada Spares help speed up the process. The back of the panel had already been coated with weld through primer before being attached and inside the sill done with construction primer with weld through coating along the back edges.
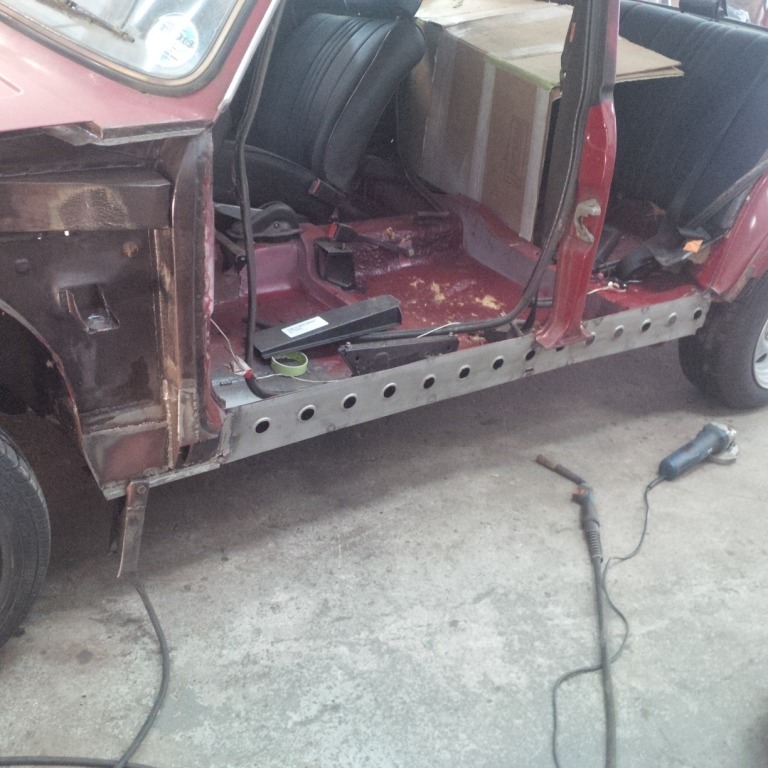
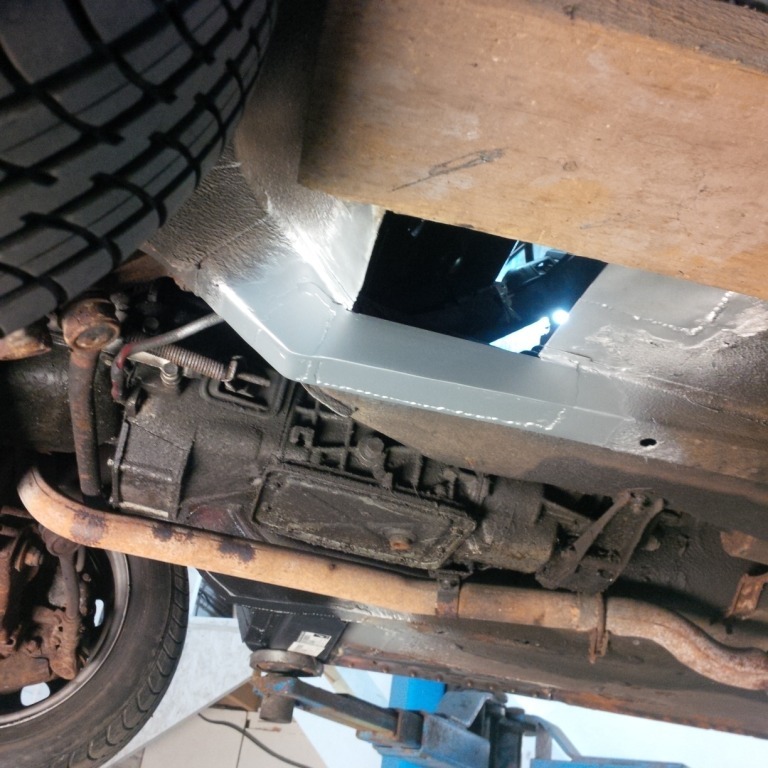
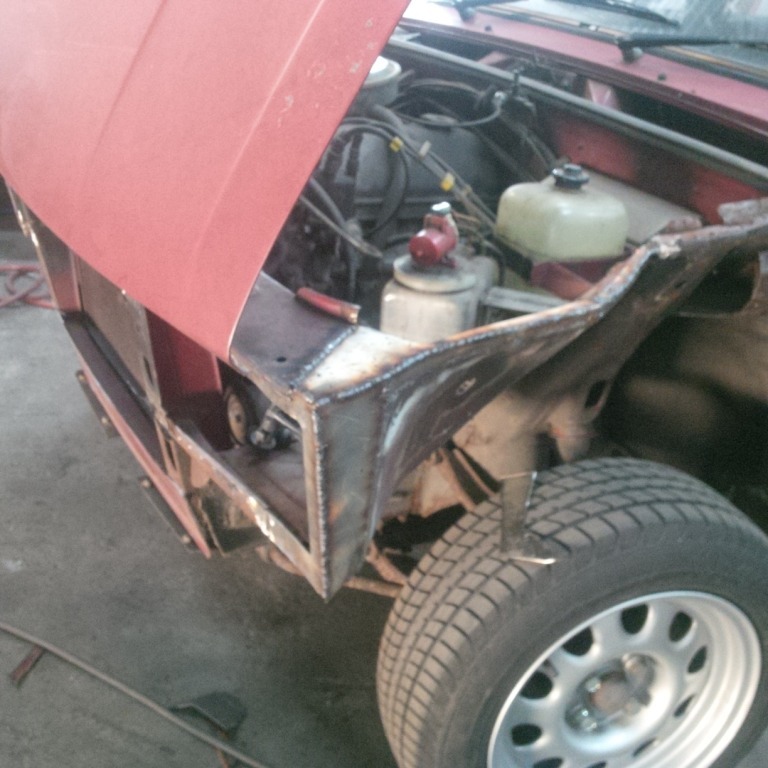
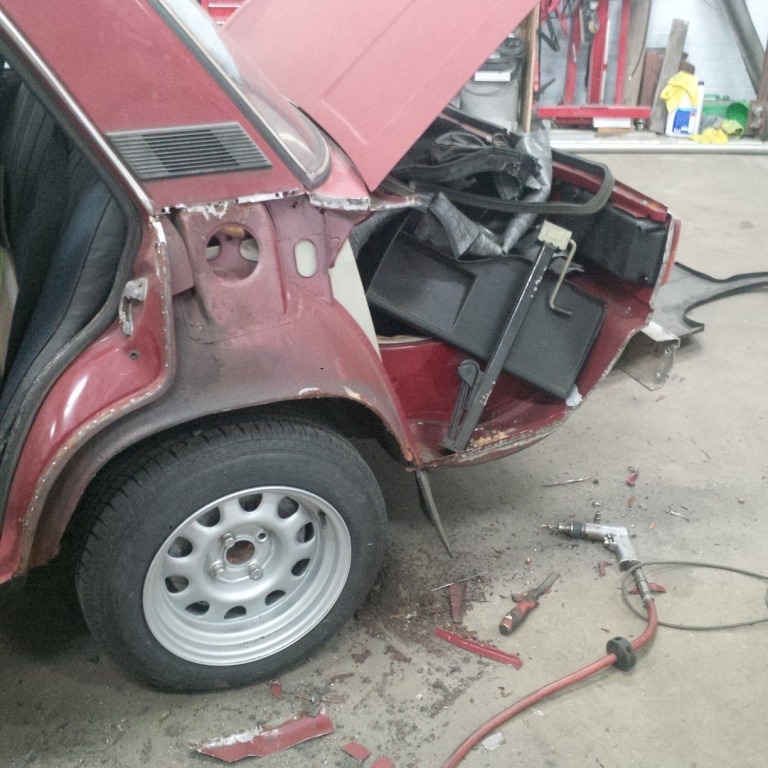
hopefully another few hours on the inner wing area will see it ready to fit the wings and front panel. Then it'll actually look like progress!
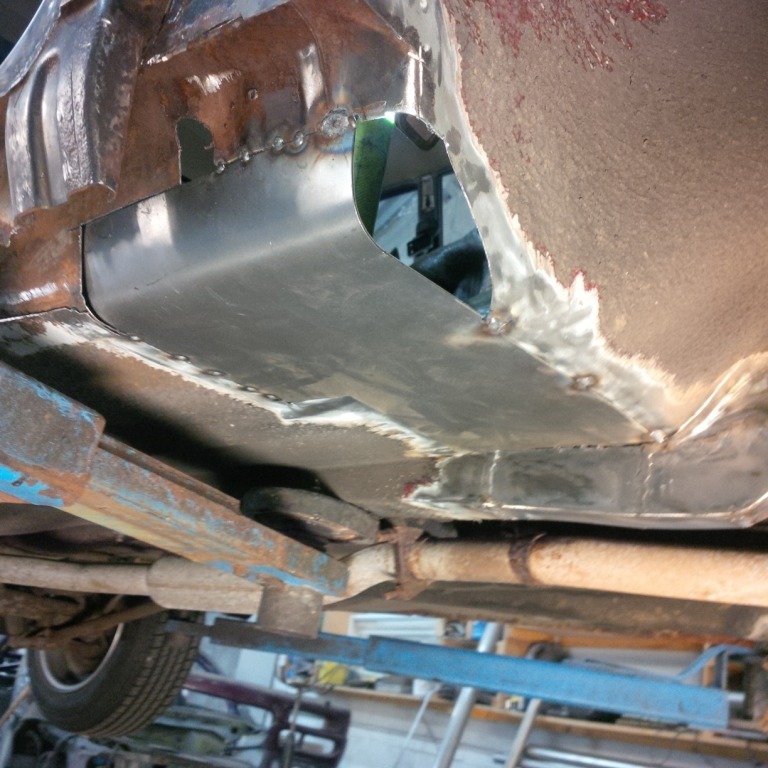
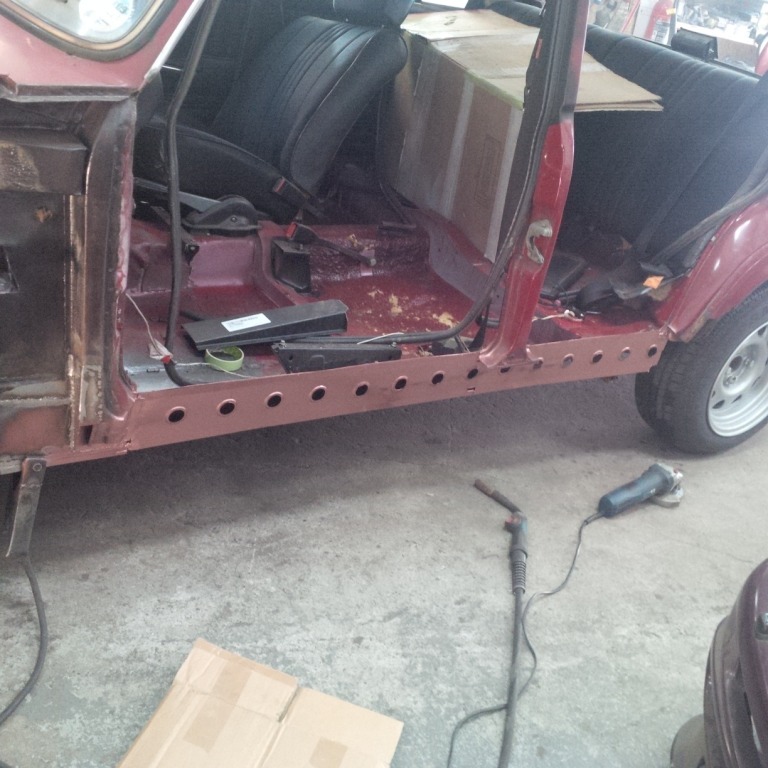
Got some more of the boring bits finished off so I can start getting panels lined up and actually see some progress.
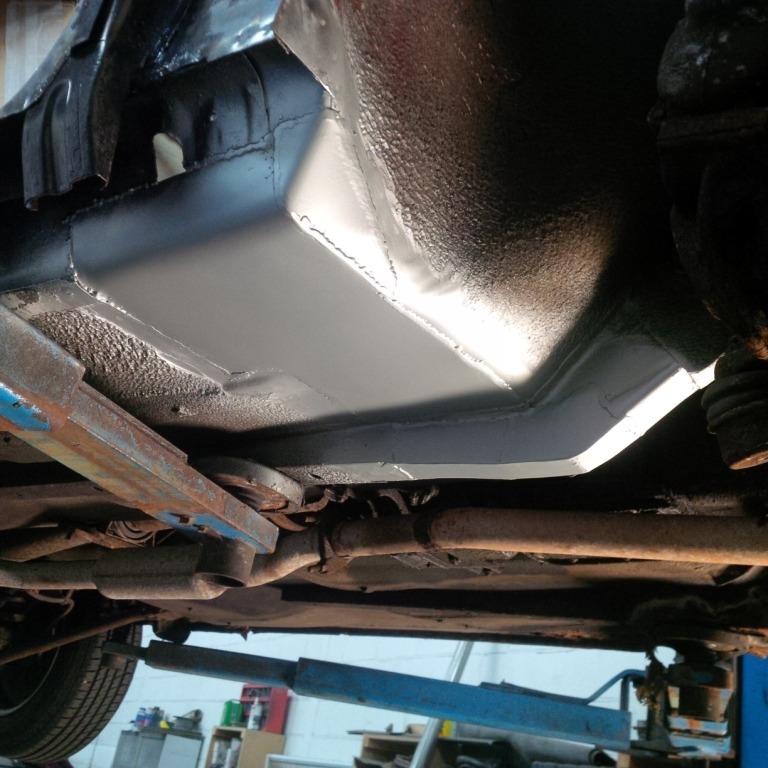
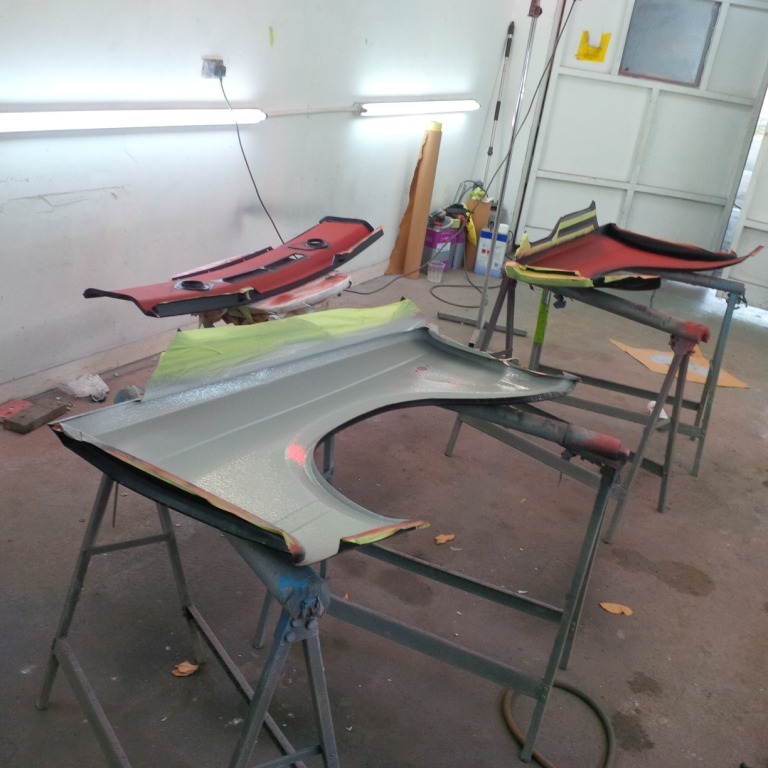
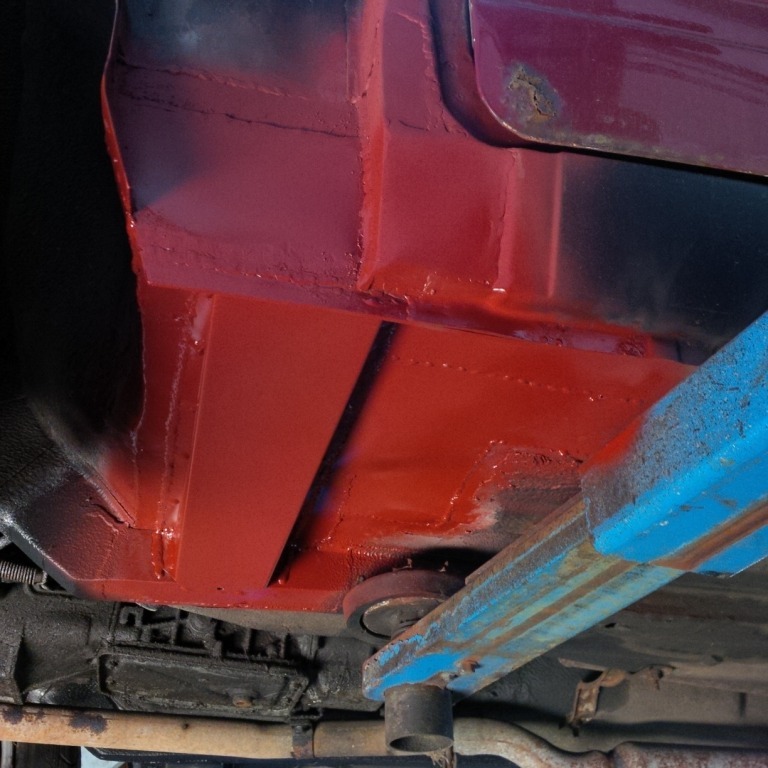
Construction primer then spray sealer around any water traps on the backs of all the new panels followed by some stonechip just to be sure.

Some more metal appearing:
More rust converter on any areas that weren't completely clean after wire brushing with the grinder and construction primer for the fresh metal:

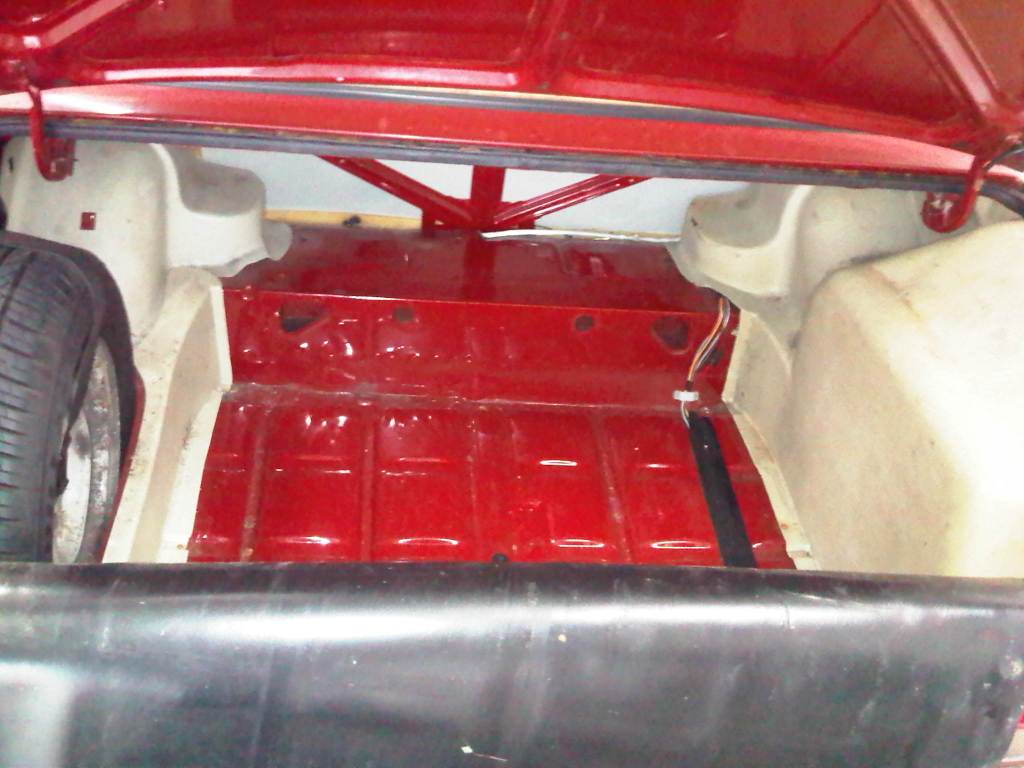
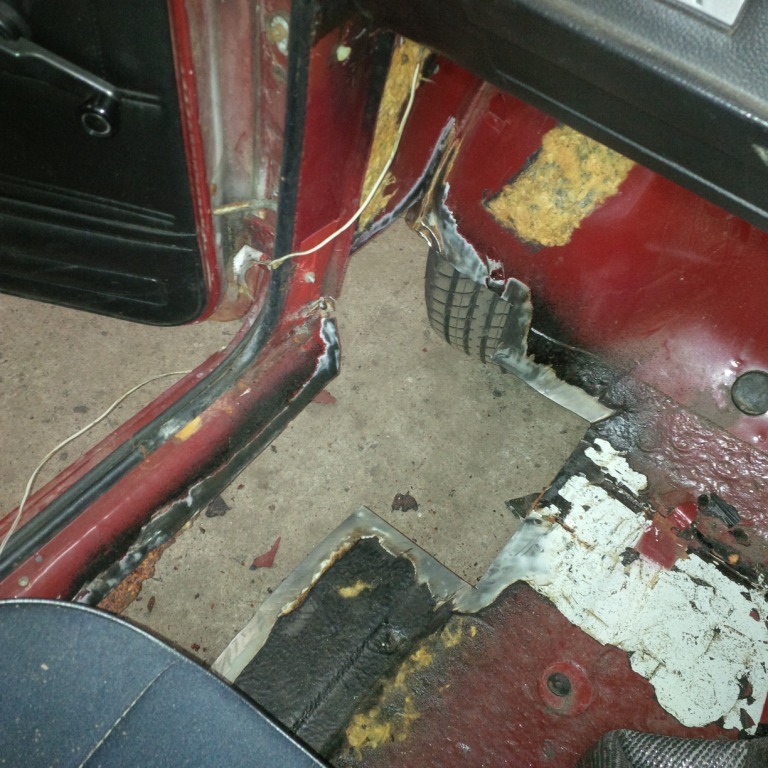
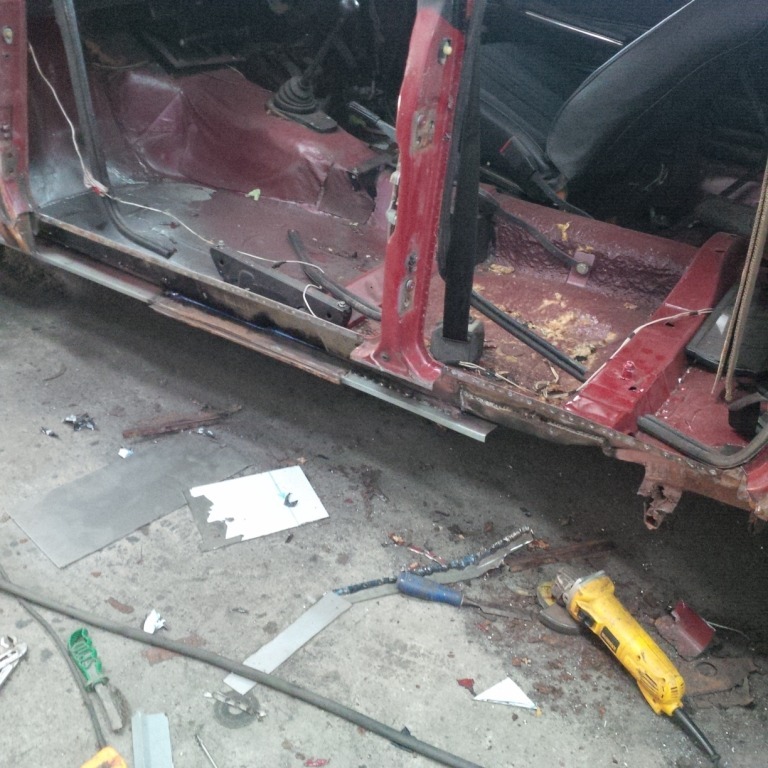
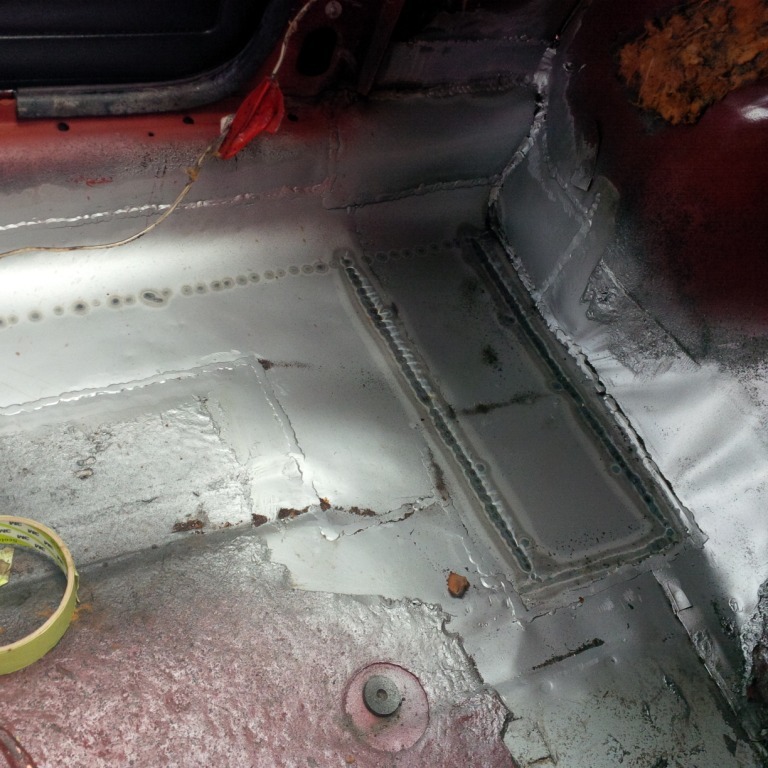
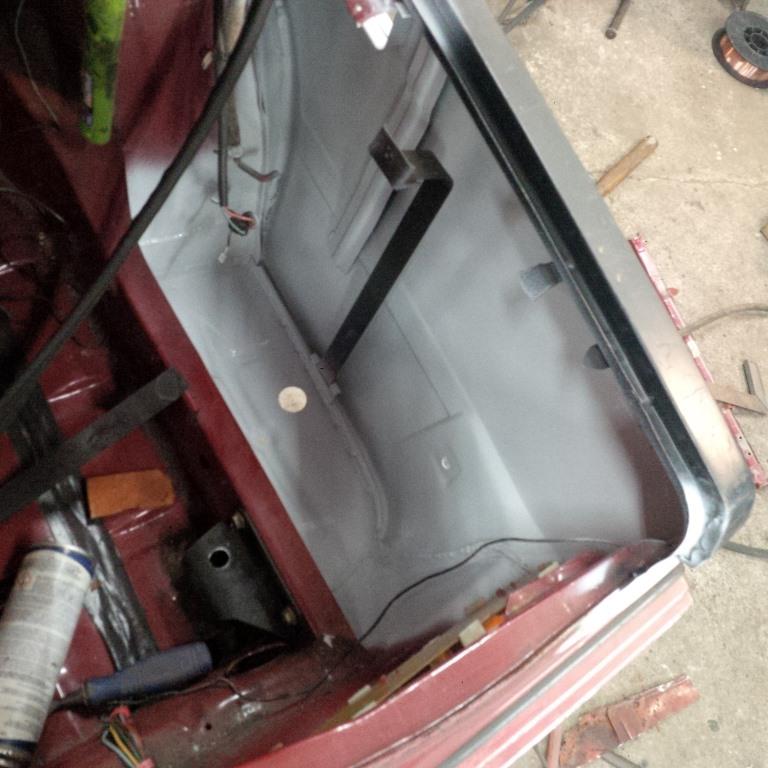
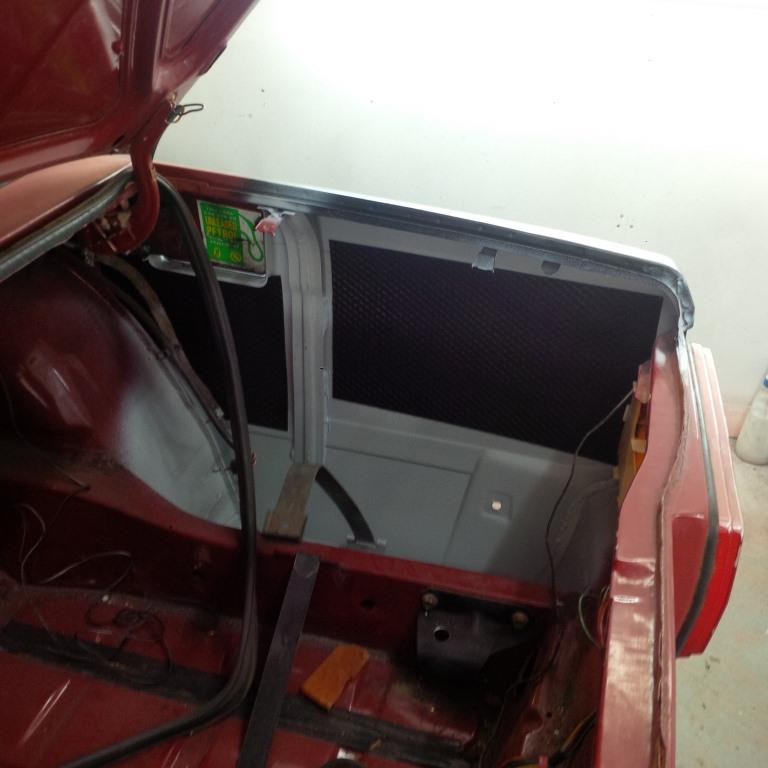
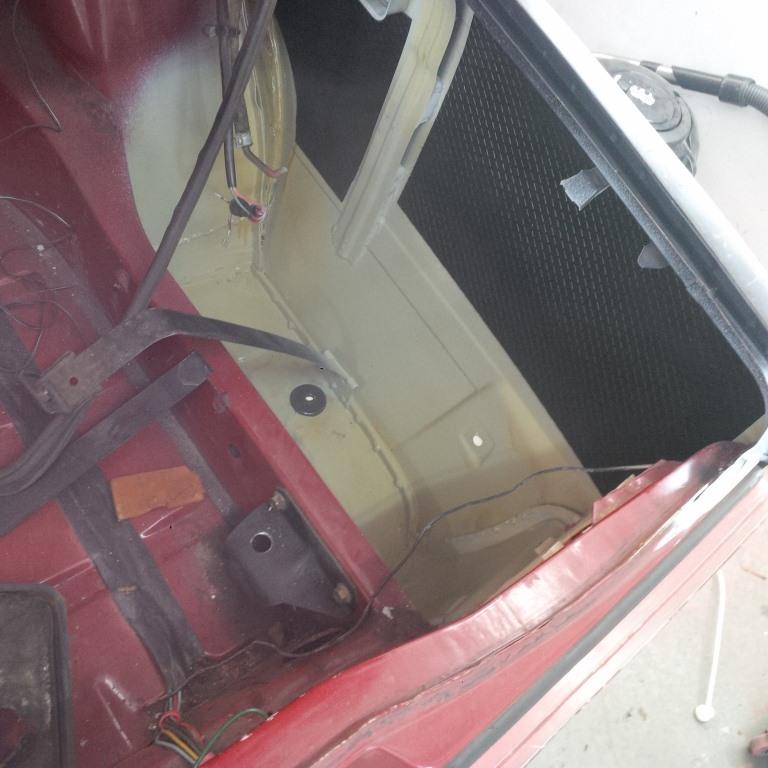
The view from inside the car now. Not too pretty but definitely strong and rust free!
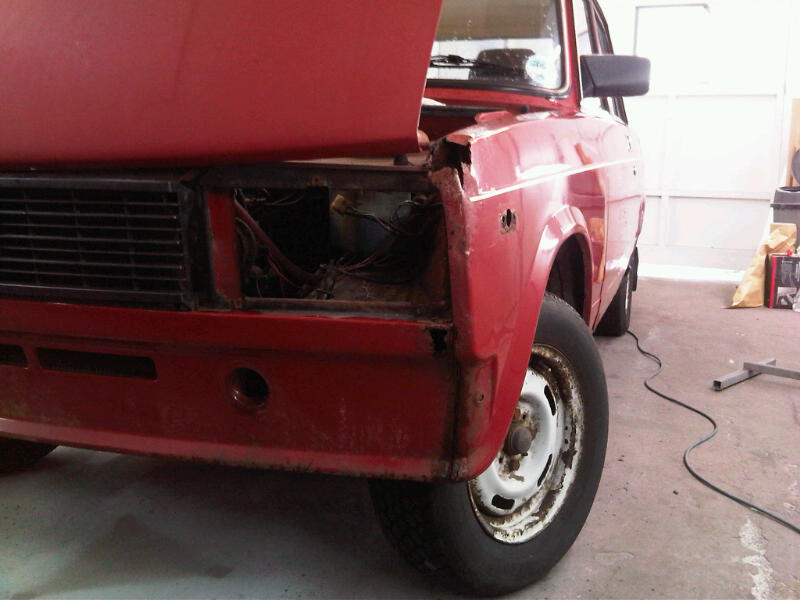
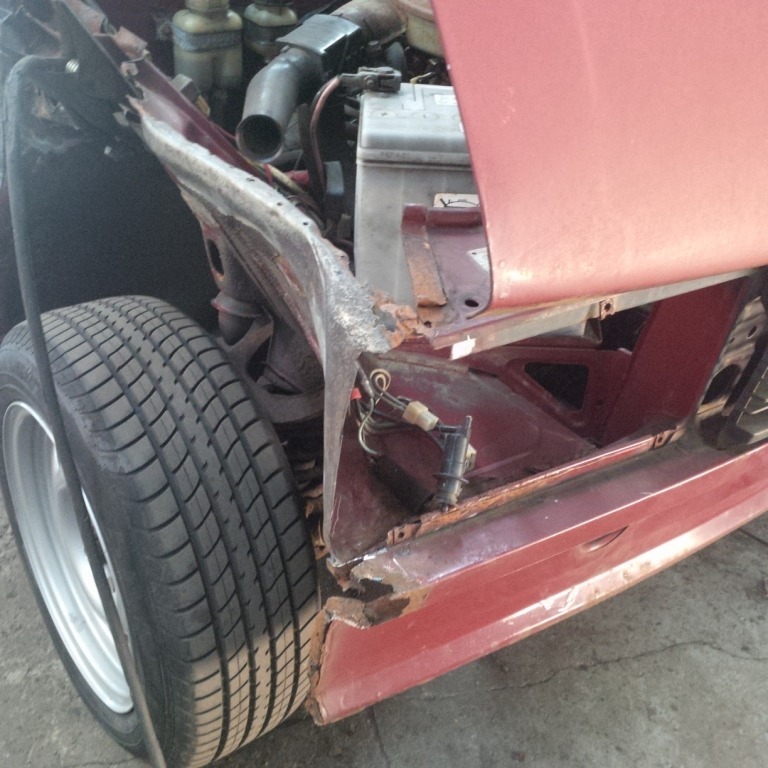
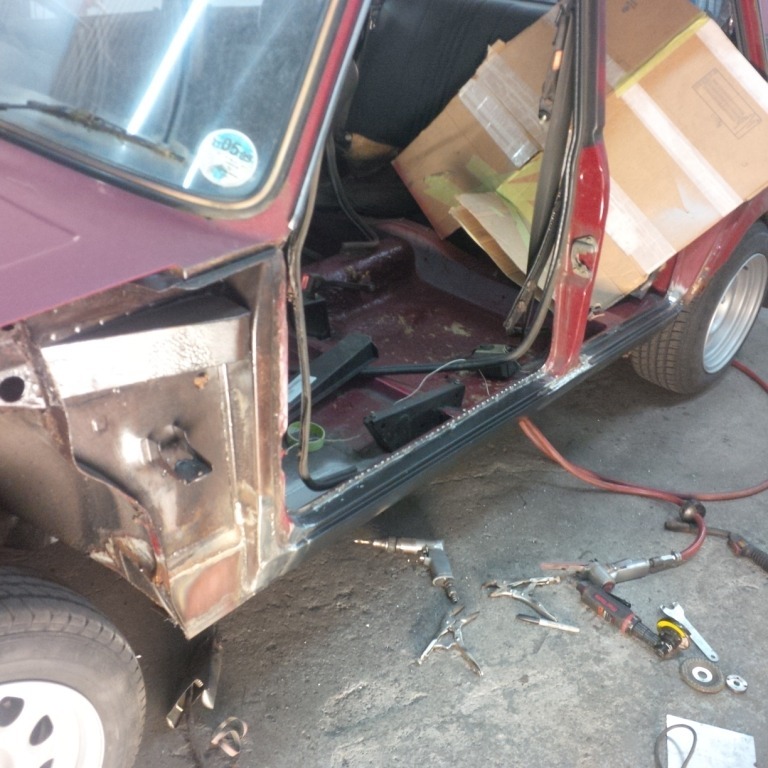
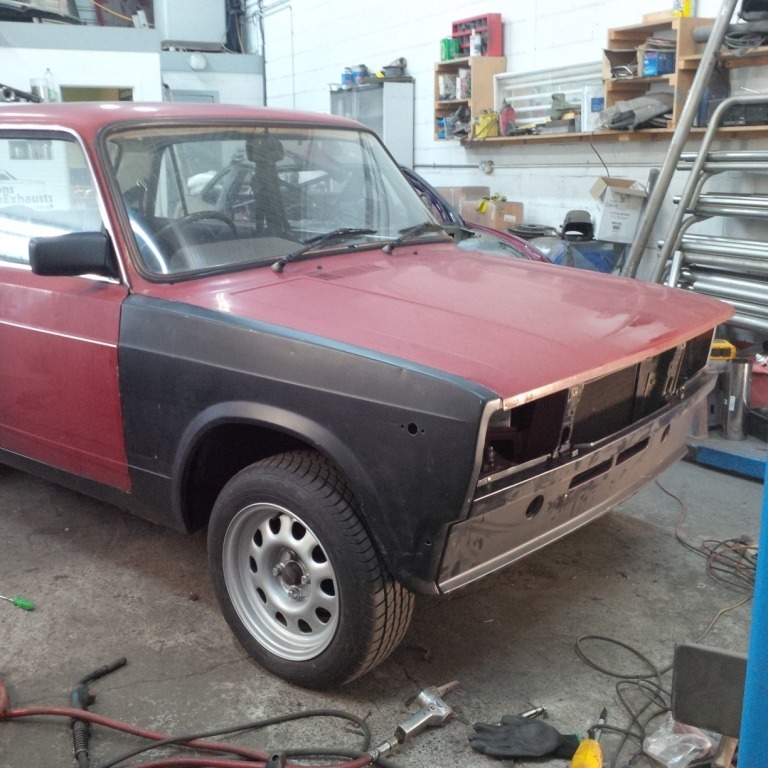
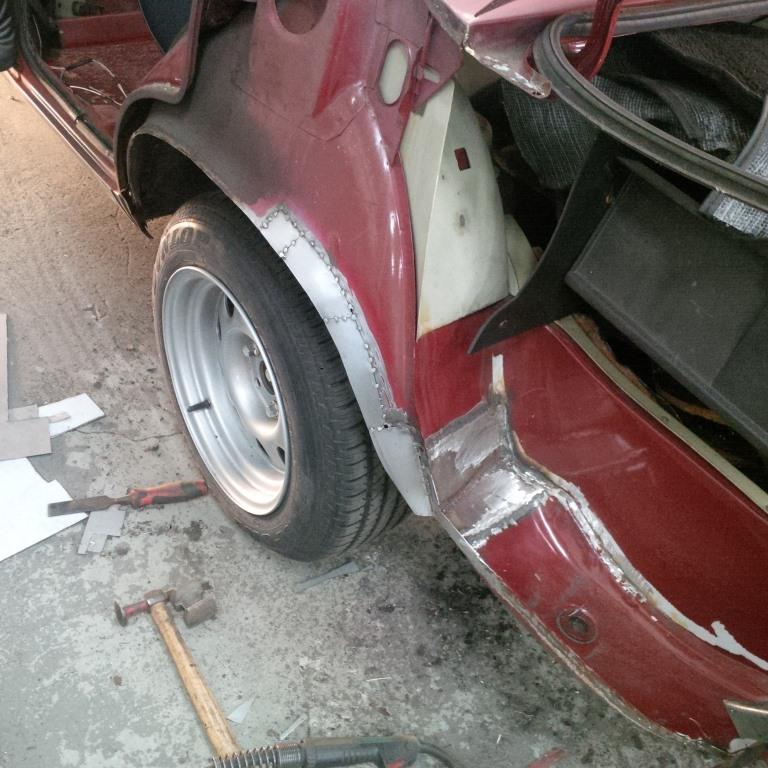
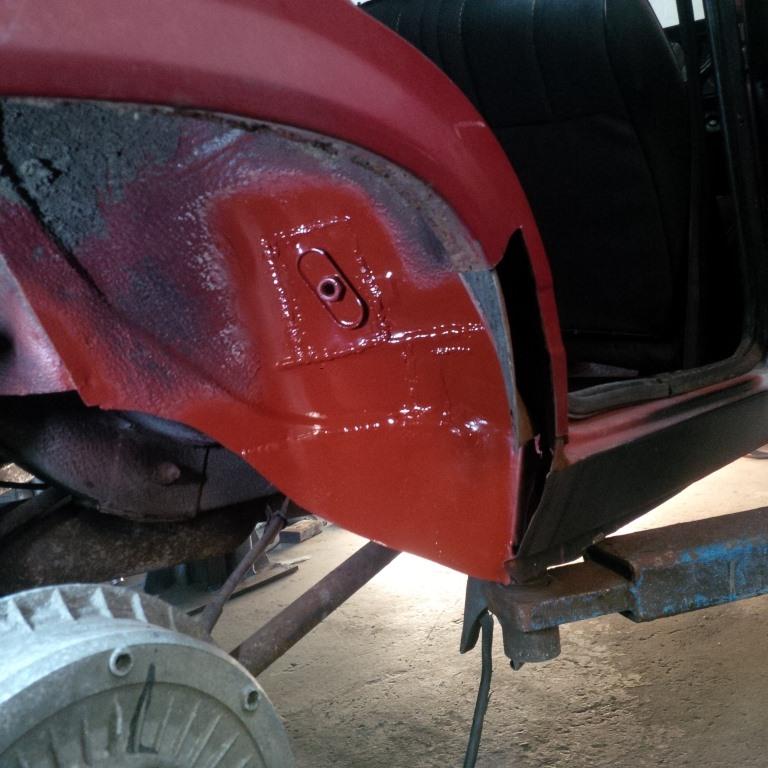
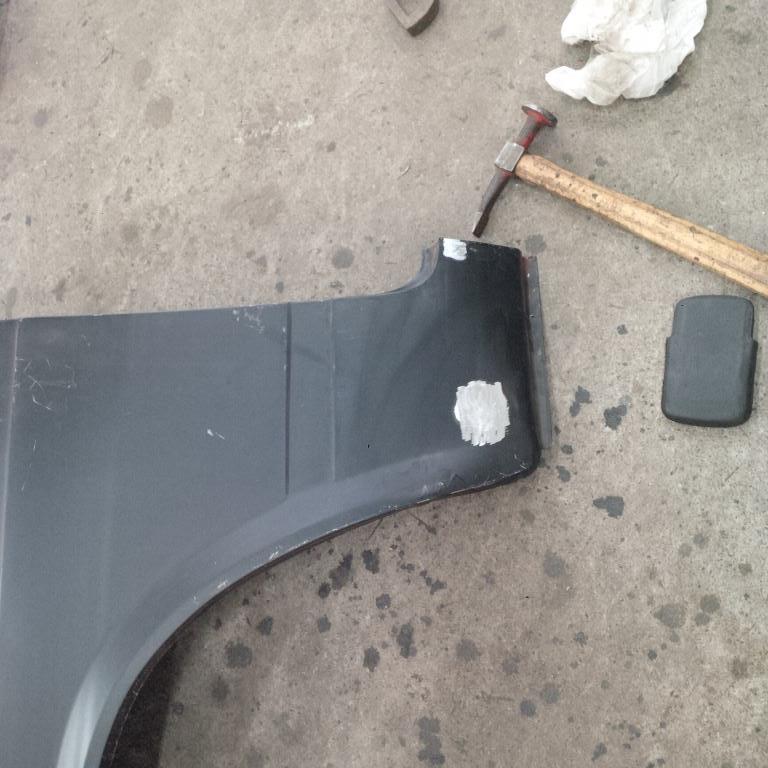
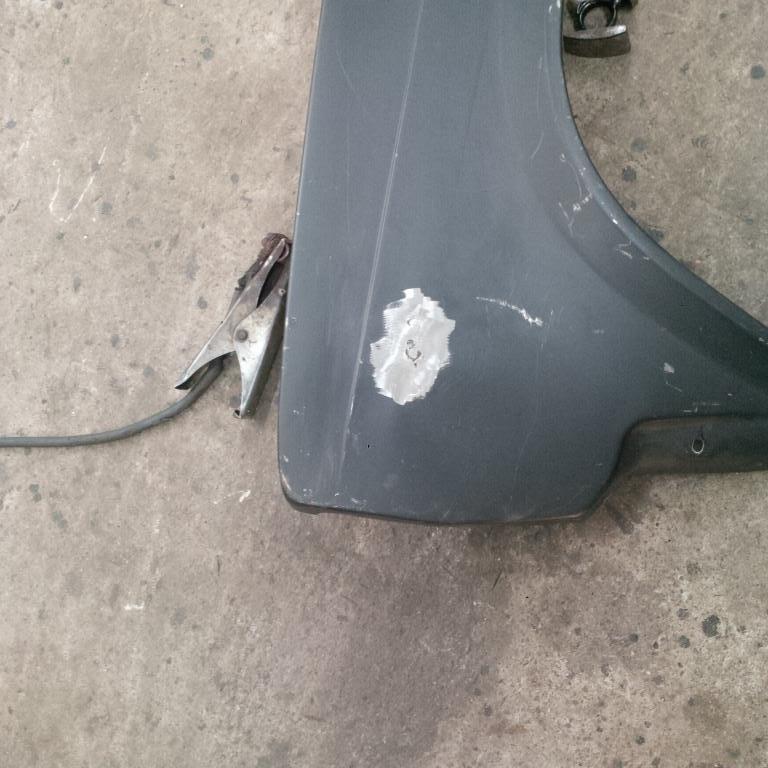
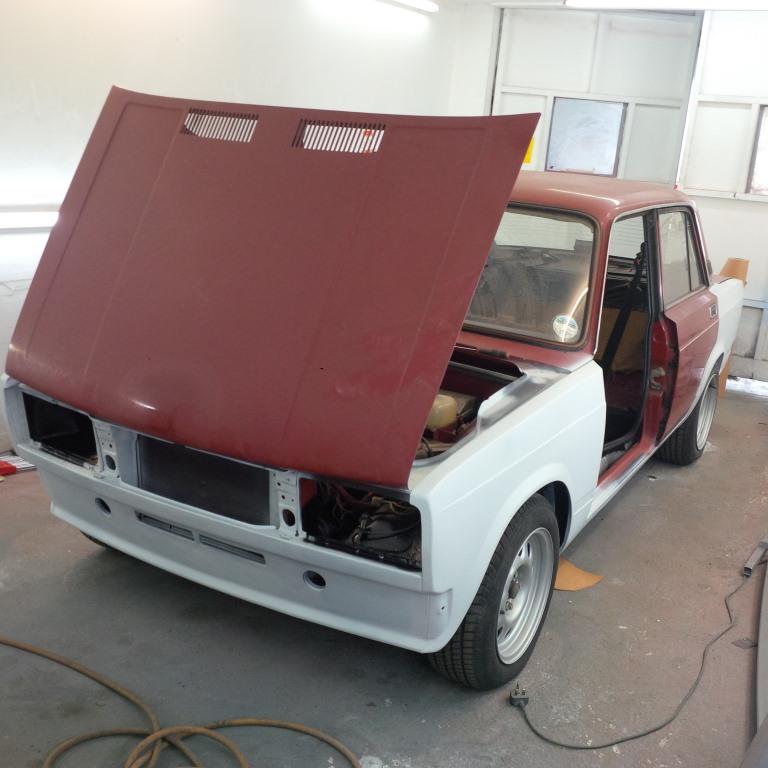
Test fit of front panel and wing. even after some trimming and bashing nothing seems to fit well. What are acceptable panel gaps on a Lada?
Time to attack the rear quarter:
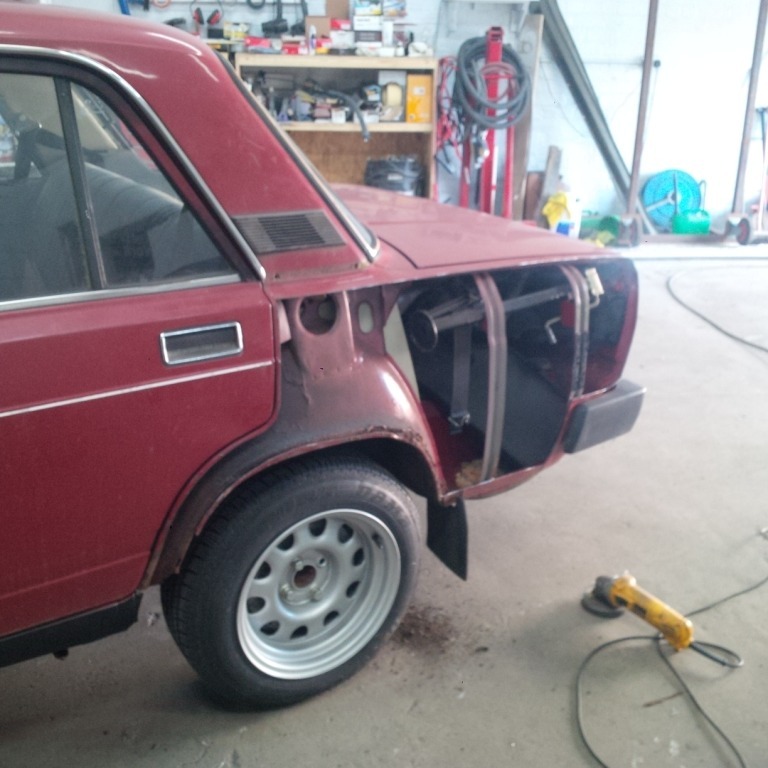
Hopefully will be able to get at least one rear inner arch repair section to save some time although this side isn't as bad as expected.
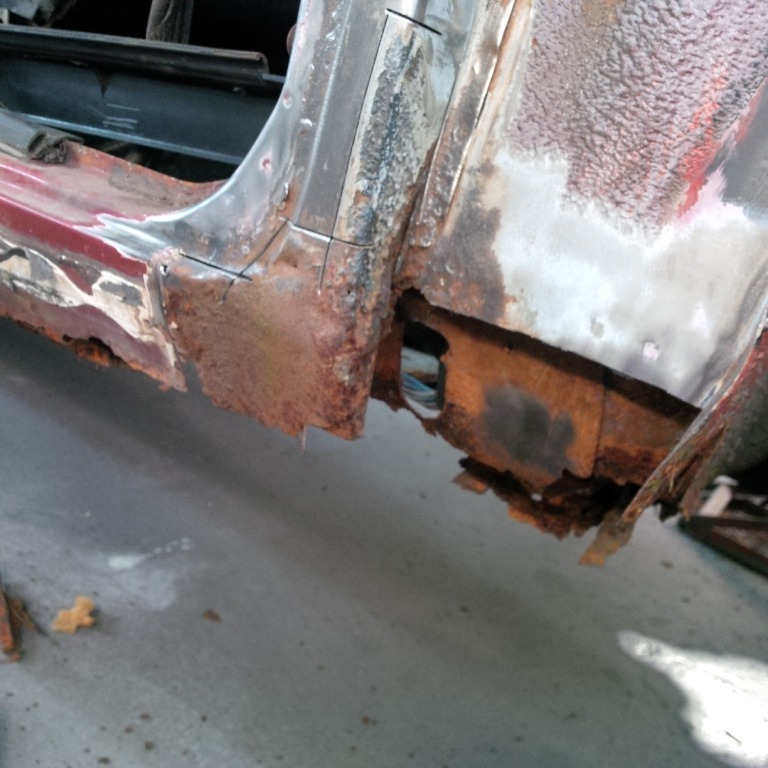
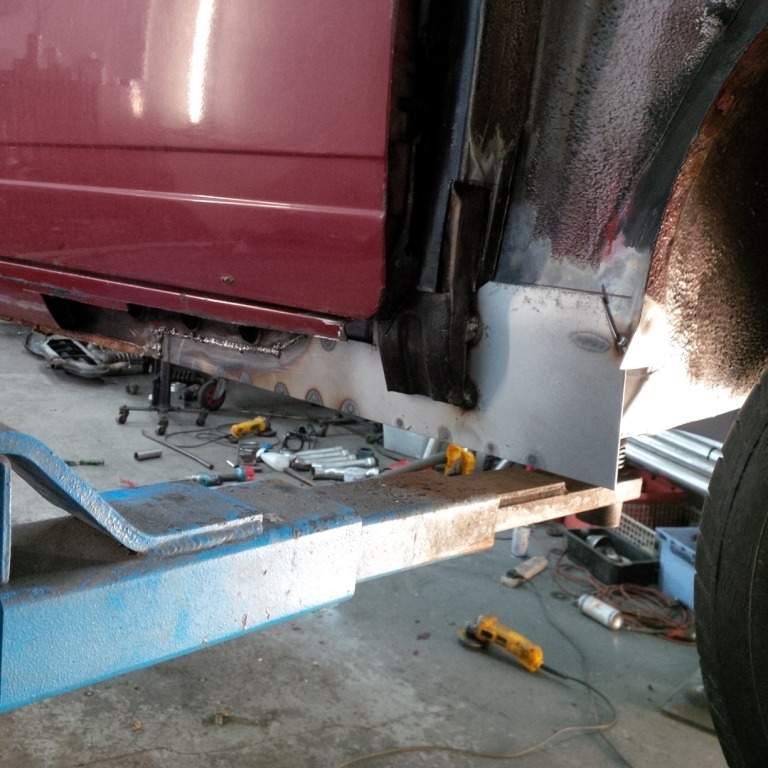
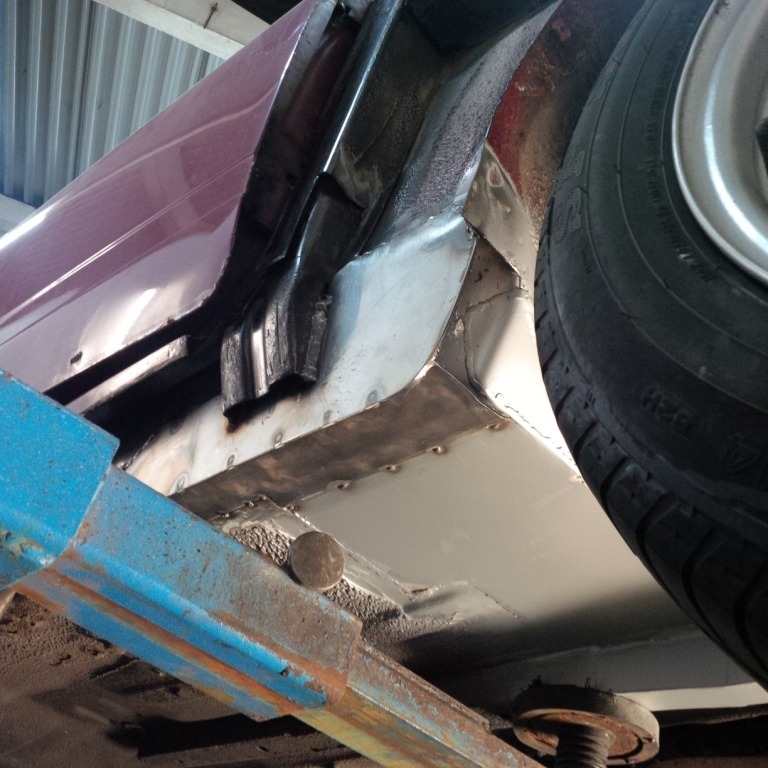
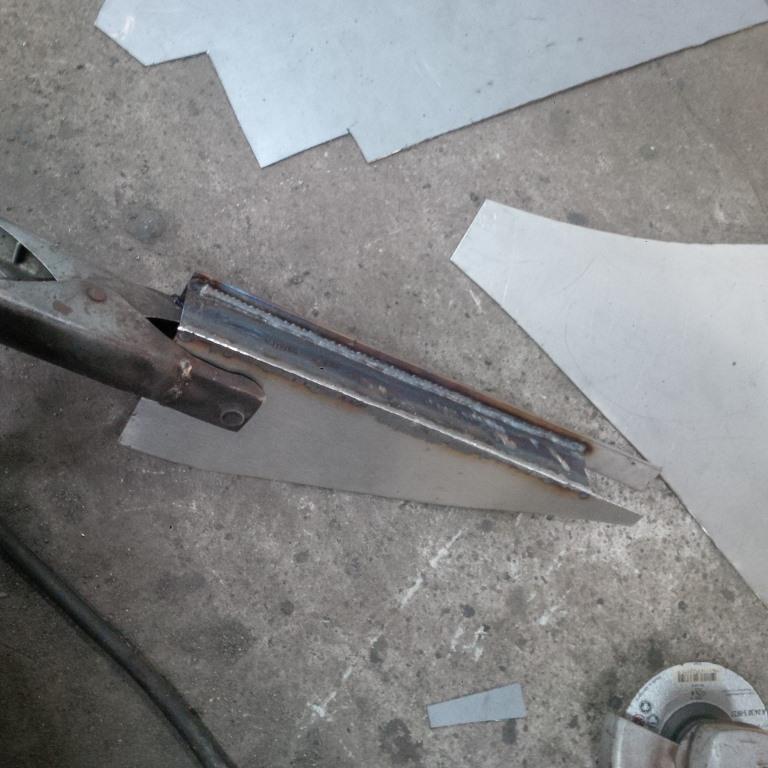
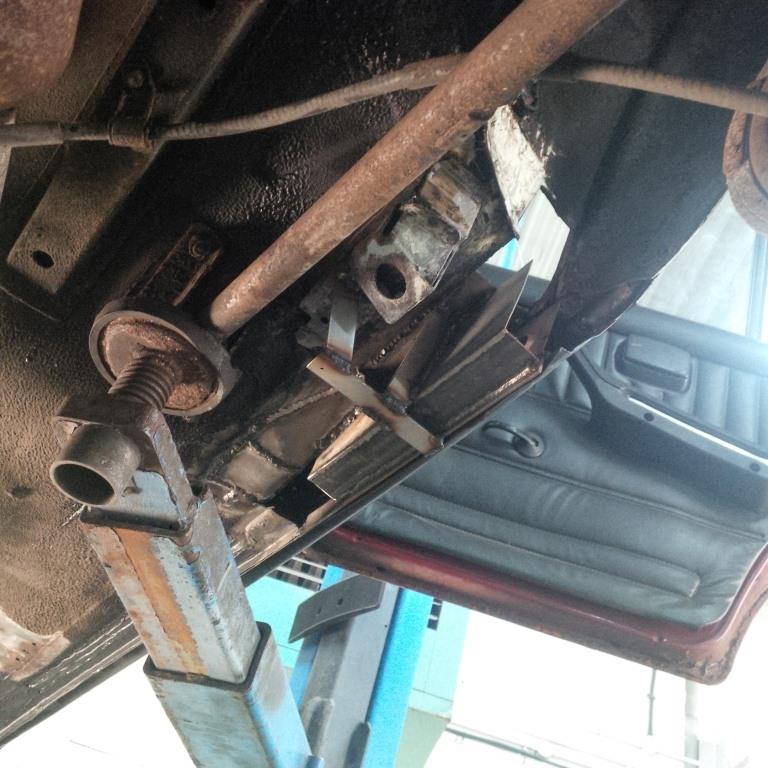
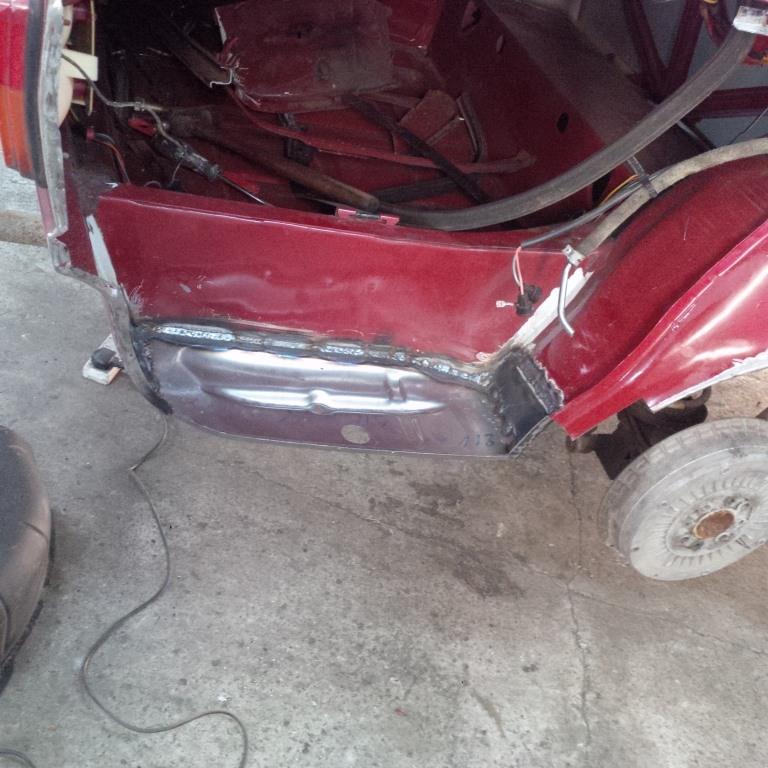
Got the rest of the rust on the passenger side rear chopped out and fresh metal welded in. Have converted the jacking points so they're flush with the sill level. I know they were really practical the standard way but I really don't like the look of them and the car is usually lifted with a trolley jack or two post lift anyway.
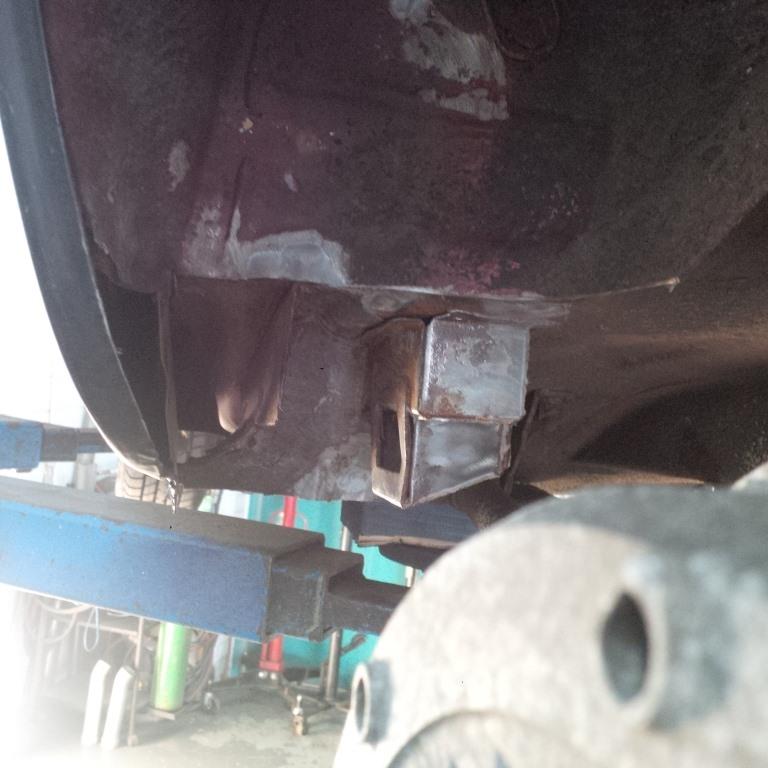

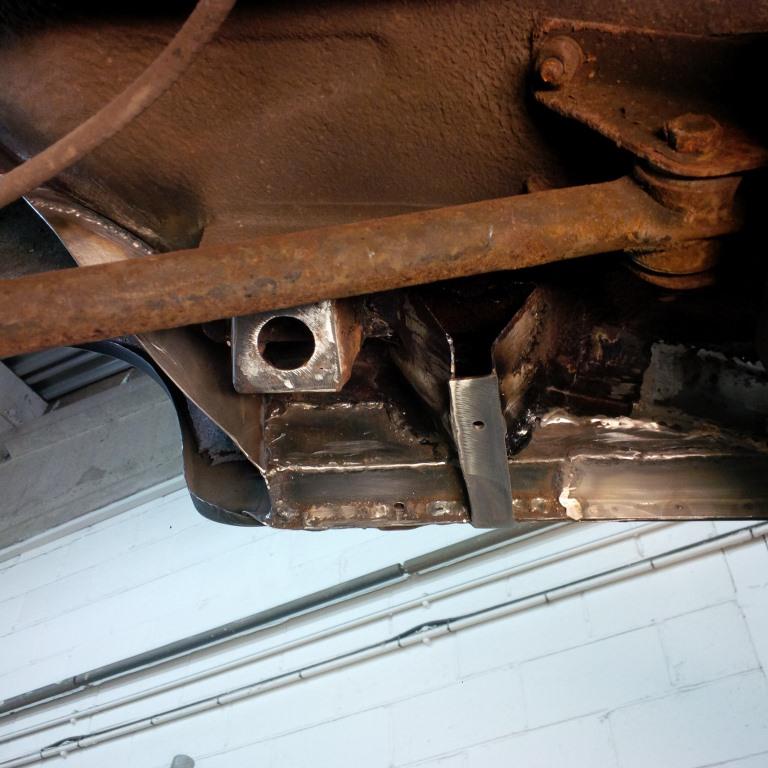
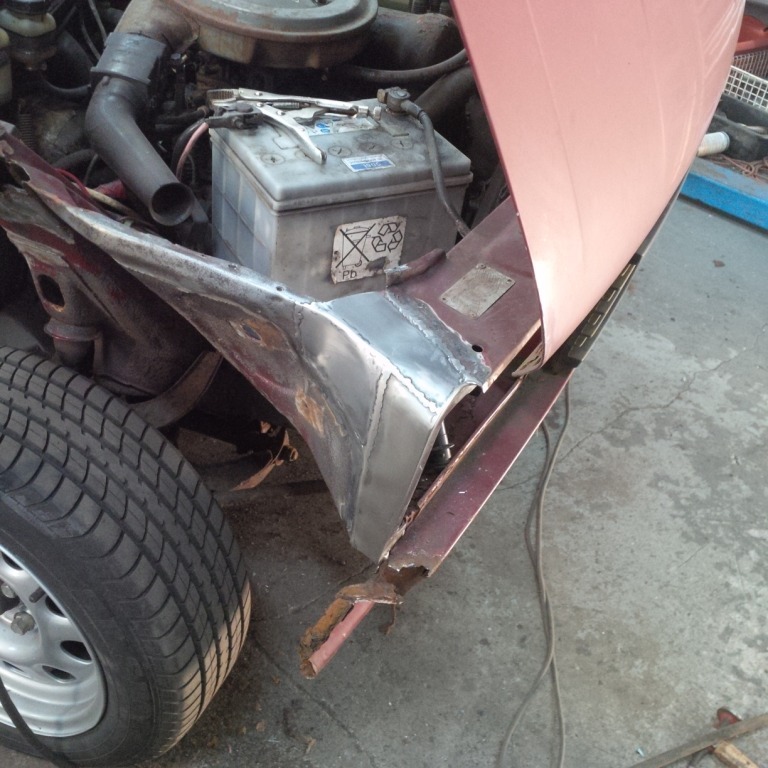
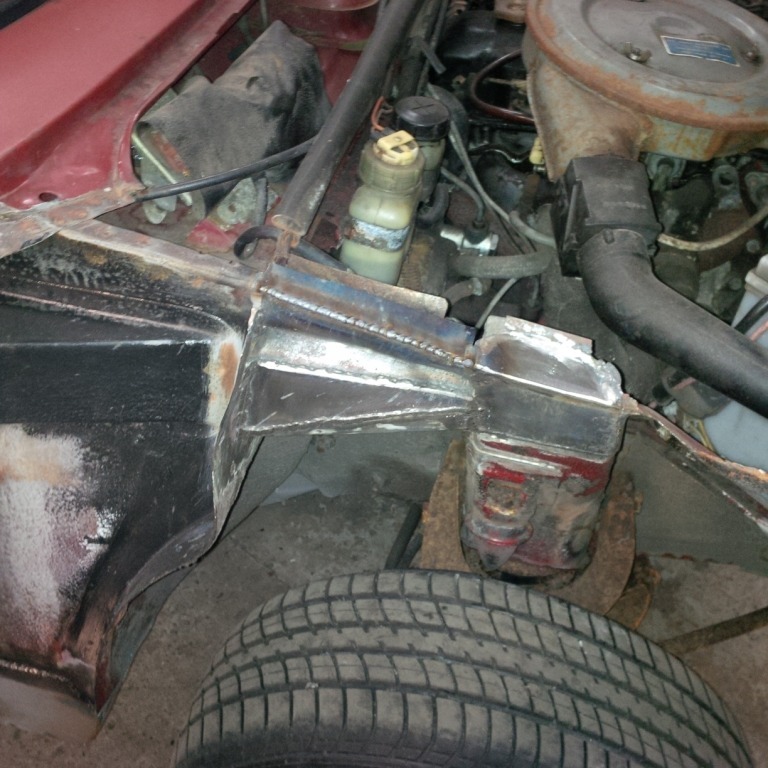
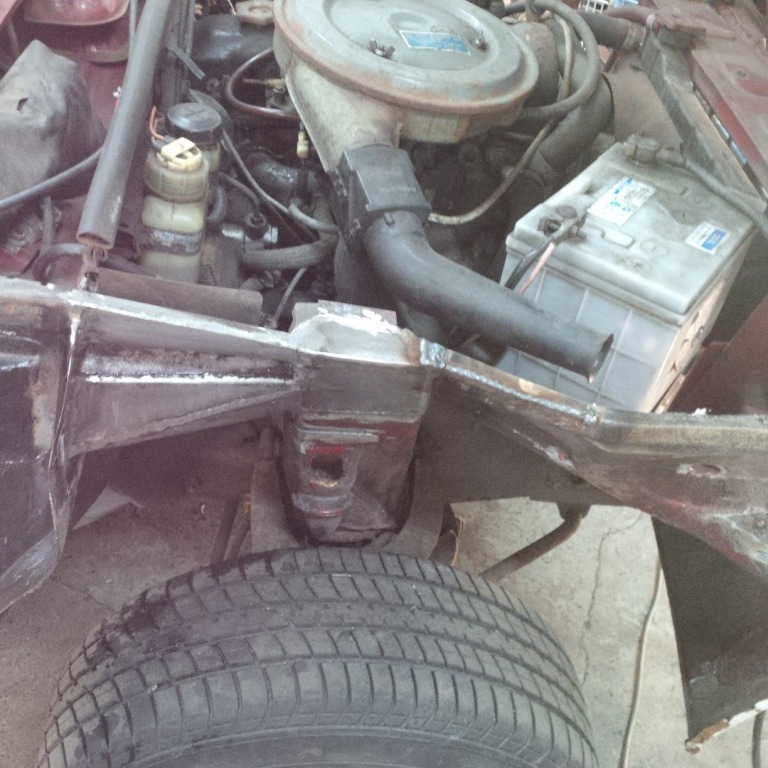
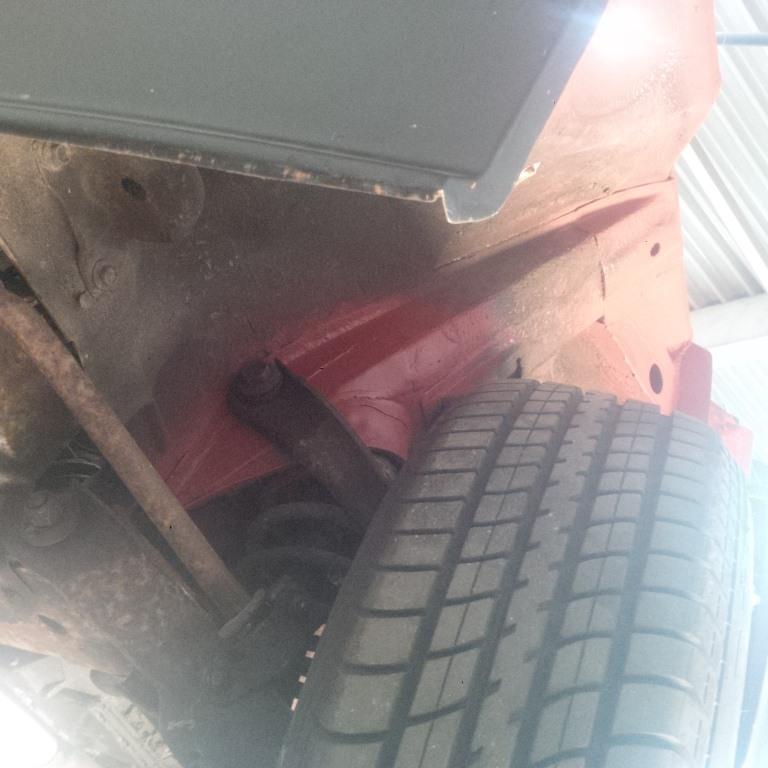
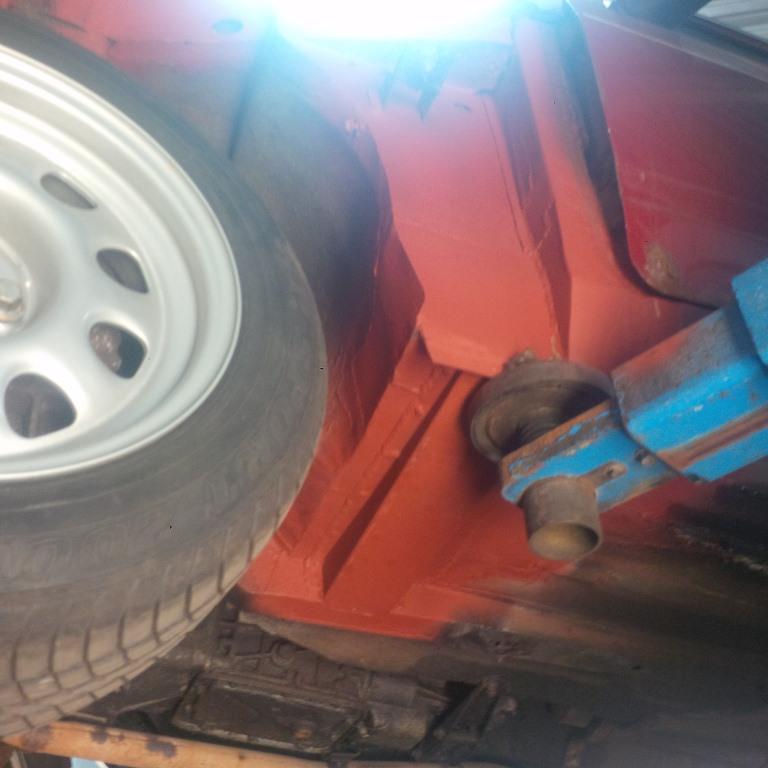
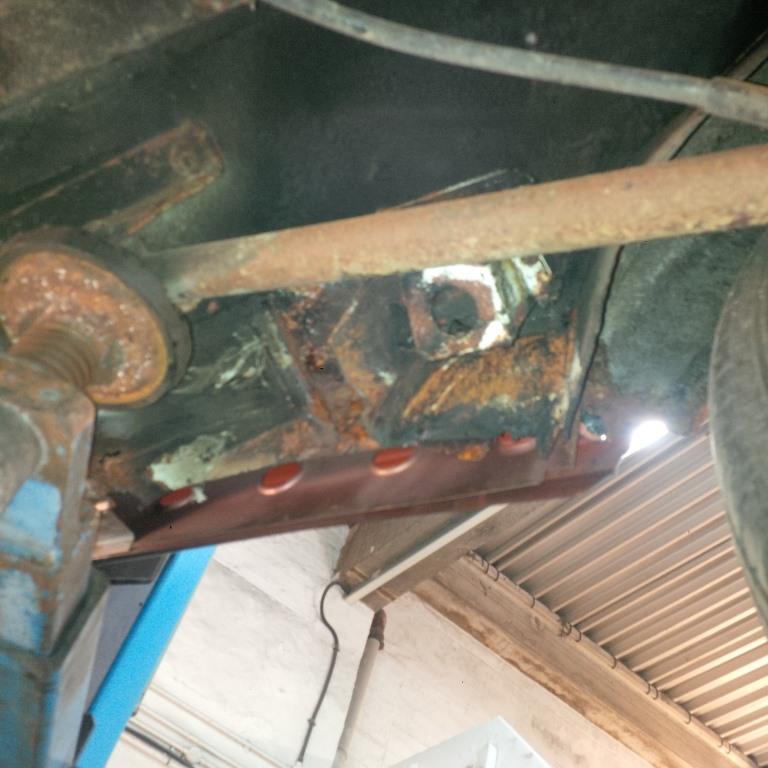
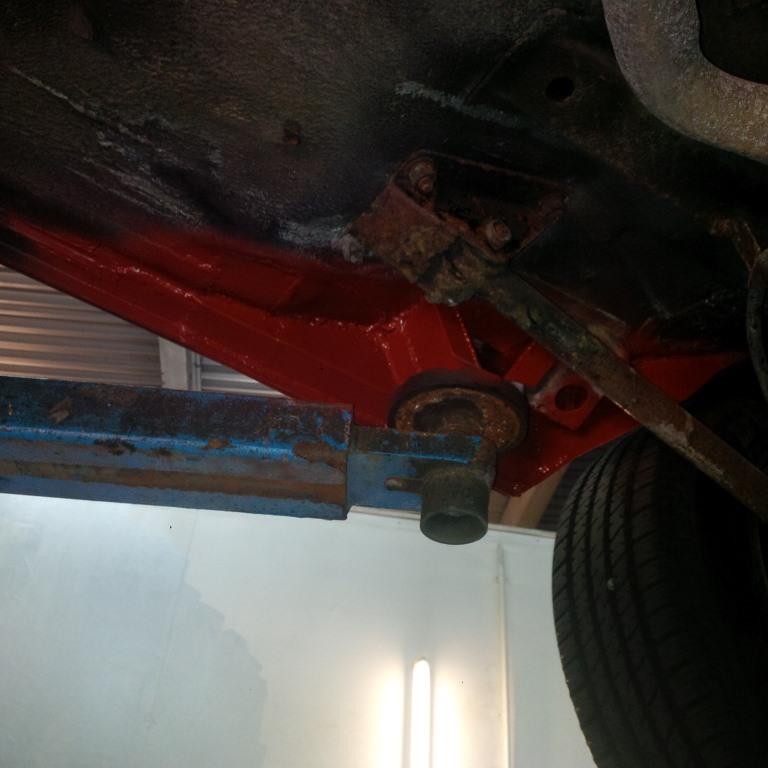
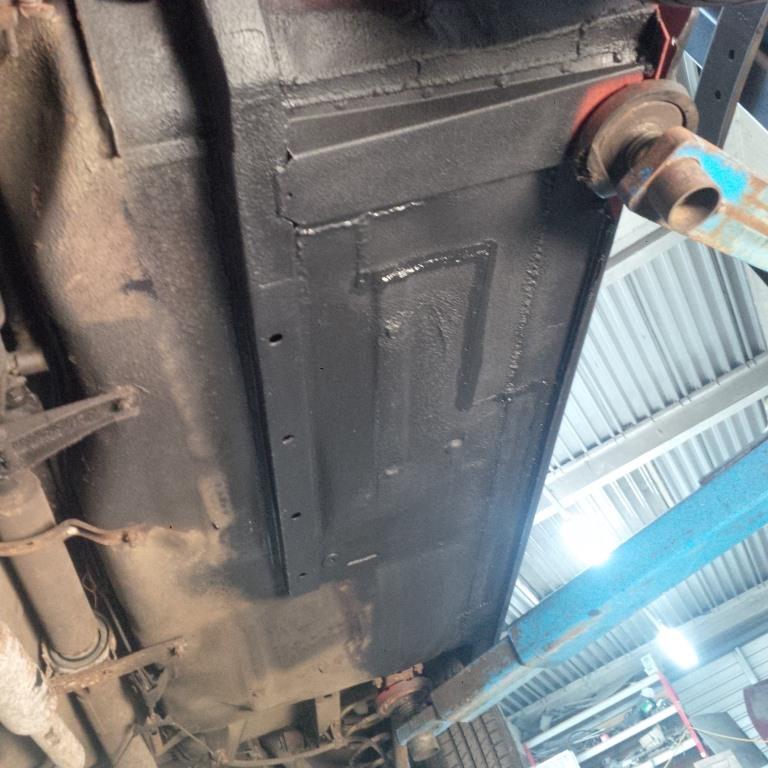
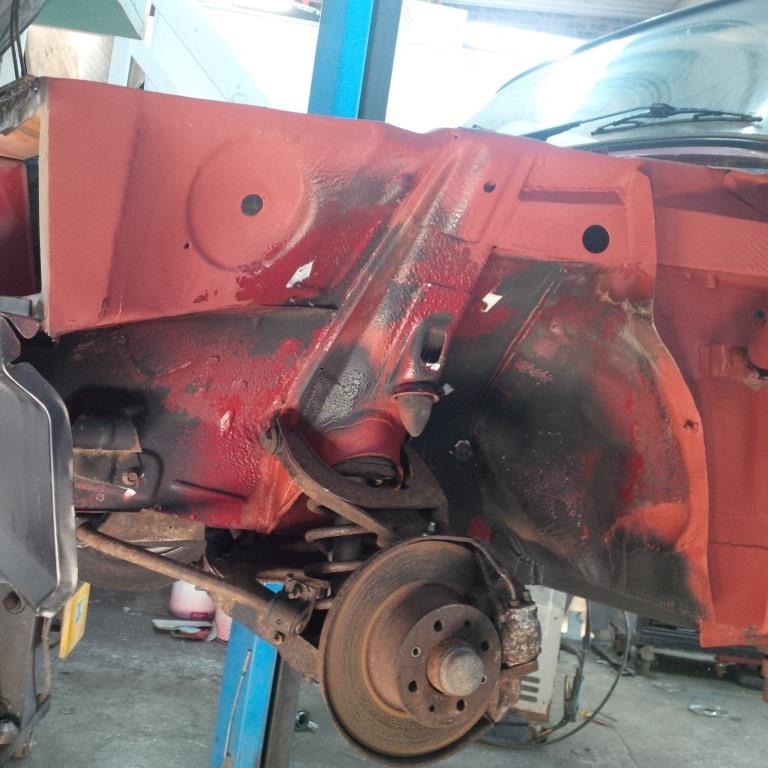
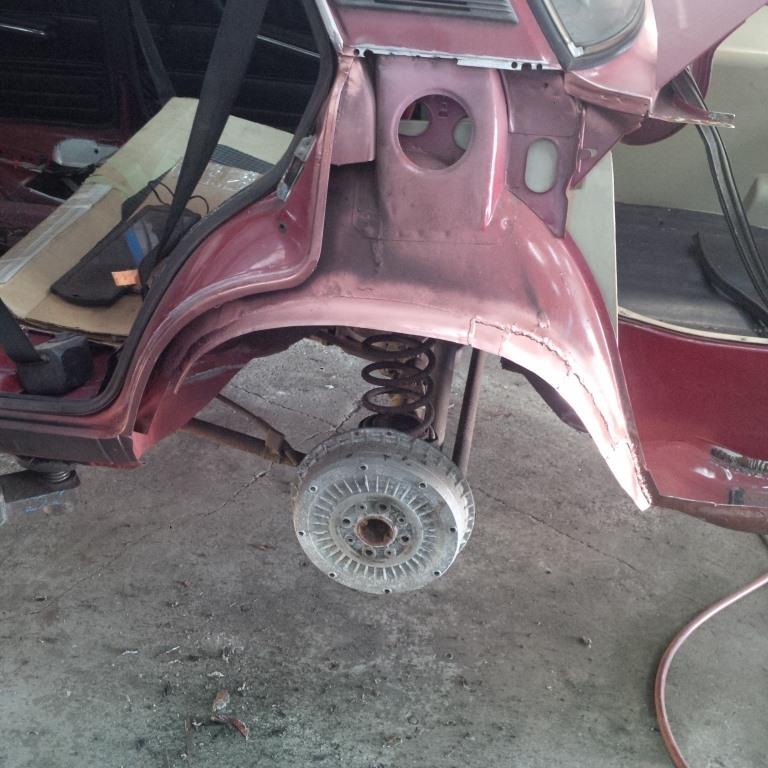
Some poverty spec lowering and more repairs around the front suspension area while everything was stripped. Construction primer again to protect the finished welded areas.

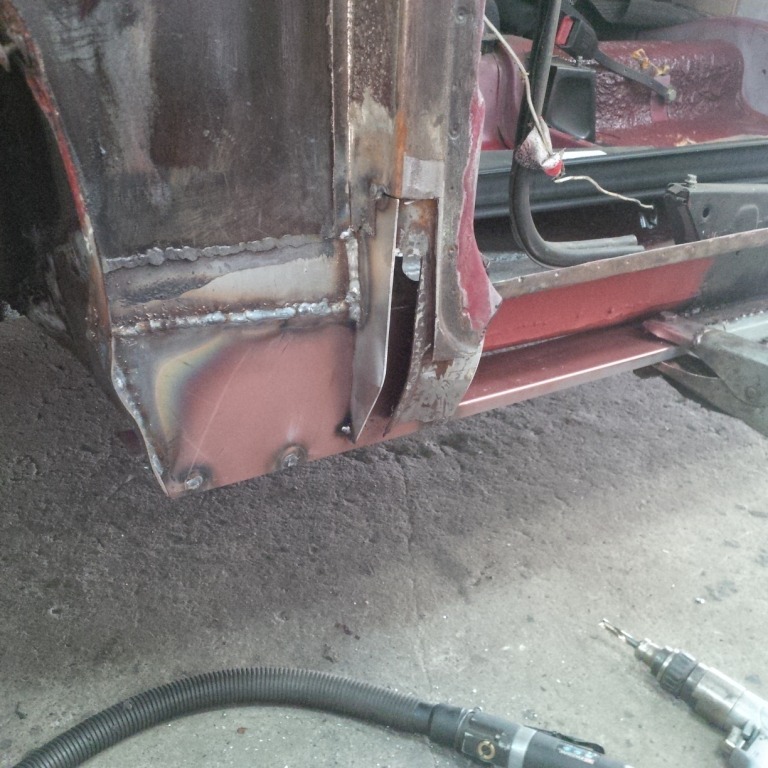
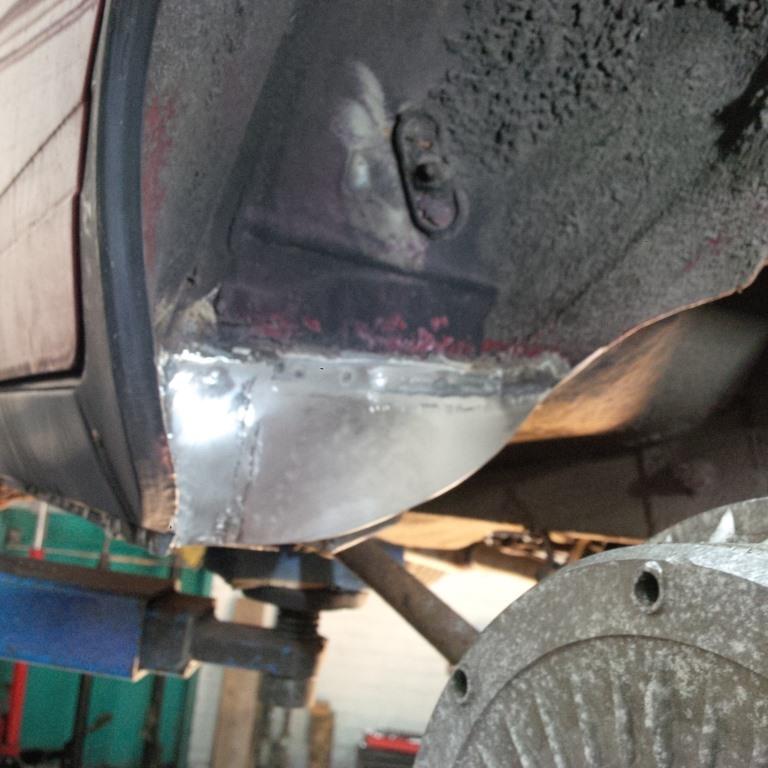
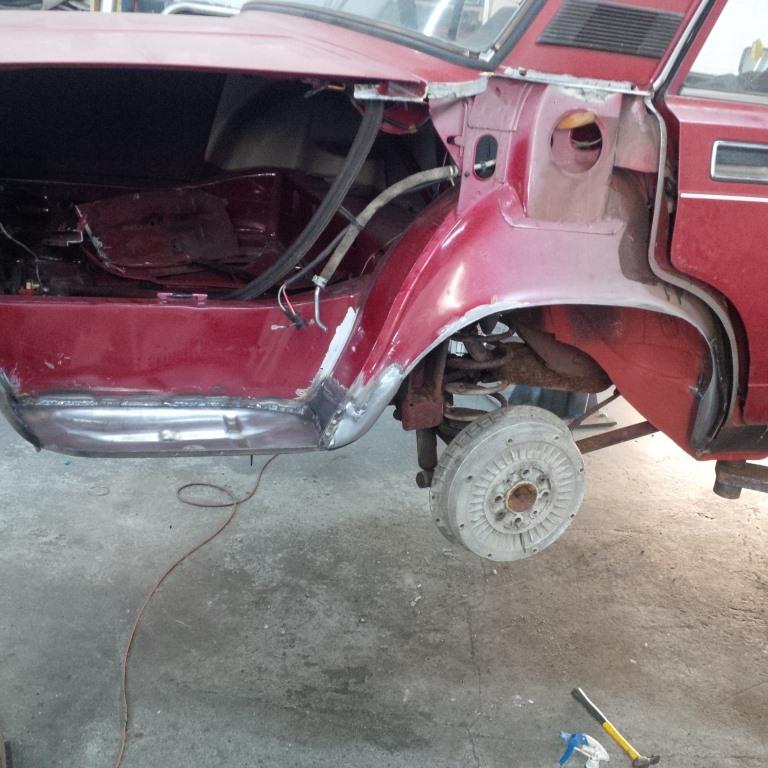
n/s/r quarter on. This was the best fit of all the panels and was pretty much perfect. Starting to get real enthusiasm again as visible progress is now being made! :-)
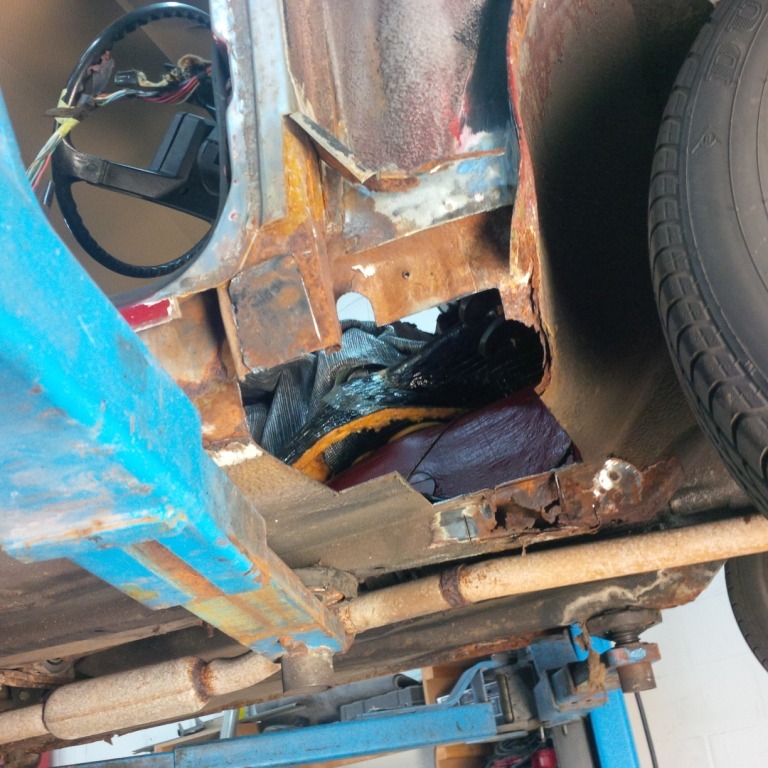
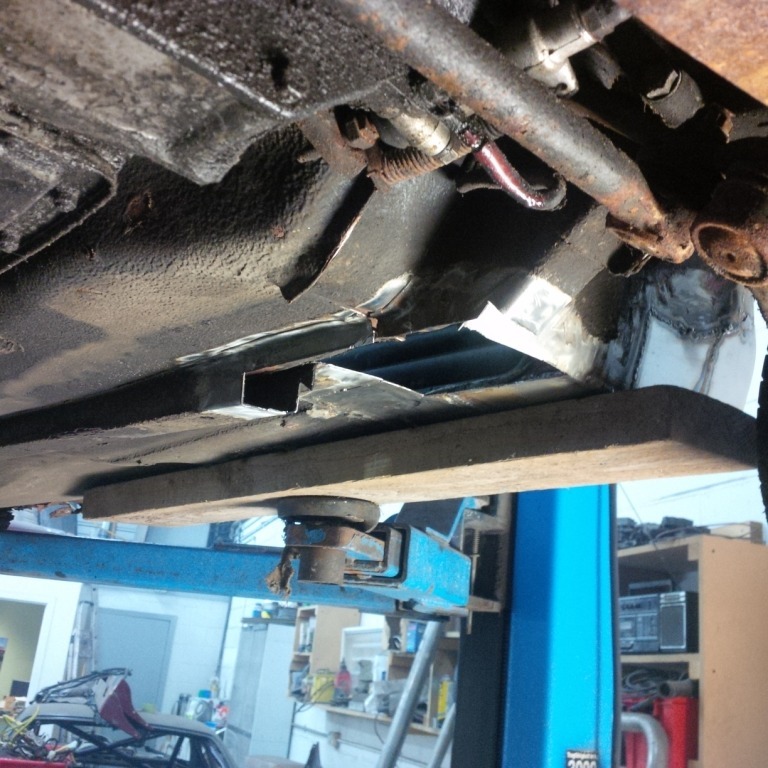
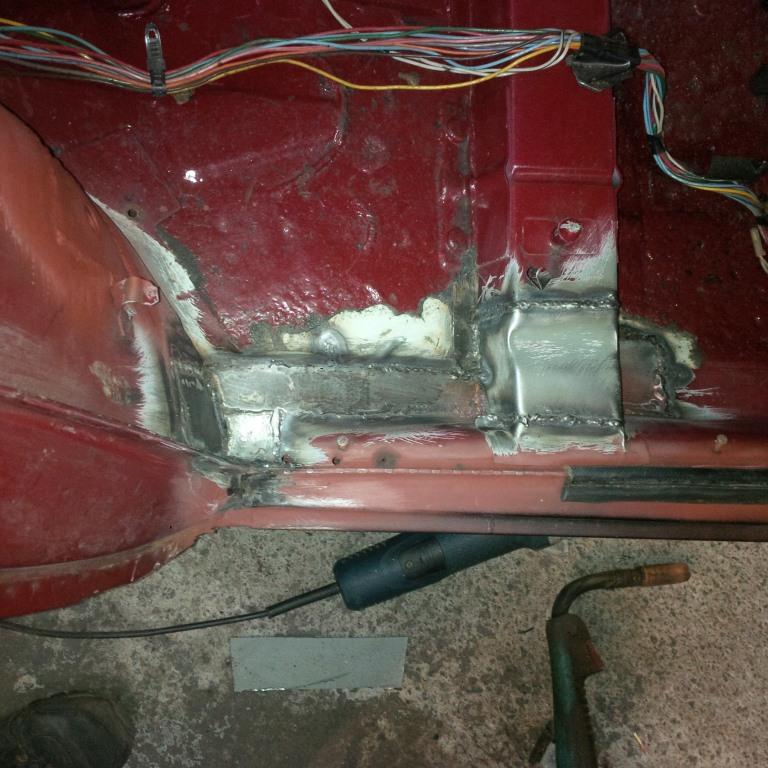
Drivers side rear lifting area/ floor/ sill area being repaired. The last real rot area on the shell. I didn't bother grinding back the welds that wouldn't be seen as was starting to run out of time to get it on the road. The priority as it has been from the start is to make sure all repairs are strong and well protected.

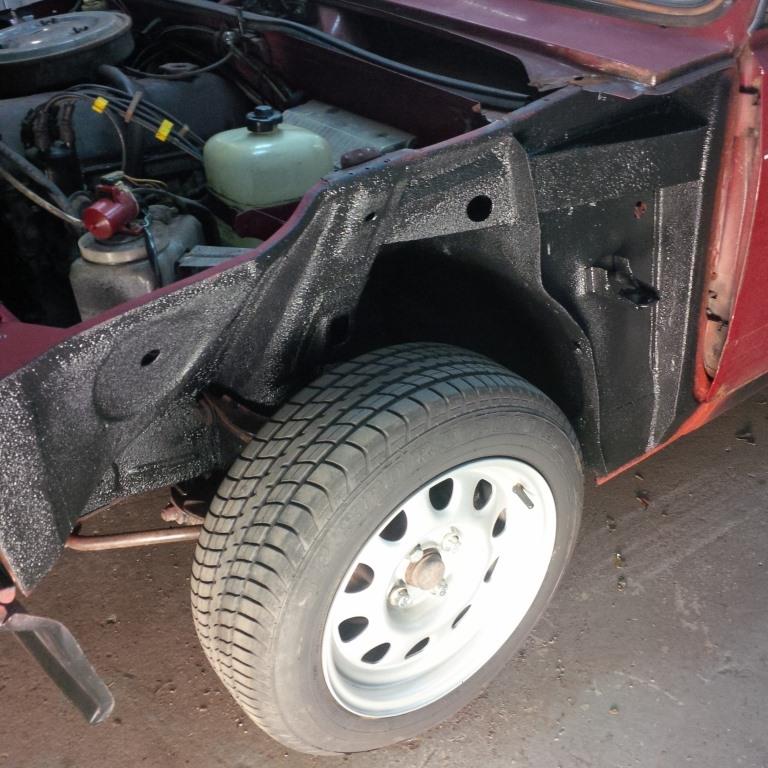
Some seam sealer then spray rubber/ sealer over the repairs to hopefully keep the rust at bay. All cavities sprayed full of cavity wax till it was running out the bottom of the car. Will put some black waxcoat over the whole underside when it's complete just to make extra sure I've not missed anything. Then welded up un needed holes on the front wings.
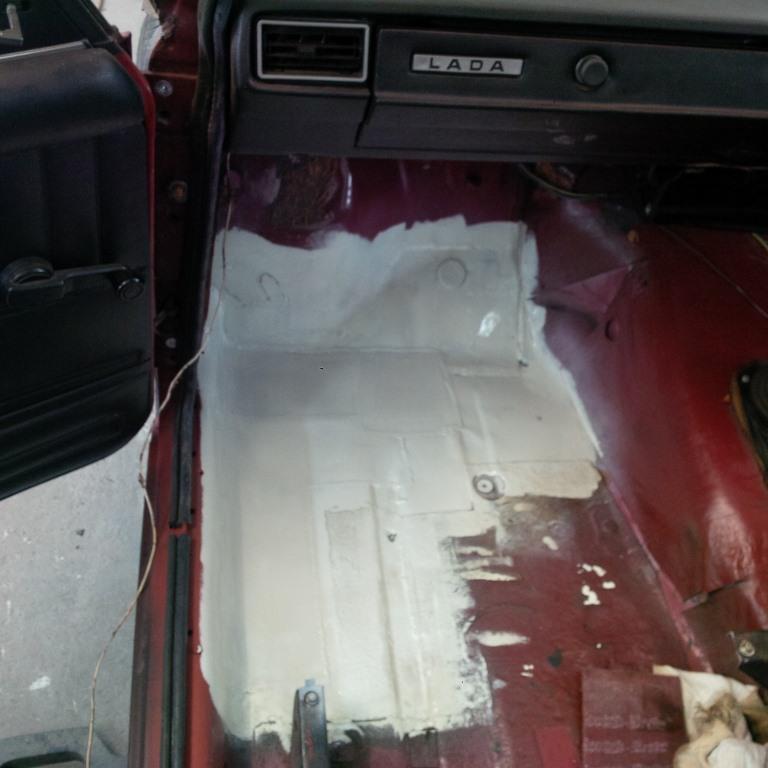
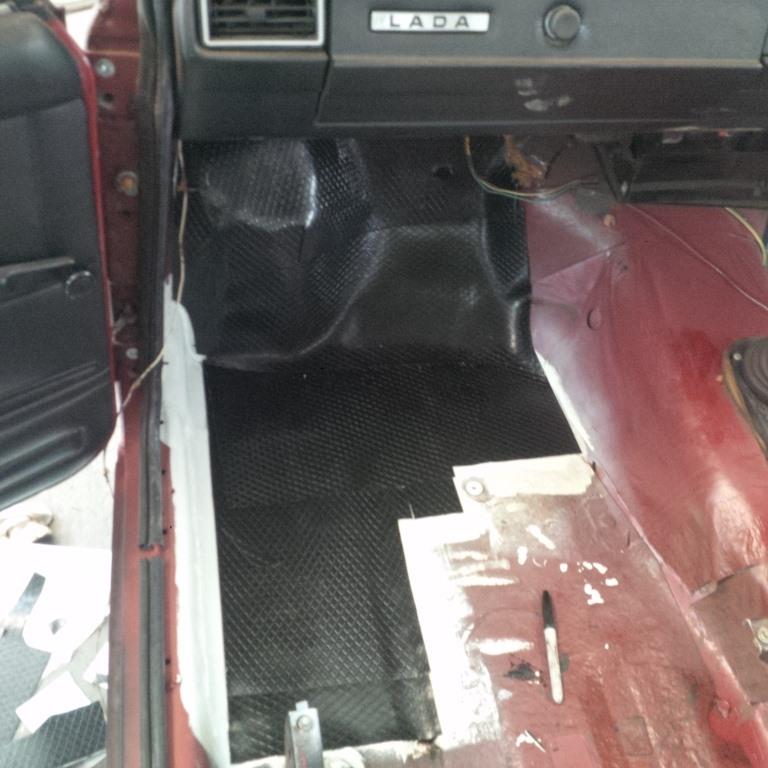
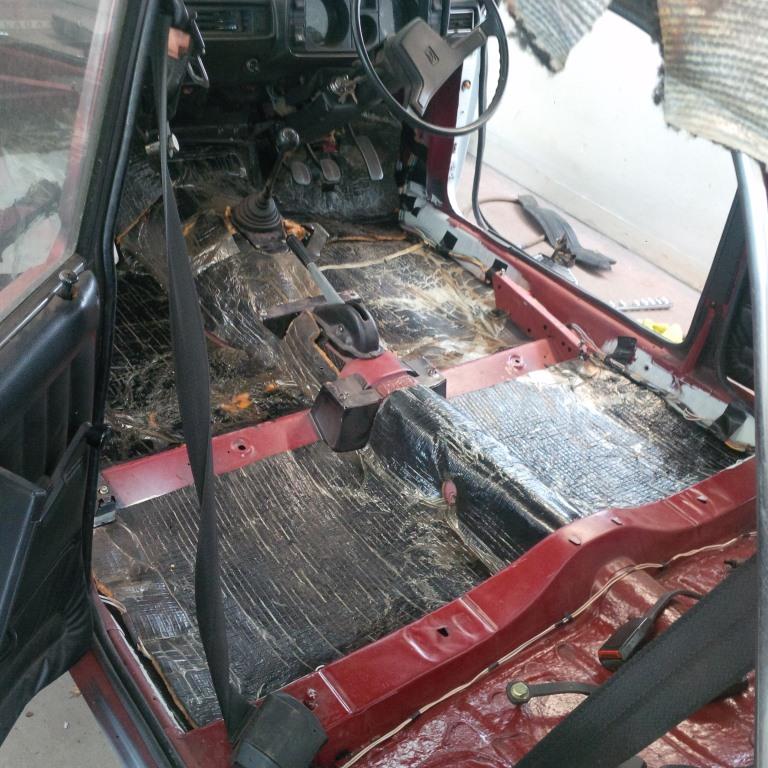
Etch primed then painted the inside floorpan repairs with 2K gloss point to make sure they're sealed before replacing sound deadening on the areas where it was removed. Found another slightly dodgy area around drivers seat mount so had to get welder back out.
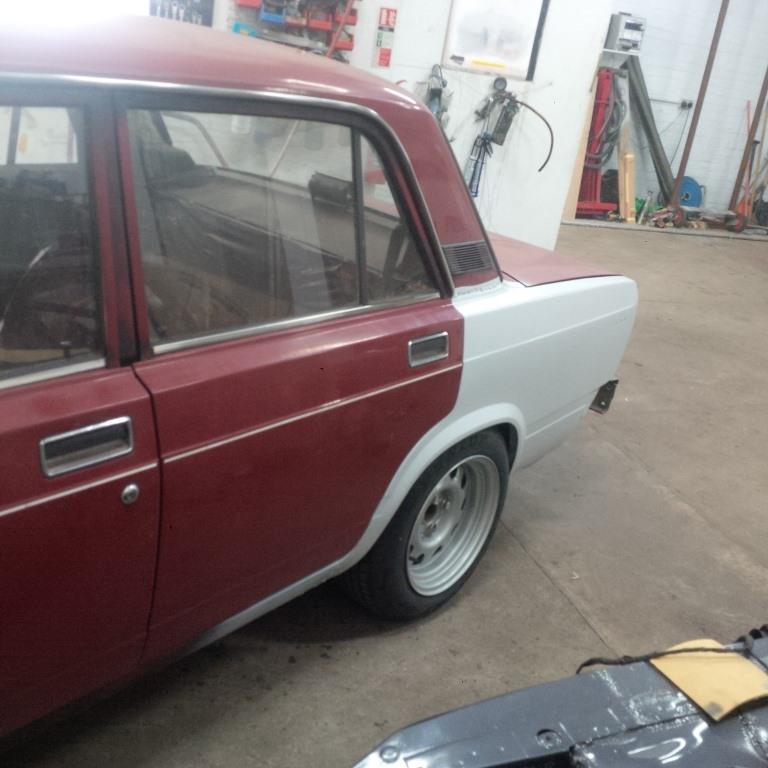
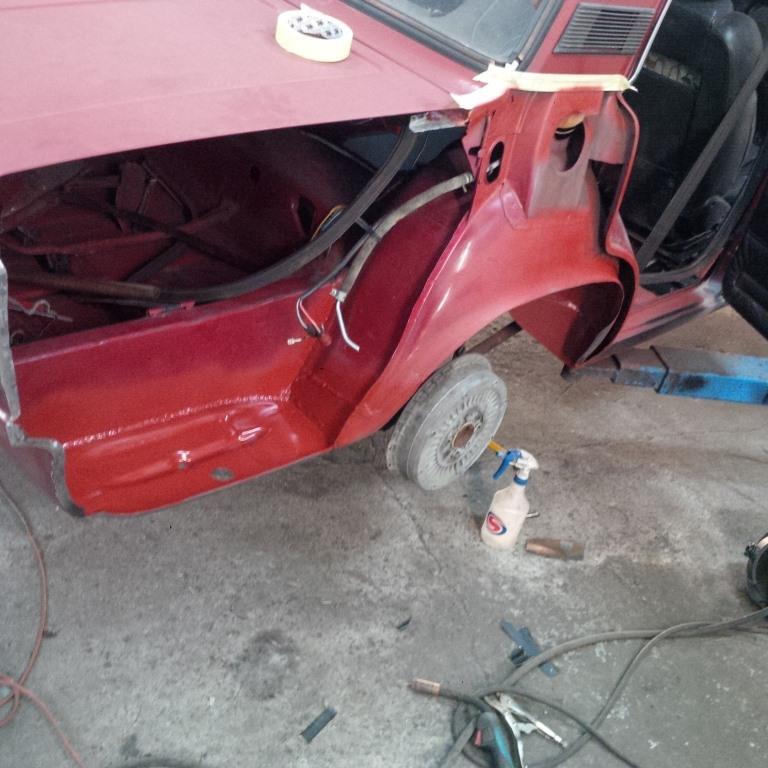
Final repairs to inner rear arch section before quarter is welded on permanently. Wings trial fitted and quarter rubbed back to bare metal ready for epoxy sealer.
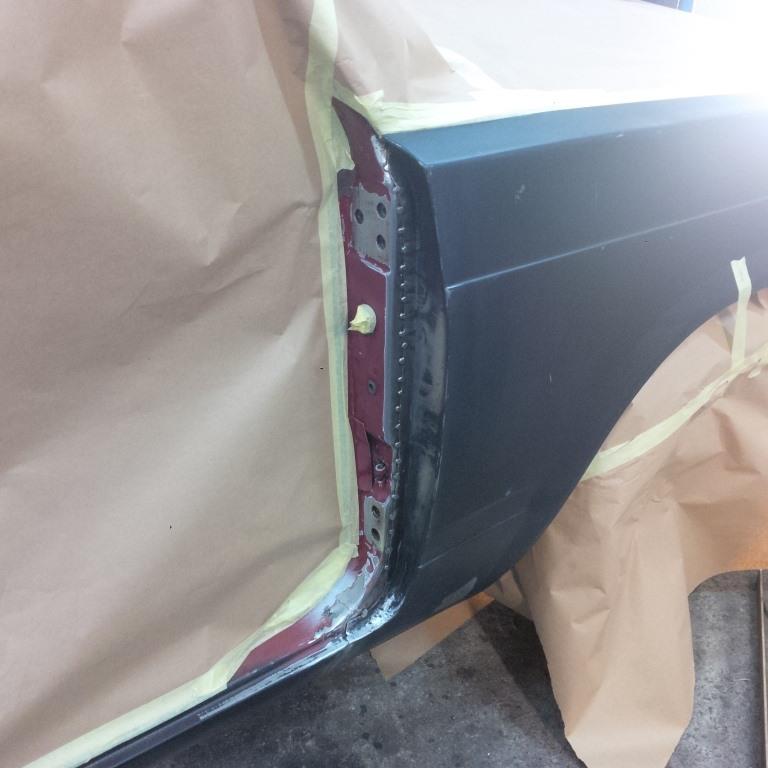
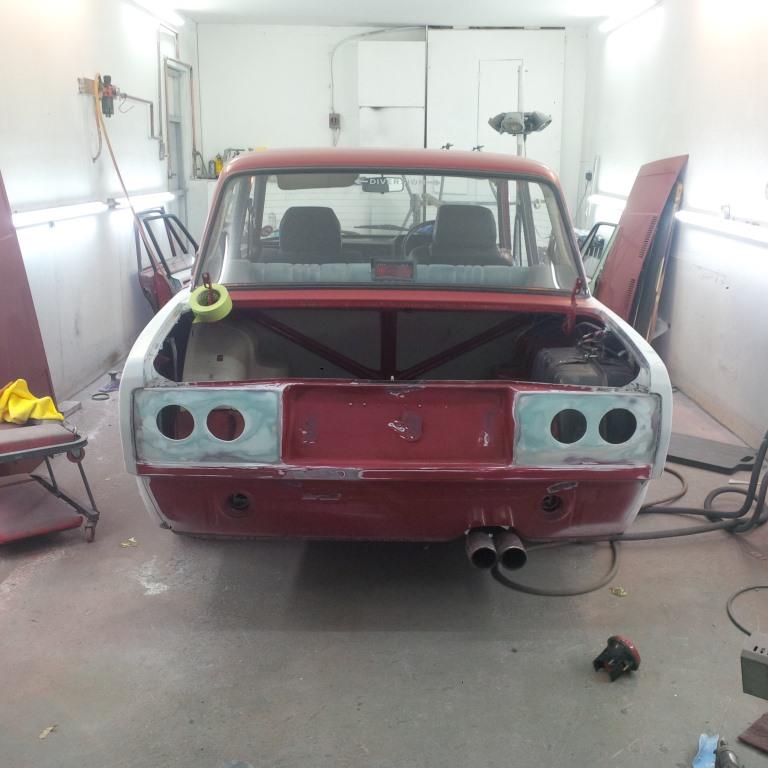
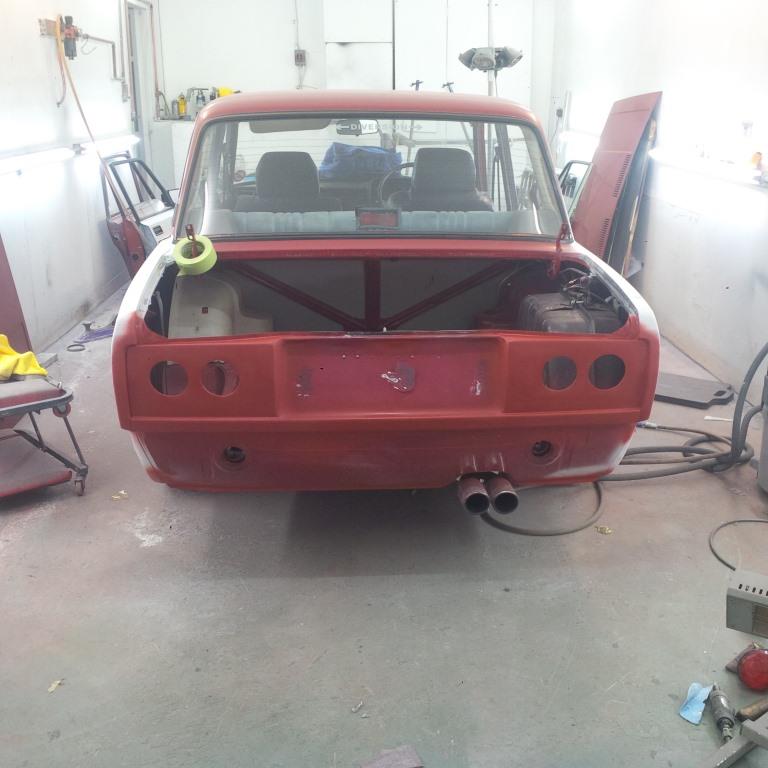
Rear quarter sealed, front wing welded on and seamsealed.
Drivers side rear quarter area tackled next.

Gravitex coating followed by cavity wax and black wax coatings to seal it against future rust and deaden the panel a bit. Original sound deadening stuff refitted.
Some rough filler work done before sealing everything with epoxy primer.
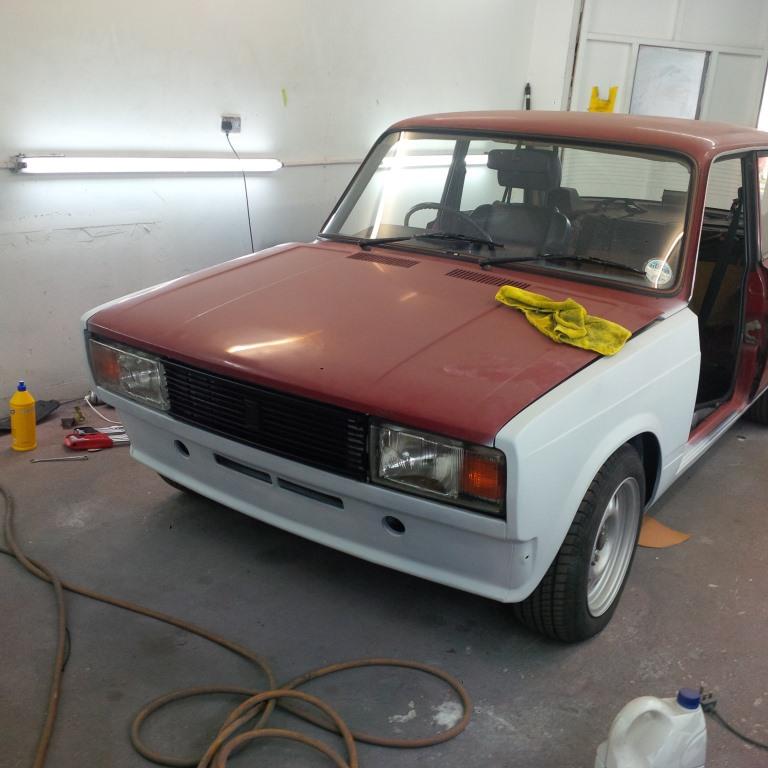
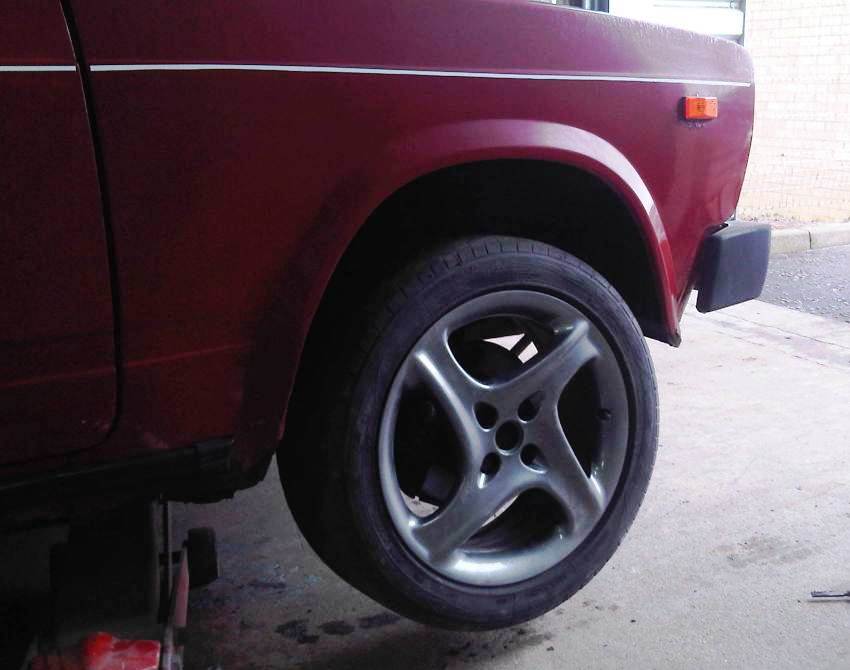
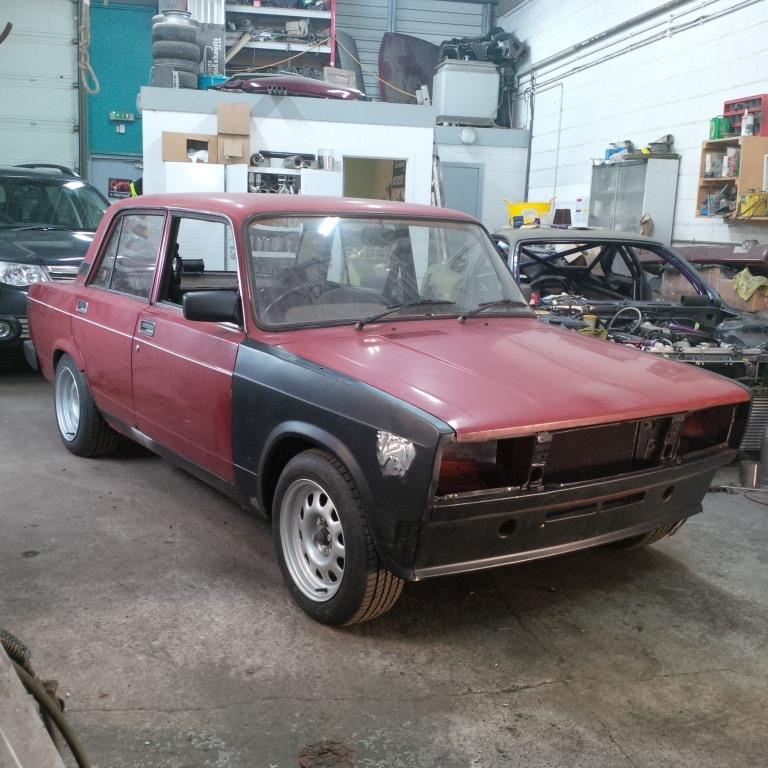
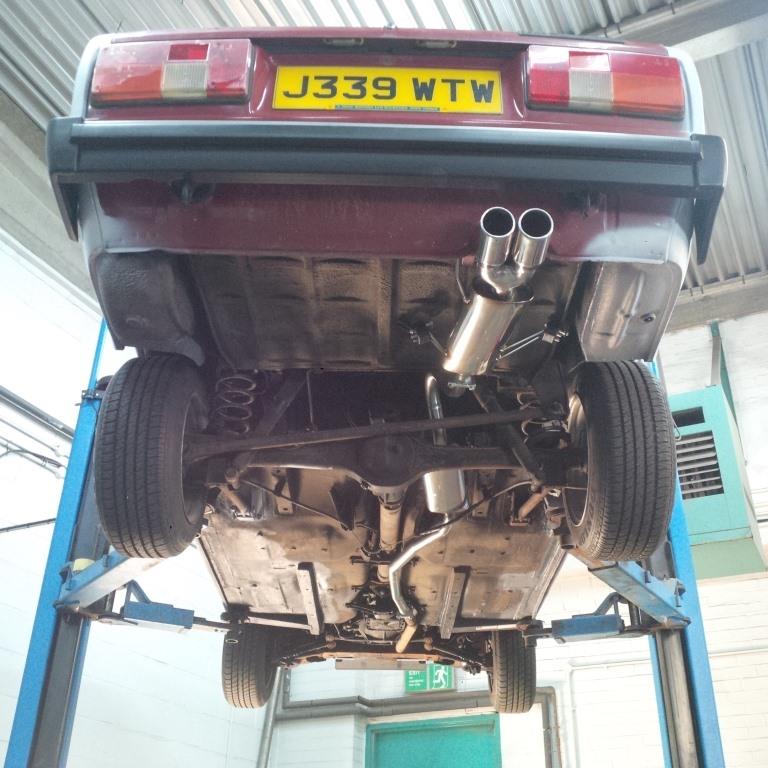
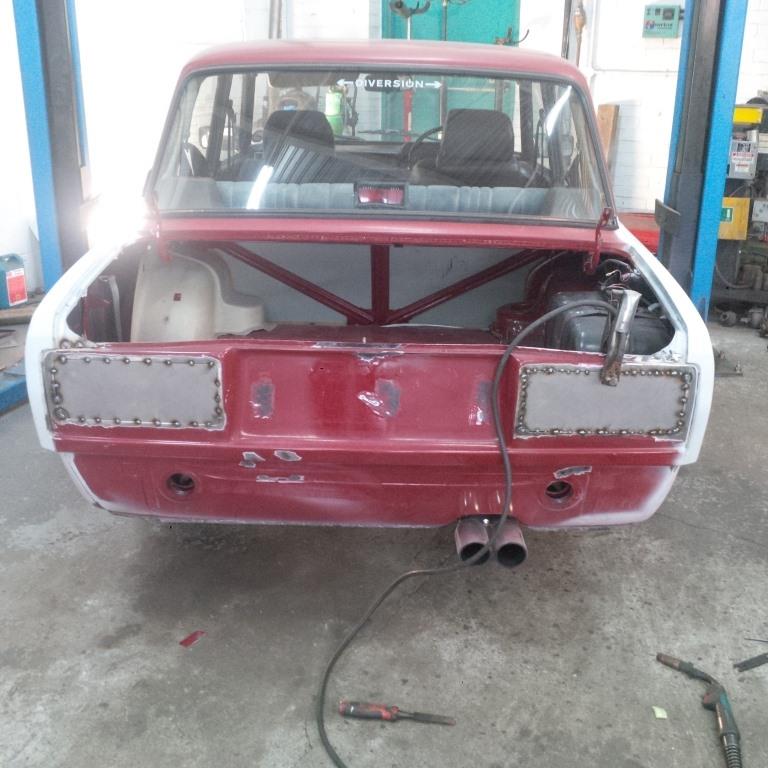
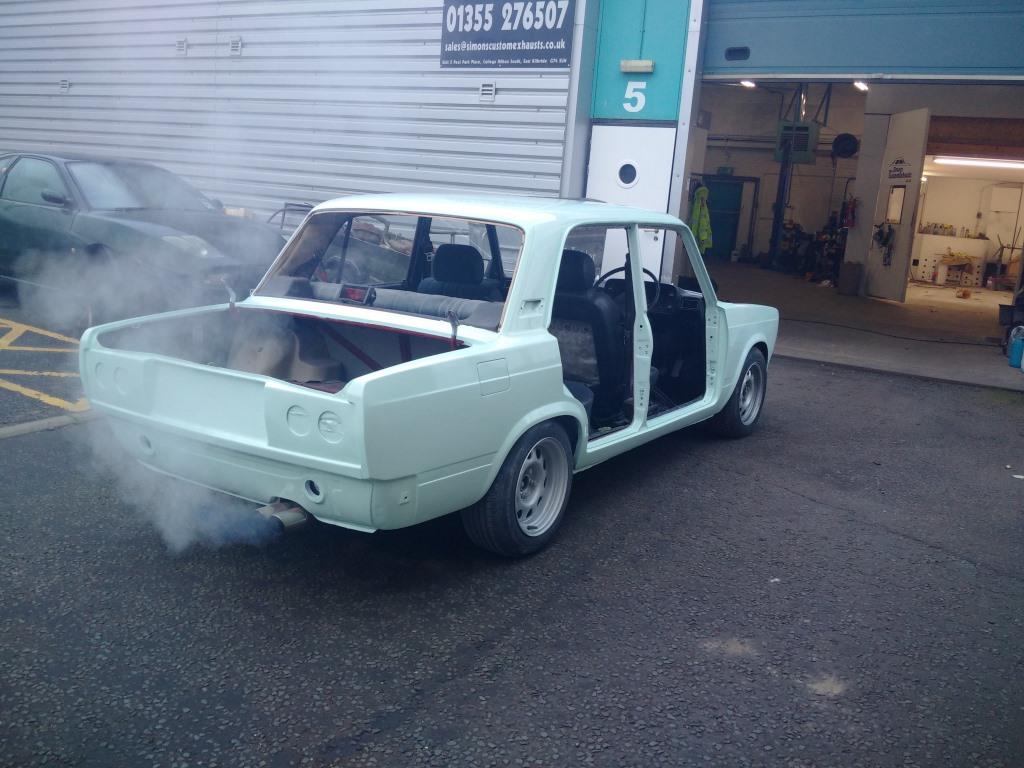
Number plate bracket, exhaust, front discs and pads, full engine service and it was MOT time. It passed!
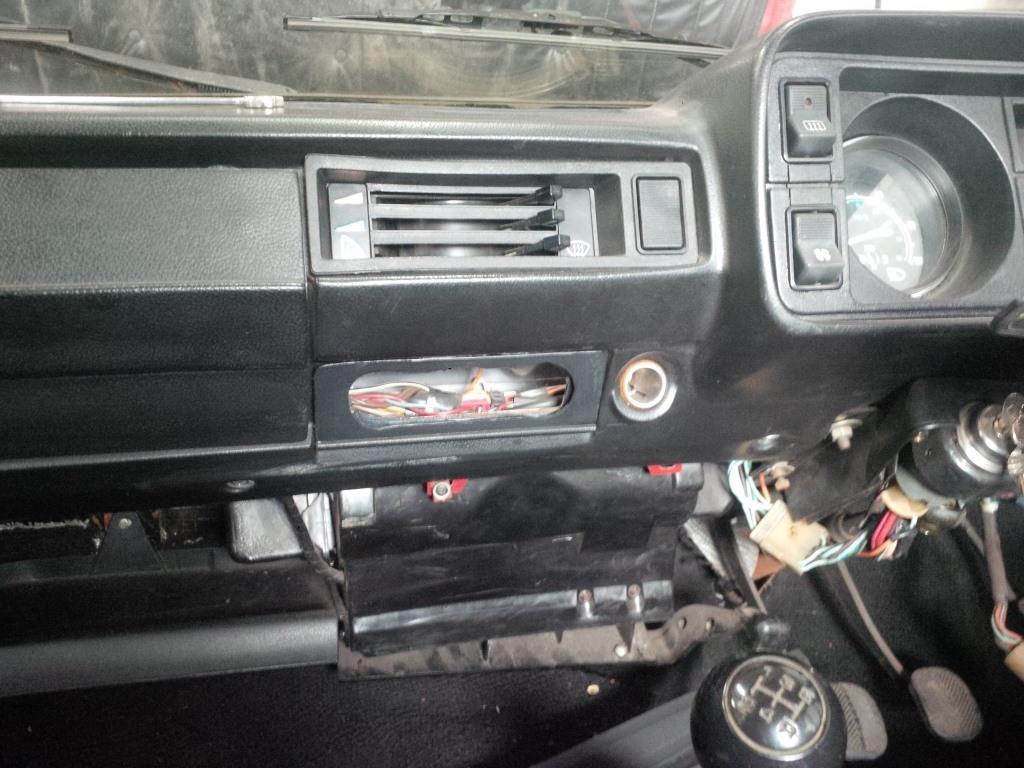
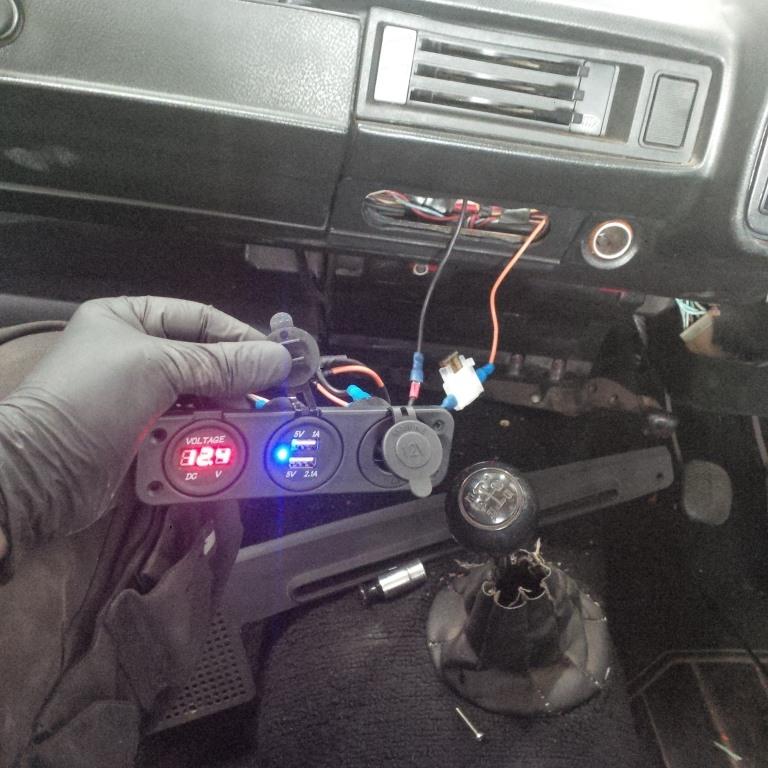
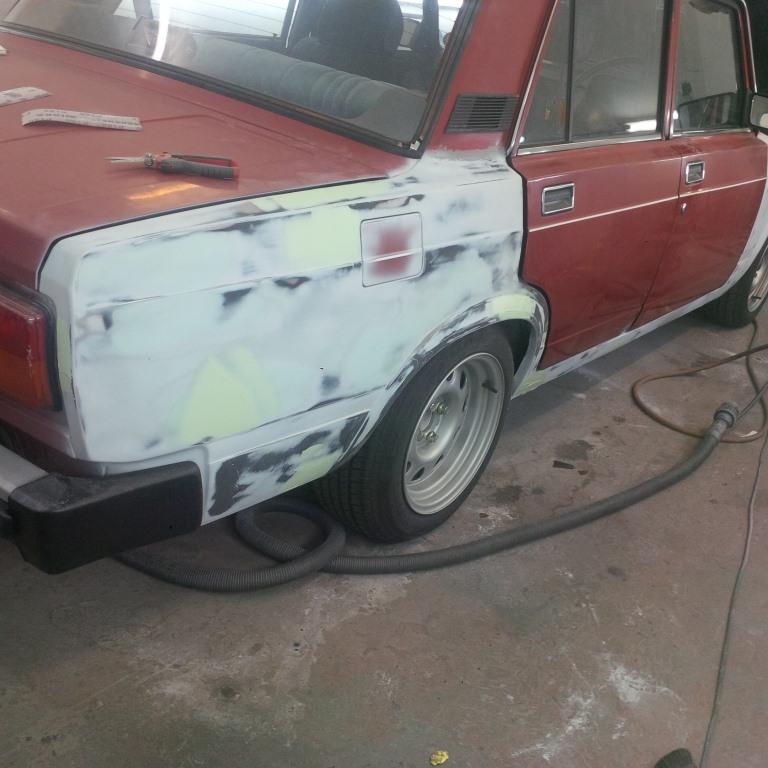
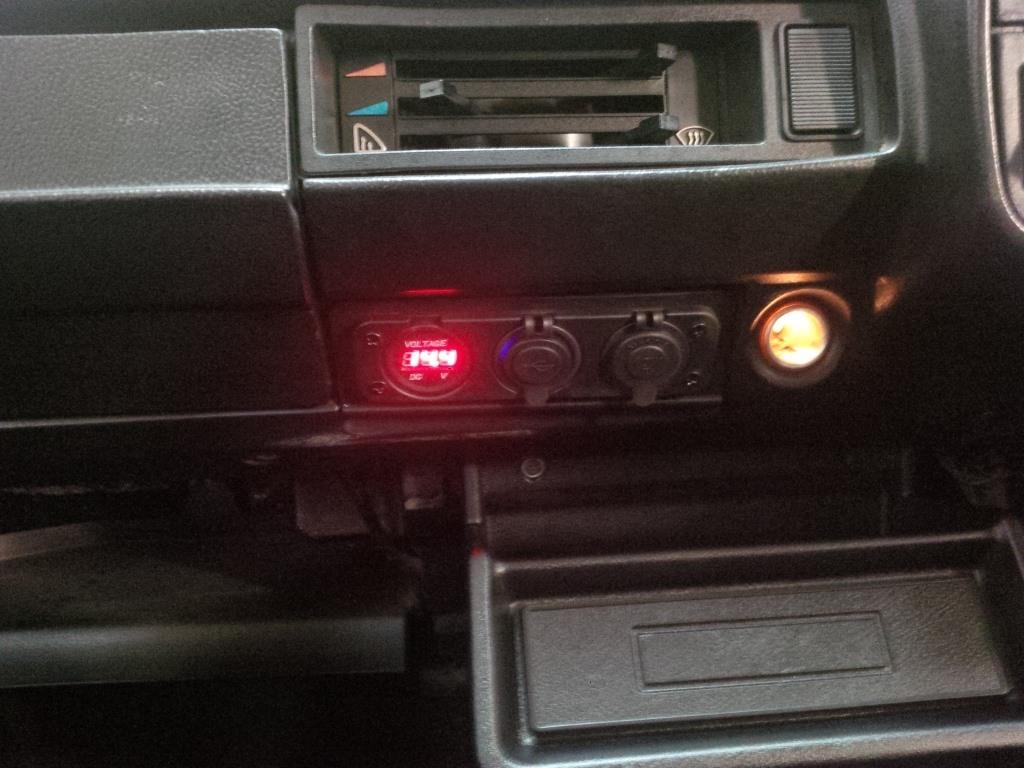
Fitted a voltmeter and did some more filler work the night before Retro Rides before sealing the panels again. Last minute panic as alternator died so had to get one on an am delivery to be ready to leave at noon.
Daughter in boot while waiting for alternator, plenty of volts again once fitted! big relief.
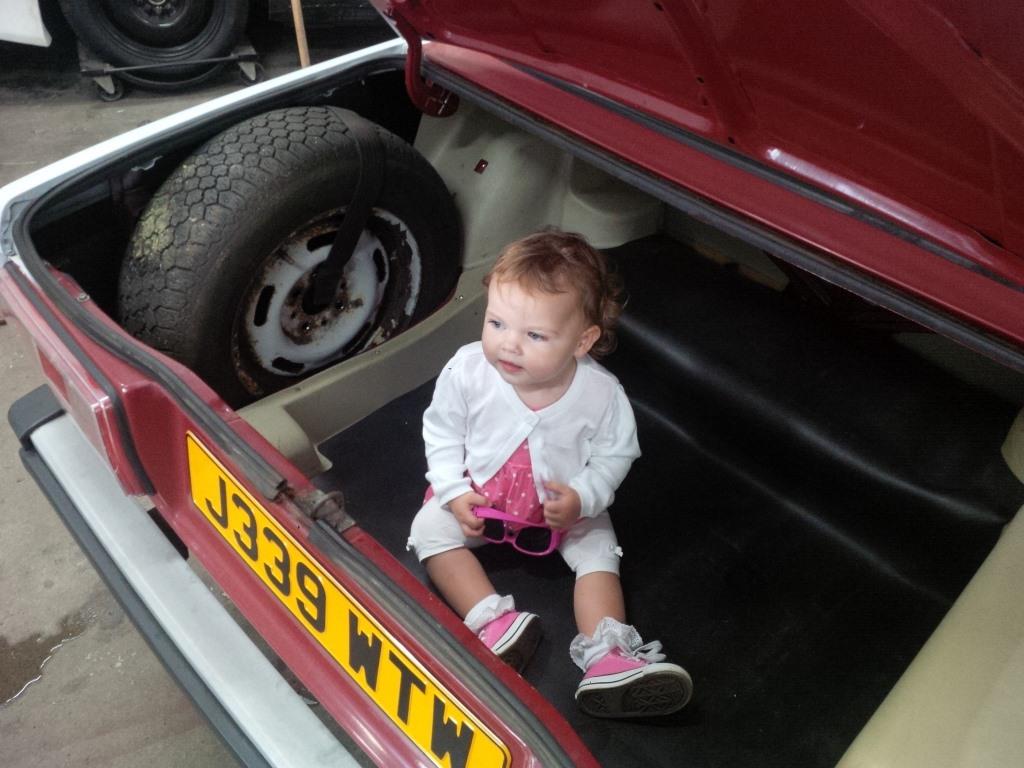
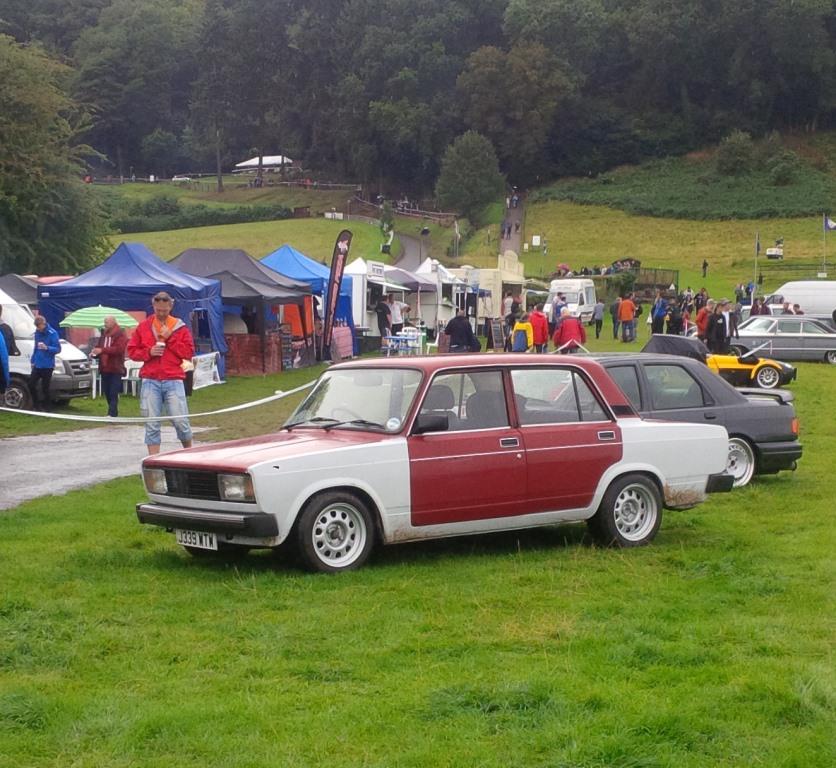
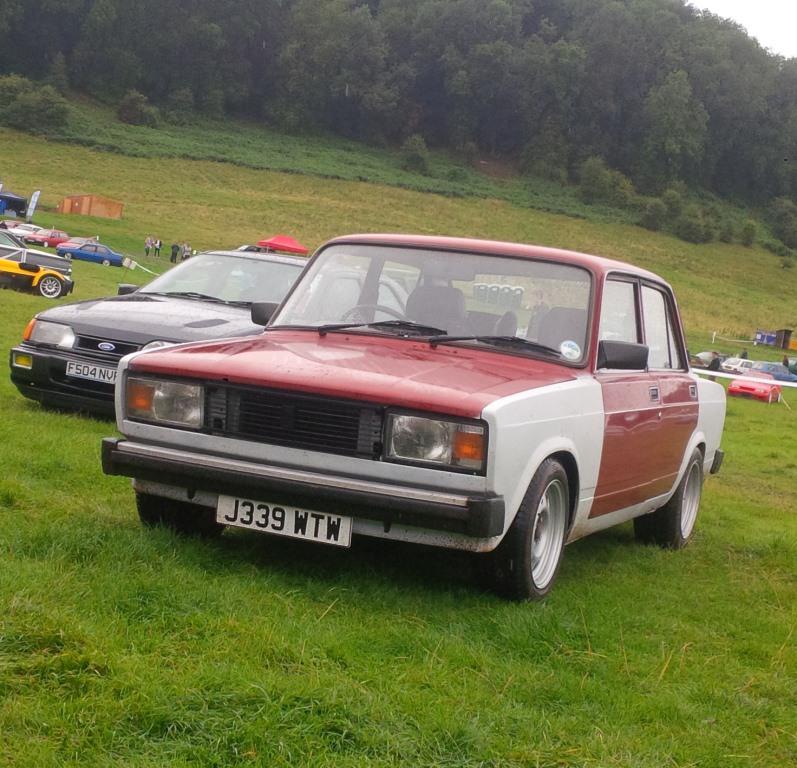
Proof that we made the it there and back, a 700 mile round trip. Impressive for its first outing. :-)
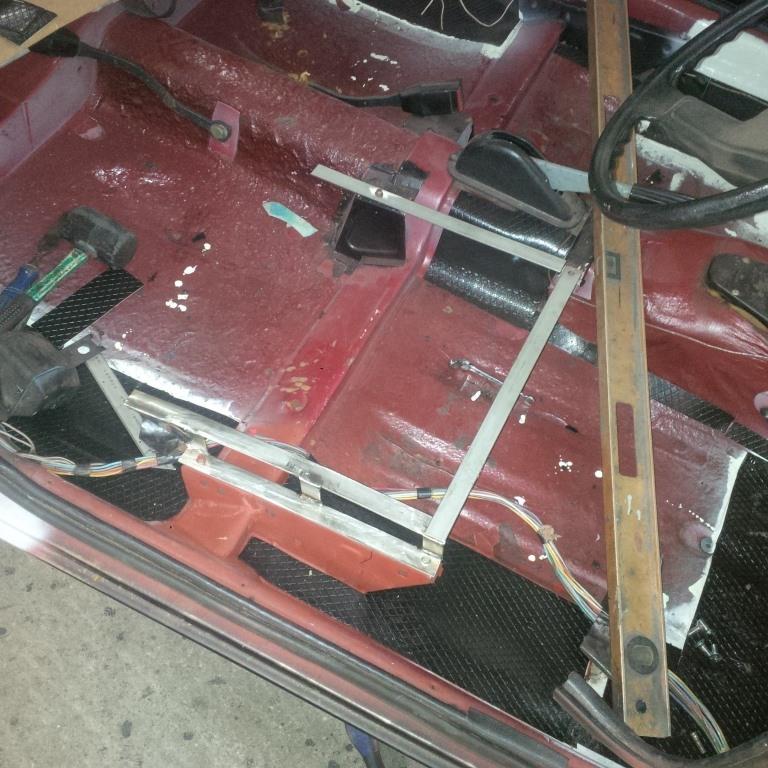
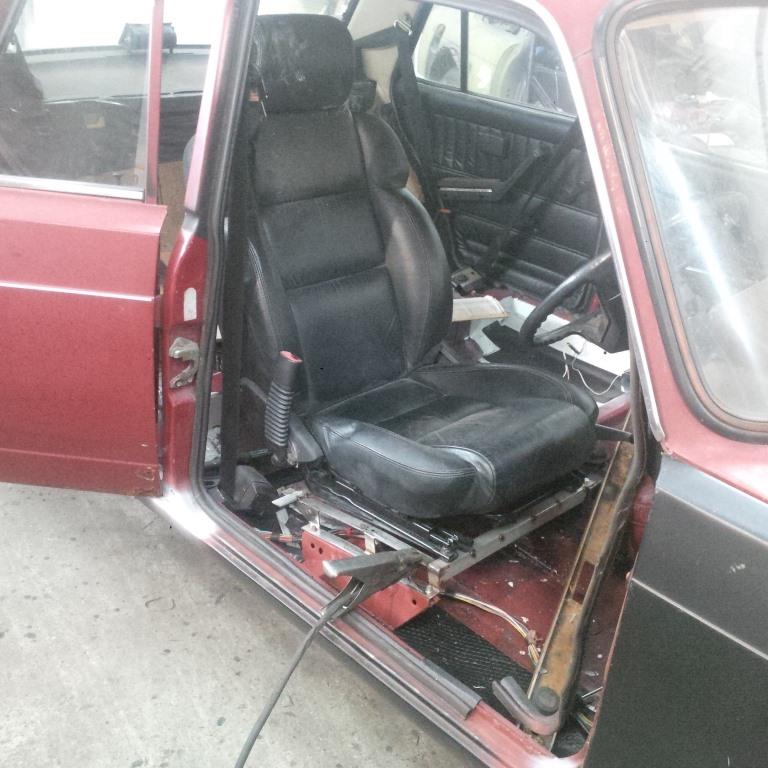
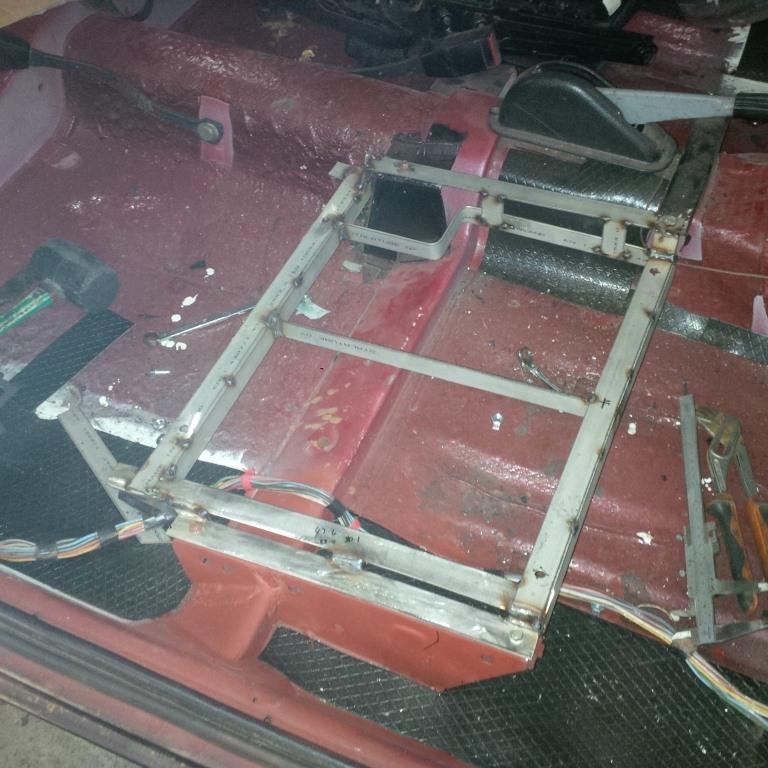
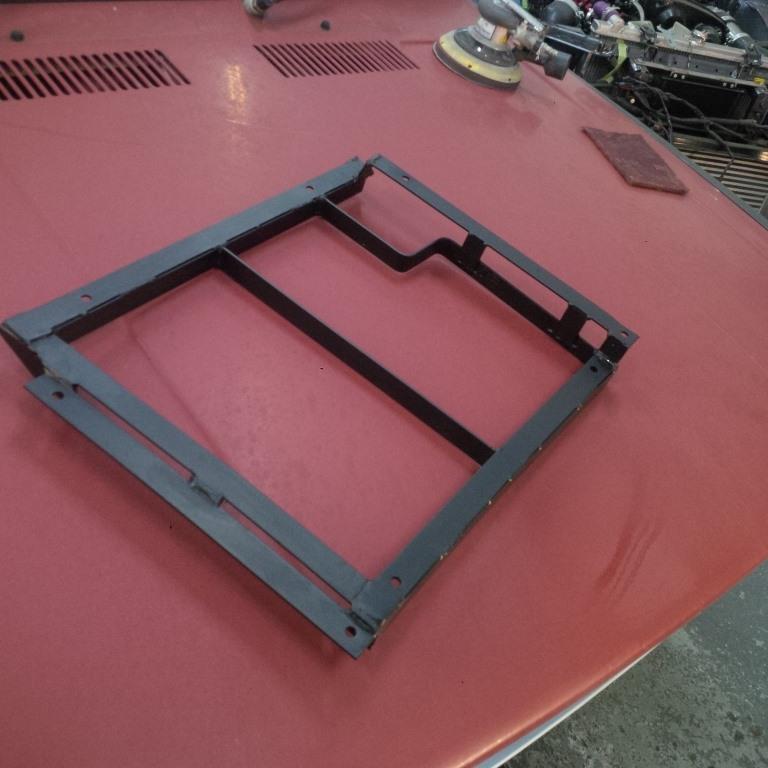
Pictures of fitting the Fiat Coupe drivers seat. Not sure where they went when I did the last update. After the first attempt making the seat far too high some adjustments with the grinder actually have it feeling like that's what is supposed to be fitted to the car. The difference it makes having a seat solidly attached is massive. Even reversing the car is so much easier when you can lean back! Will need to get another one for the passenger side eventually but it's surprisingly comfy and with the standard seats being completely black it's not the first thing you notice being wrong with the car :lol:
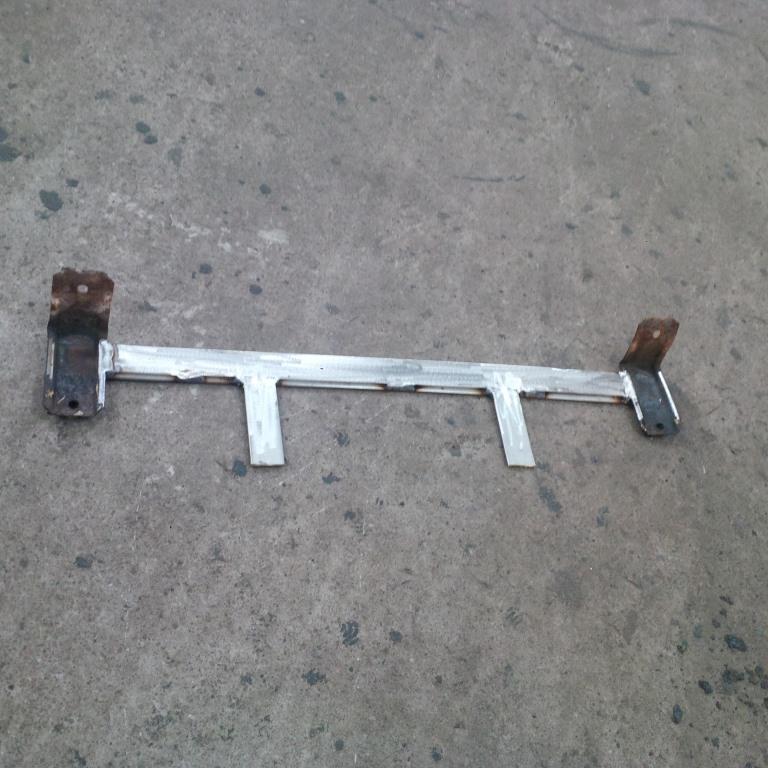
First small job after the run down to retro rides was to cut and weld the gearstick so I wasn't hitting the passenger's legs every time I wanted first or second gear. Gearstick seemed to be in LHD position. Is this normal?
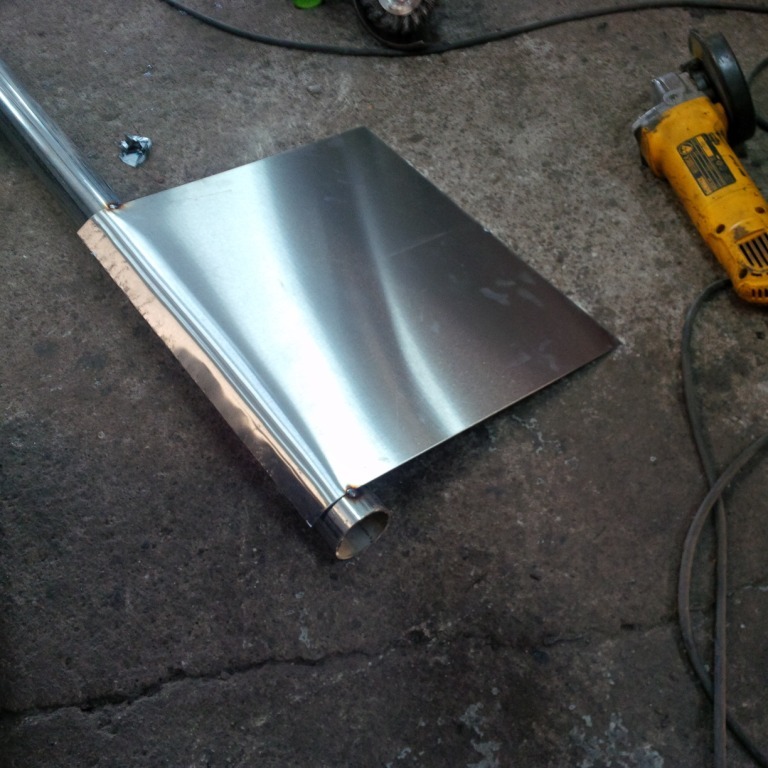
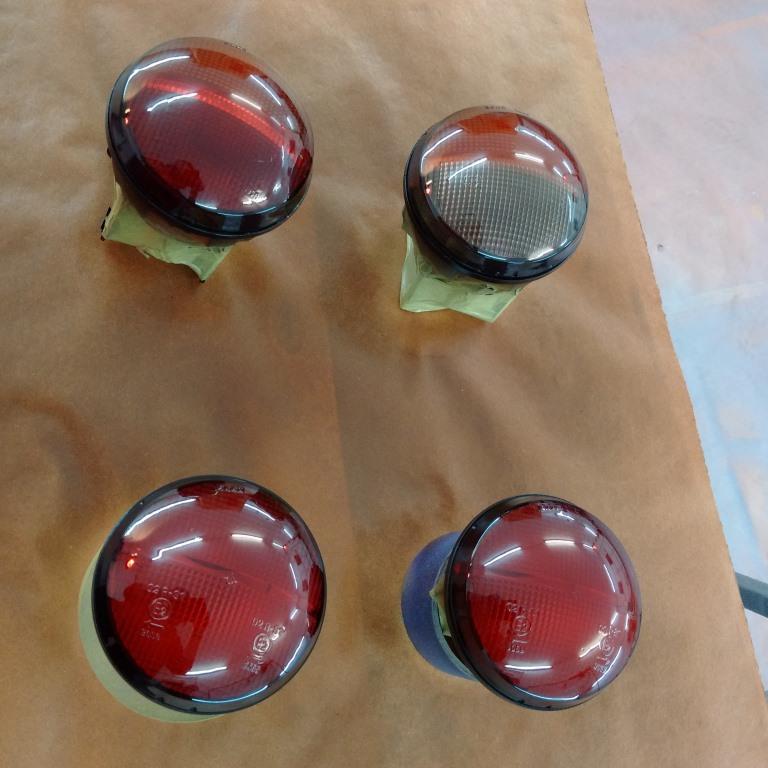
A quick cardboard template to see if Fiat Coupe rear lights would suit the car as I really don't like the standard ones. Looks worth a try to me!
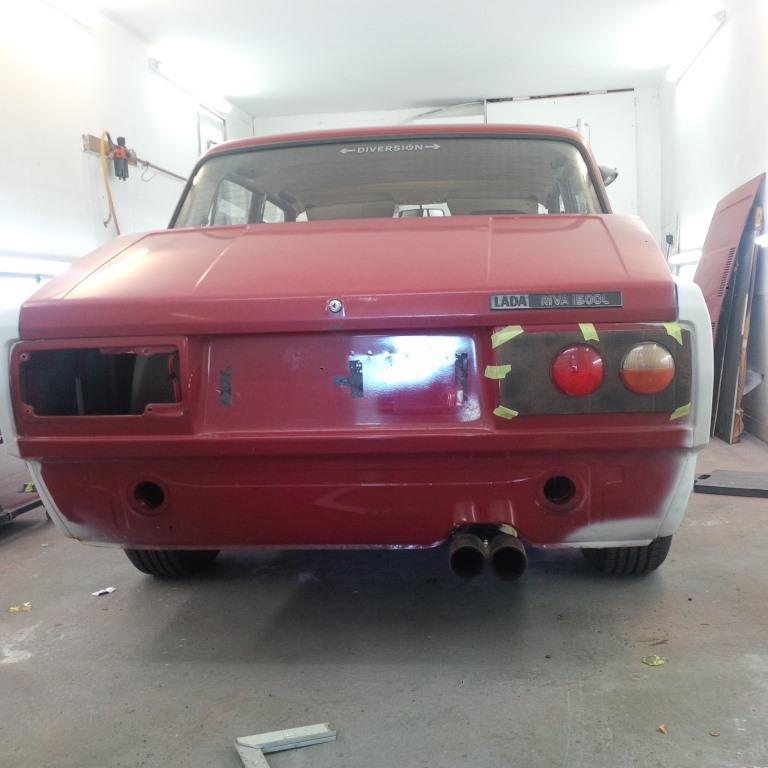
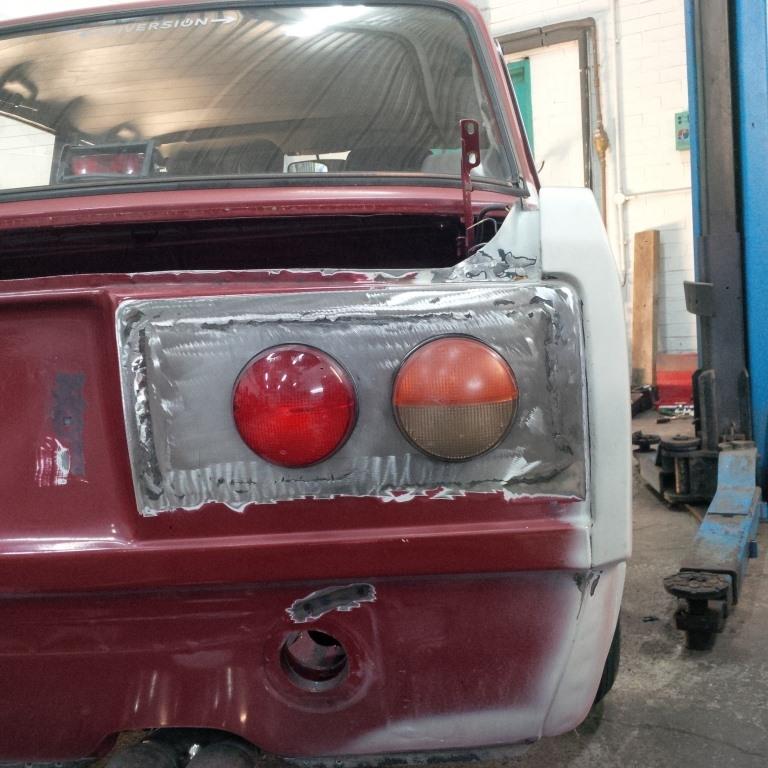
Some angle grindering at a Fiat Coupe donated rear lights and some cut down housings to hold them in.
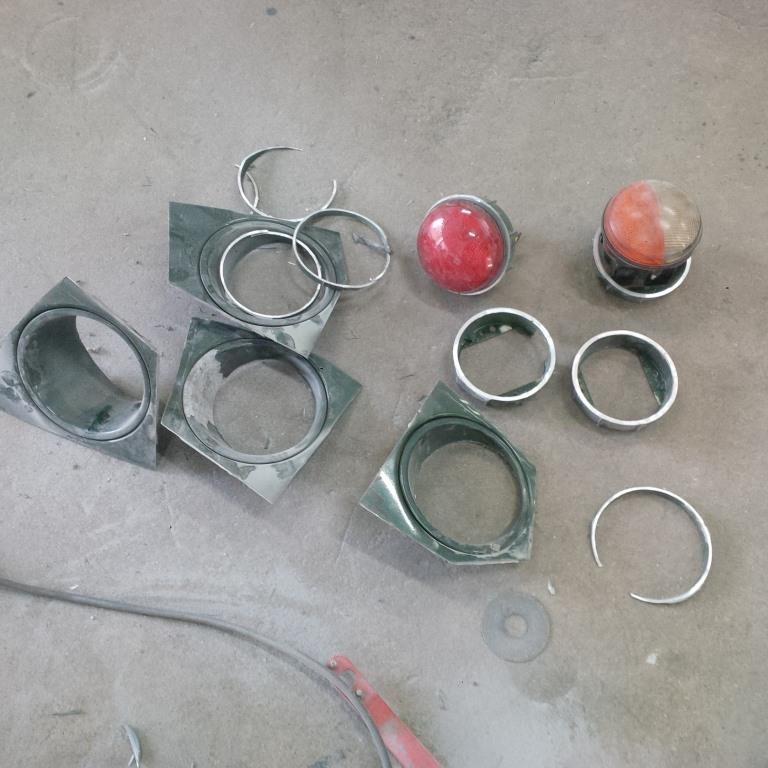
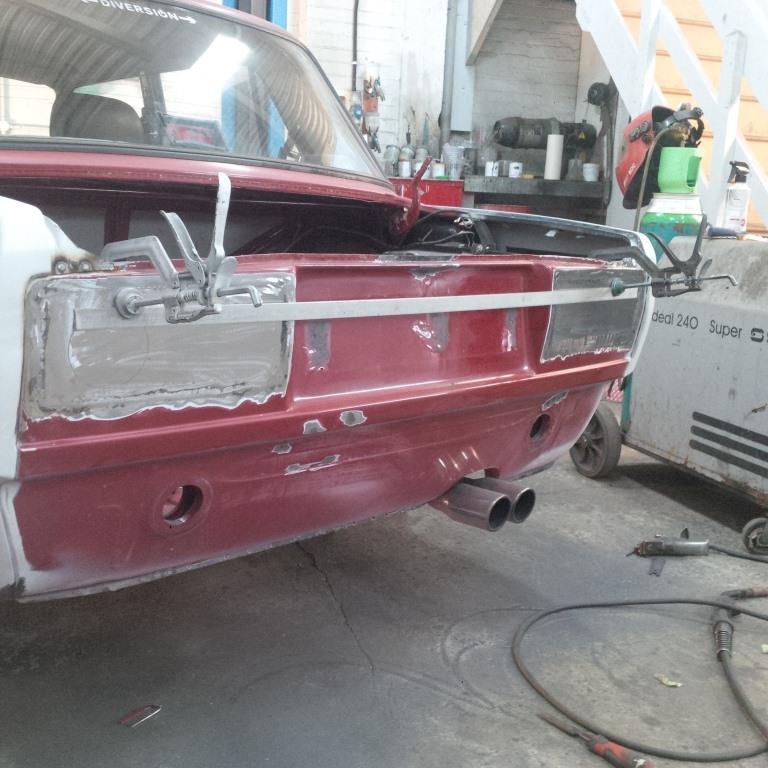
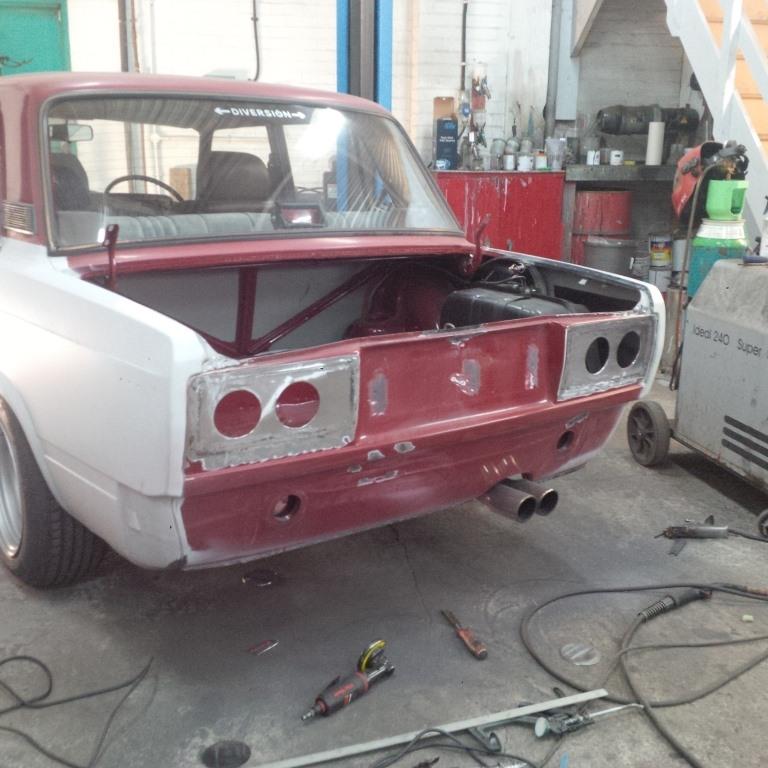
Cleaned up the rear panel and made infill sections. Got some thicker metal from eBay so it wouldn't warp too much.
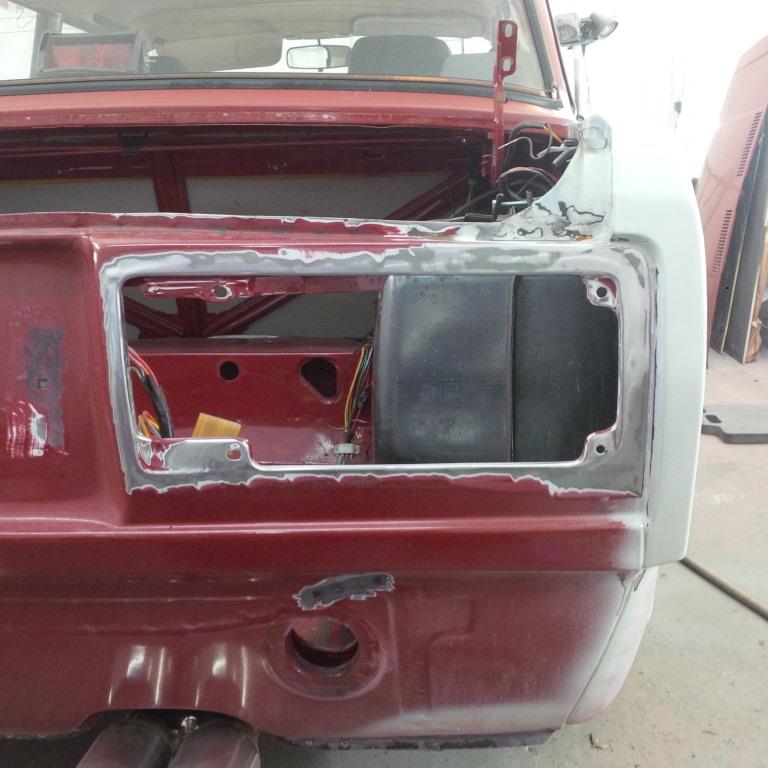
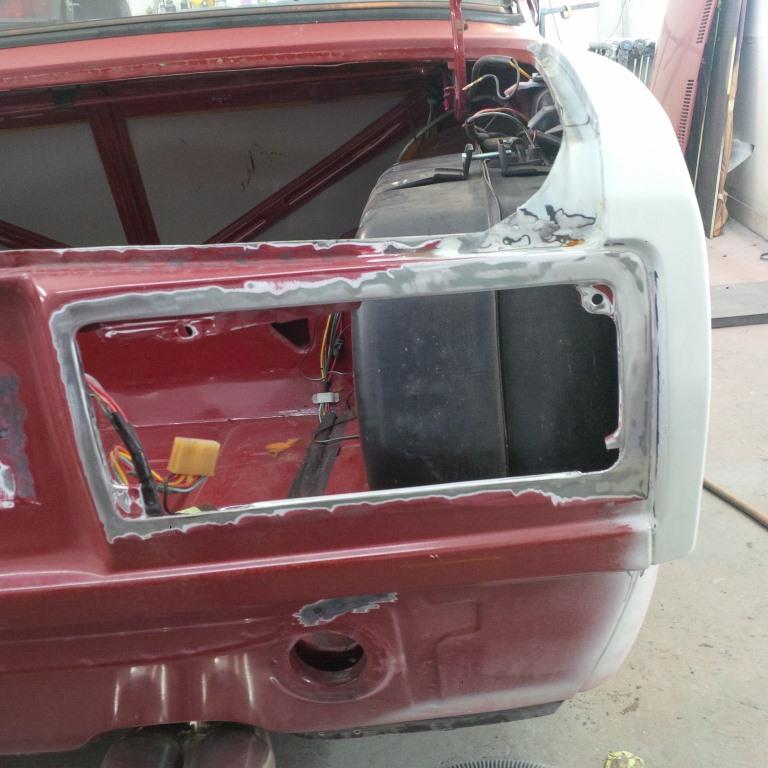
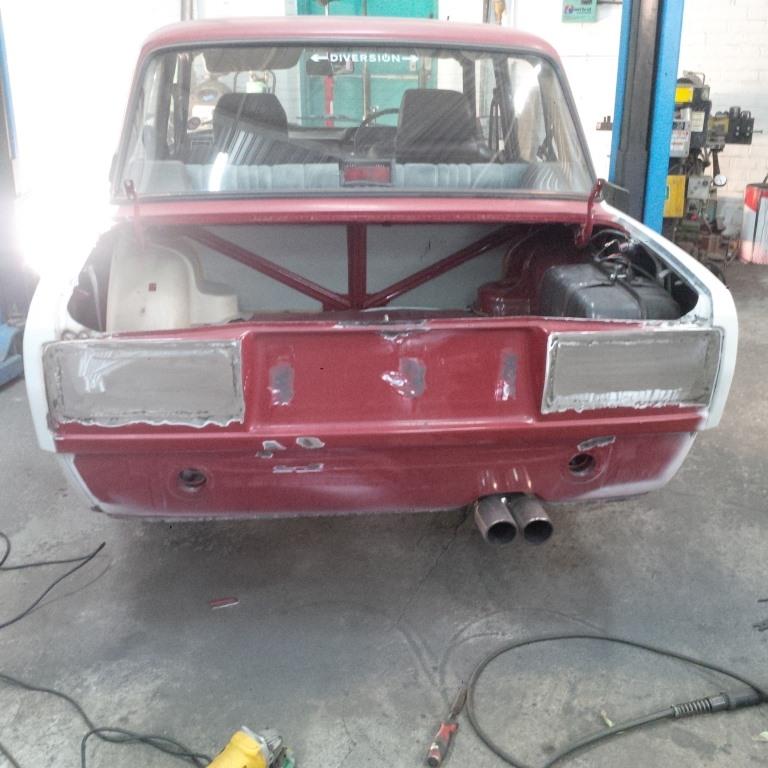
No going back now. It took ages to cut out the holes with a mini grinder but they worked out well. No laser measuring available but flat bar and clamps worked fine to line things up.

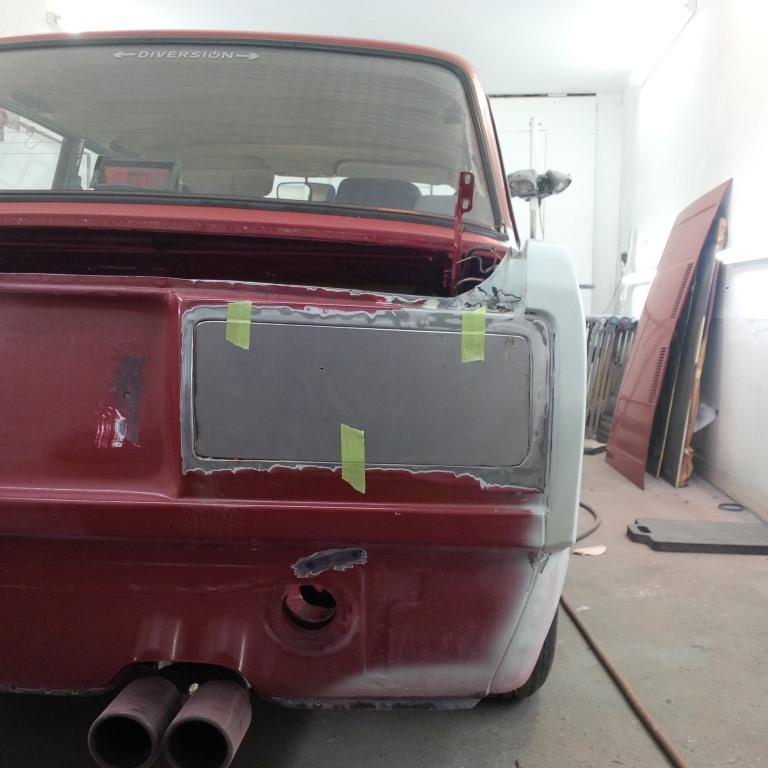
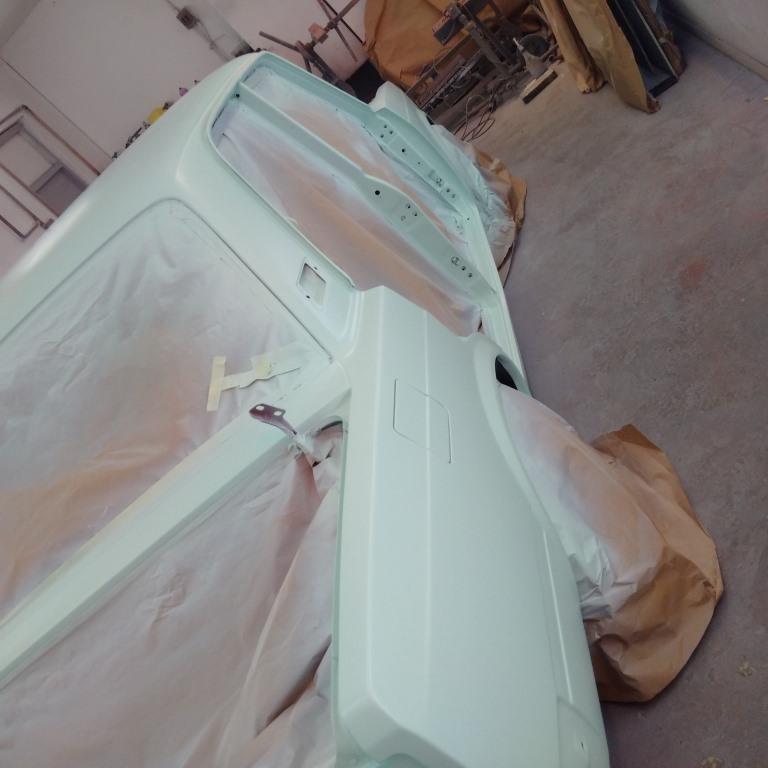
From here on in I know things aren't being done in the right order but I'm trying to focus on small sections at a time to make sure everything works. Will then go back and repeat it on the other side. I smoothed the rear quarter into the roof panel and the inner arch as I've never liked the unfinished look when you open the rear door. Also didn't want to have to put the extra chrome strip back on at the quarter join. Needed to get some colour on it to make sure I liked the choice so just working on drivers side, roof and rear just now.
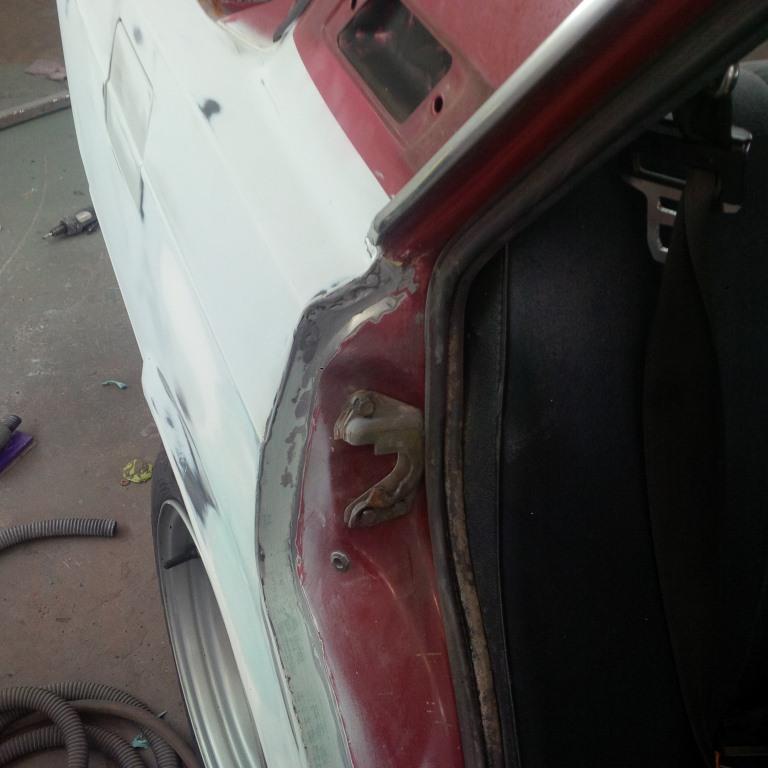
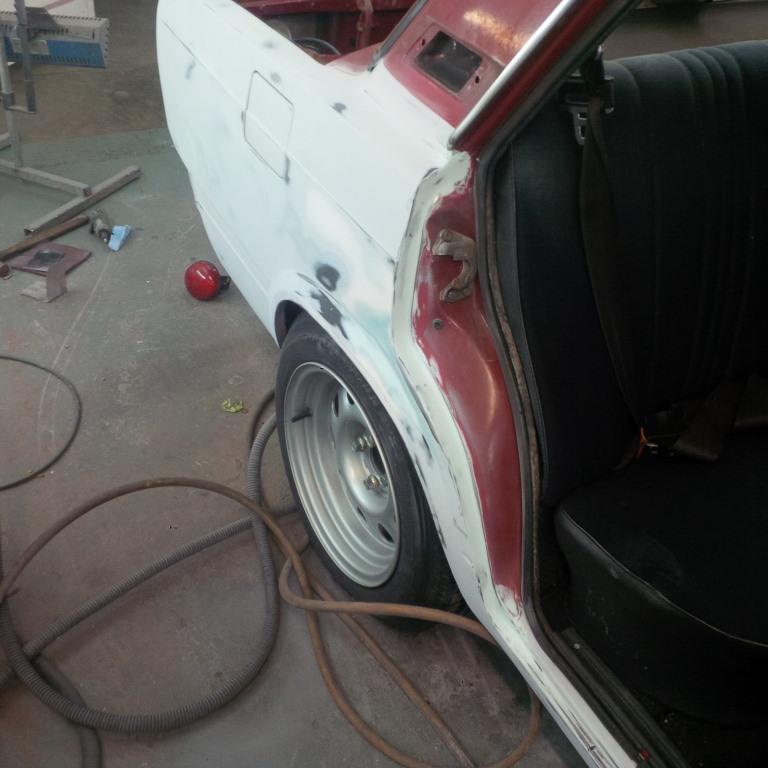
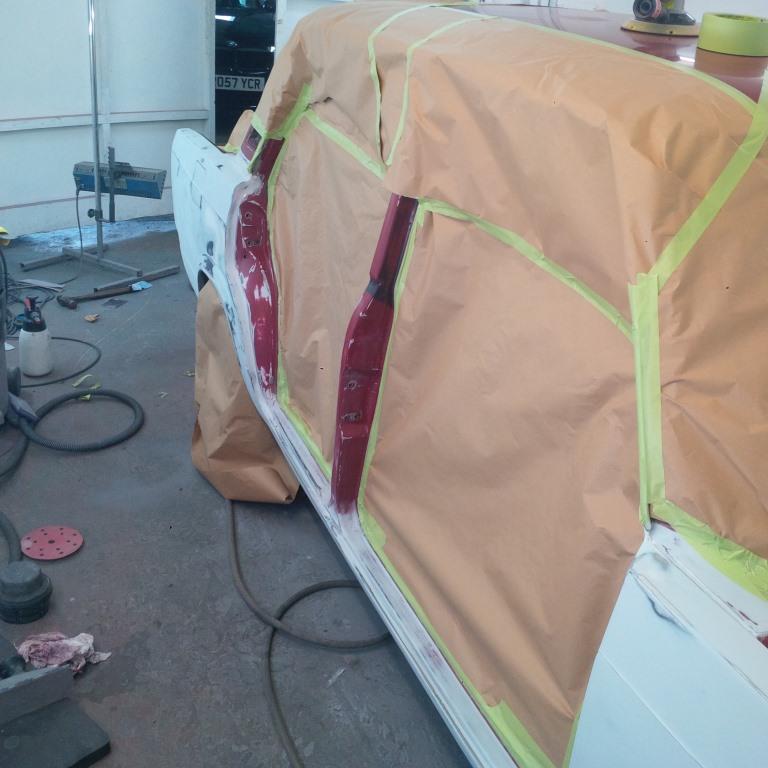
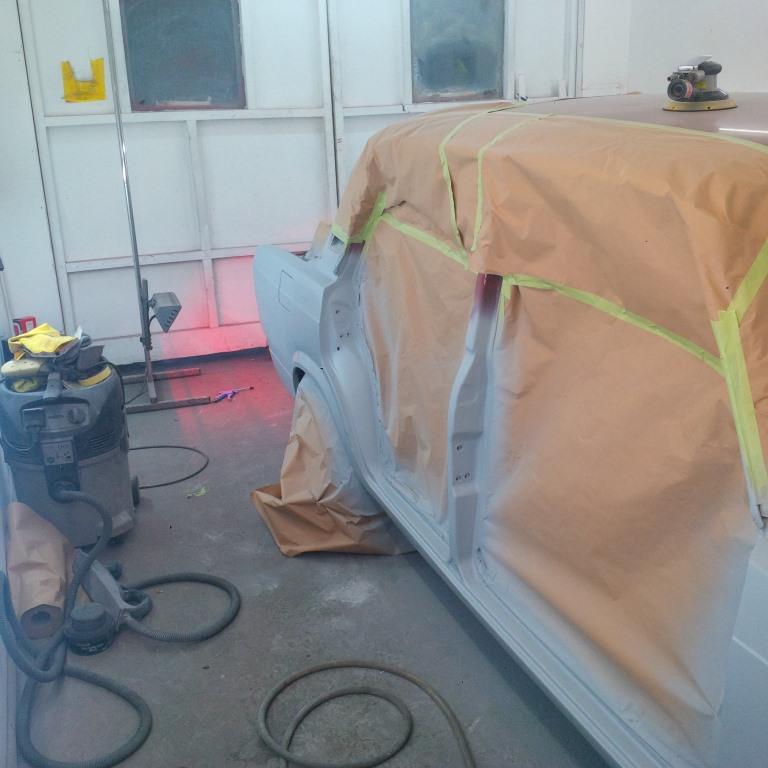
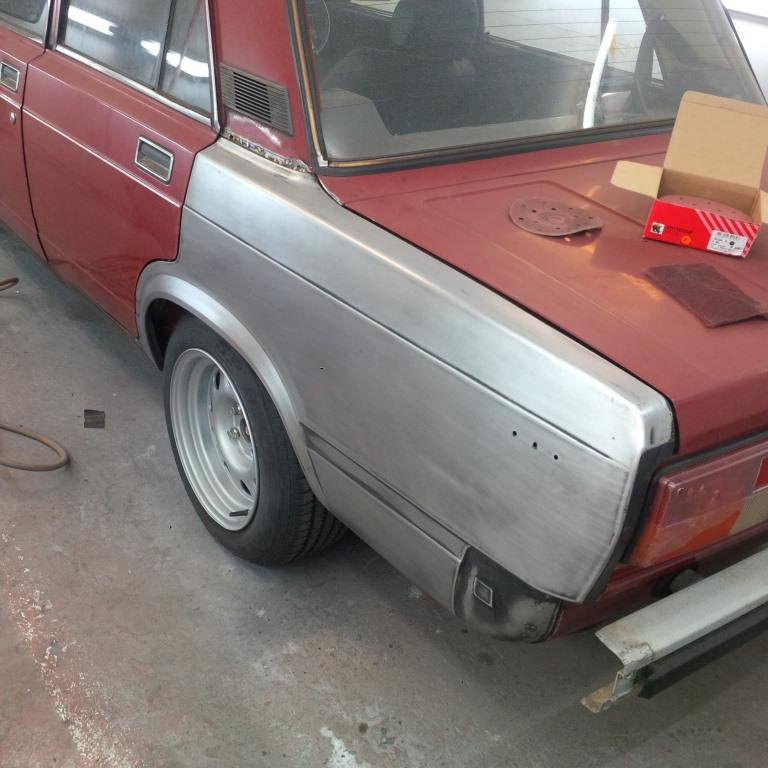
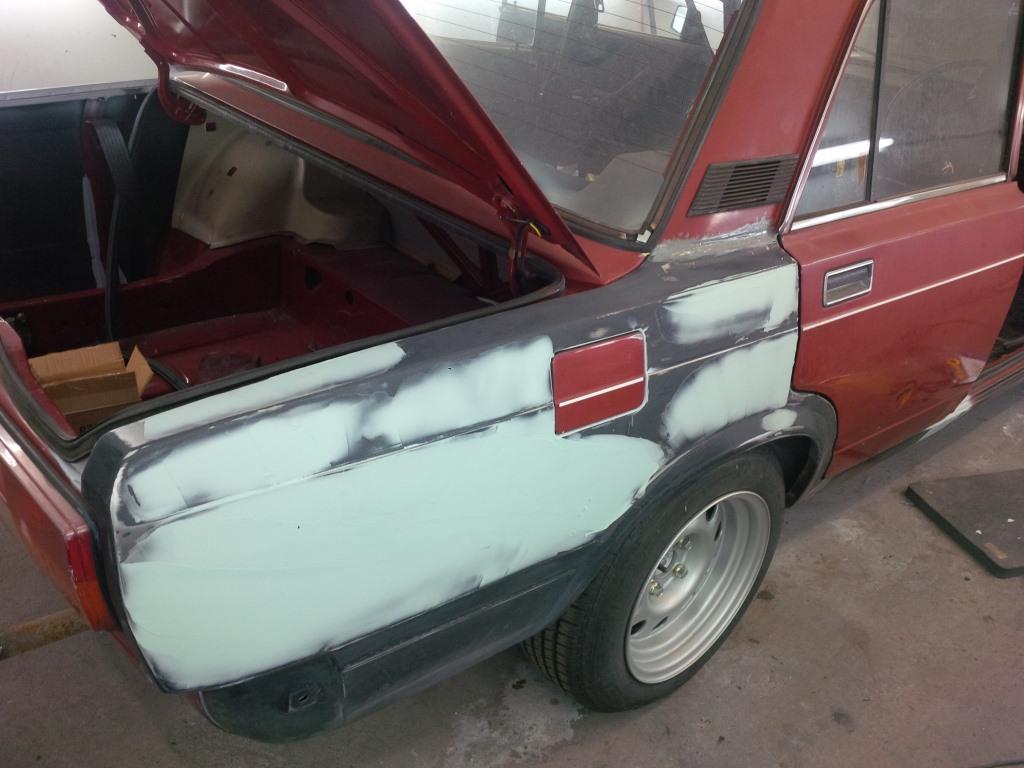
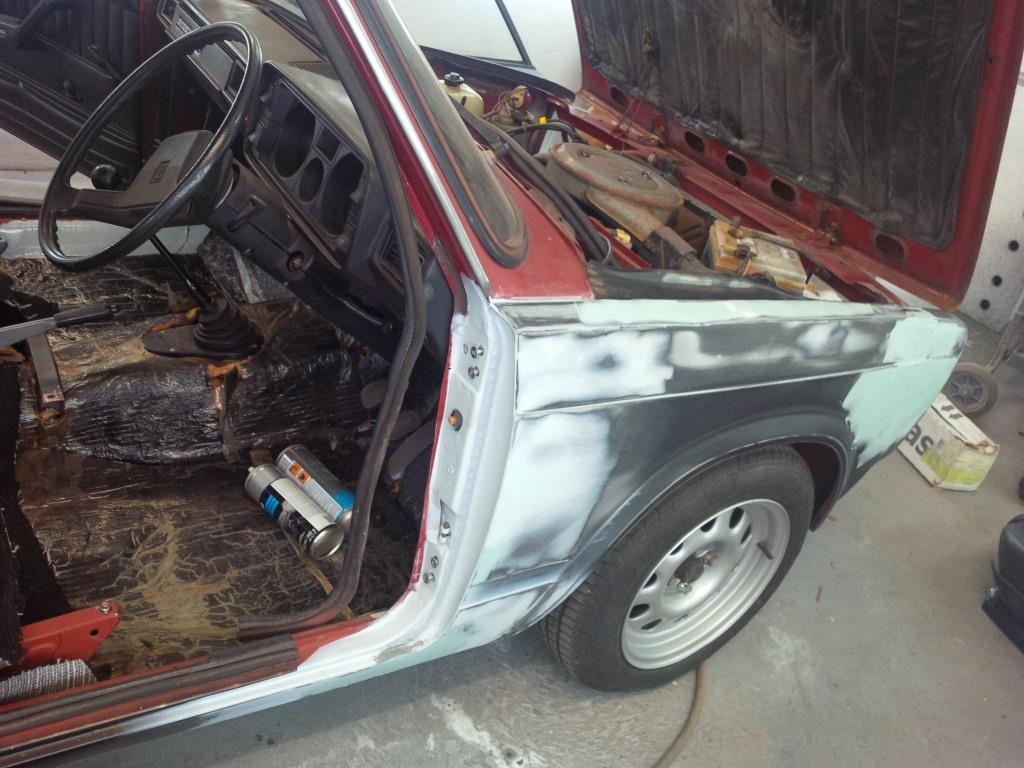
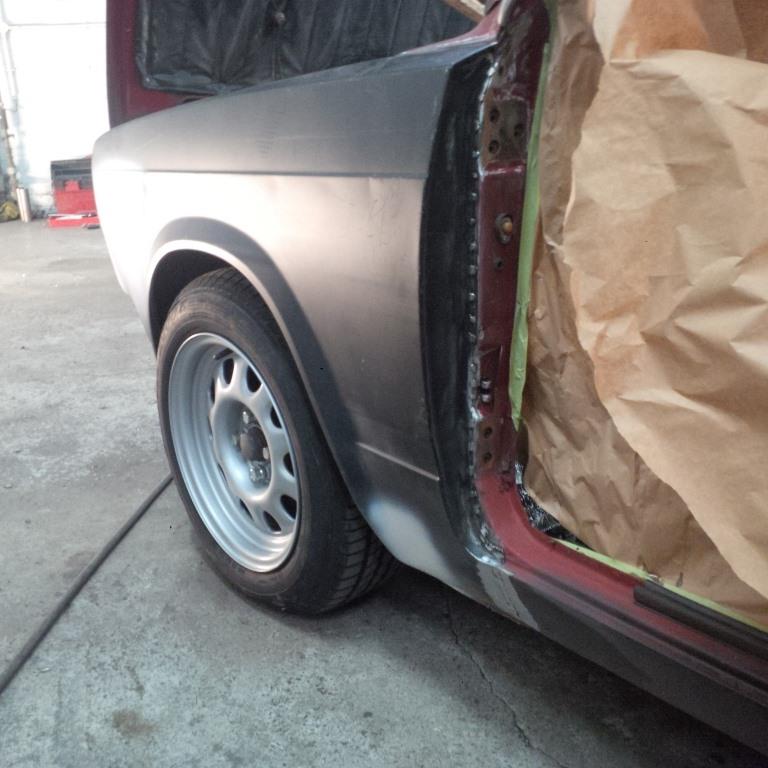
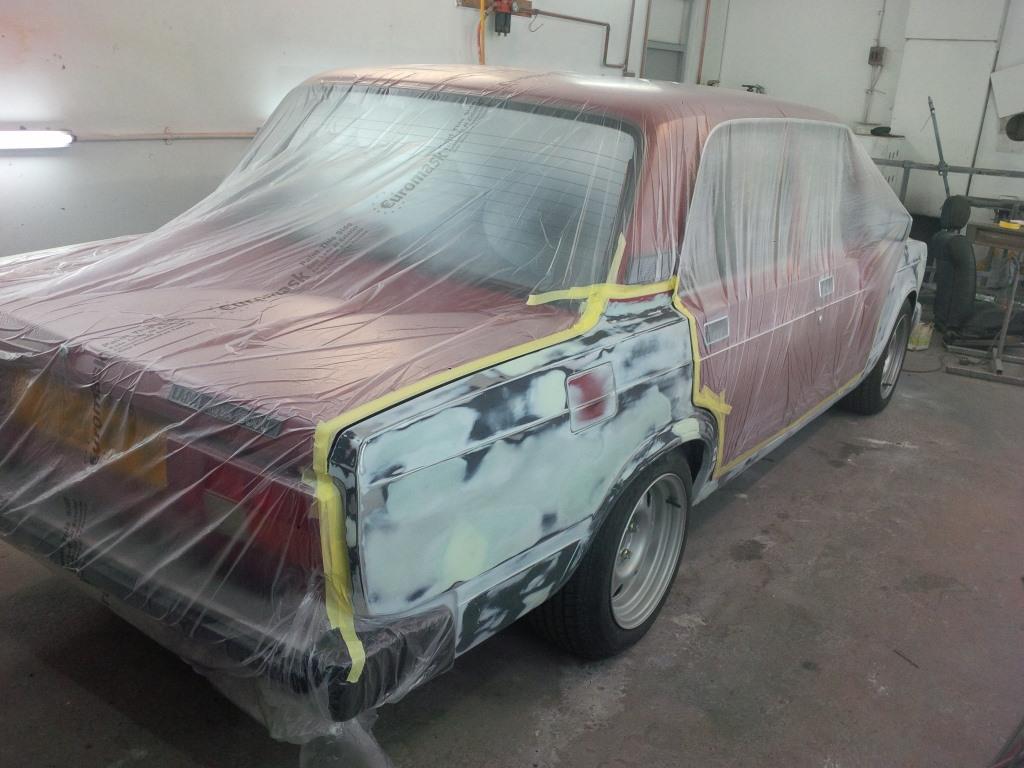
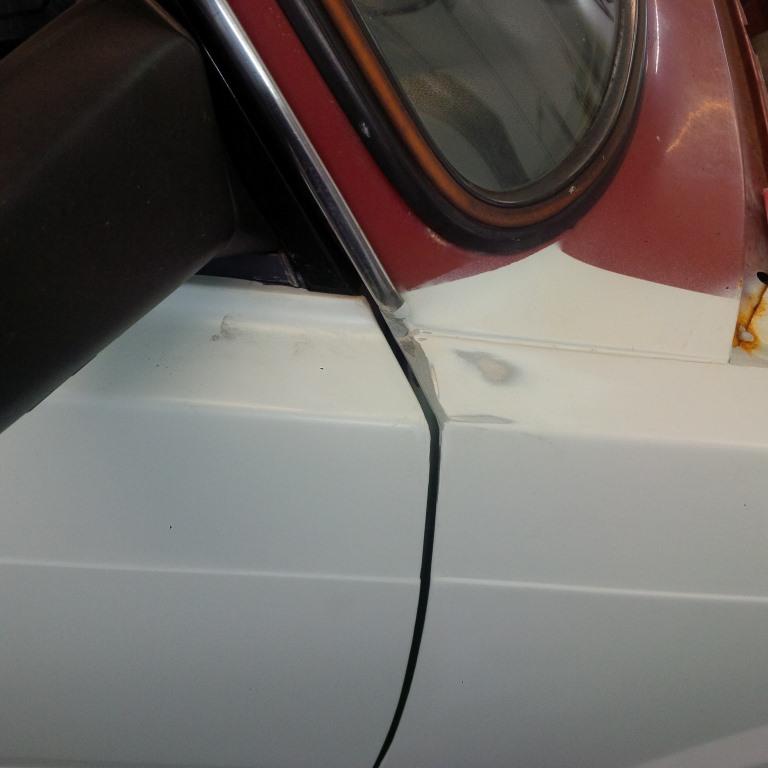
Bit of a bodge but used epoxy metal repair to extend the wing and improve the triangle gap at the top of the front door. Neither the wing or the new door had the same profile as the originals and I didn't want to start welding this area after all the sealer and rust prevention stuff that had been put on the back of it. Fingers crossed it holds up. Seems really strong.
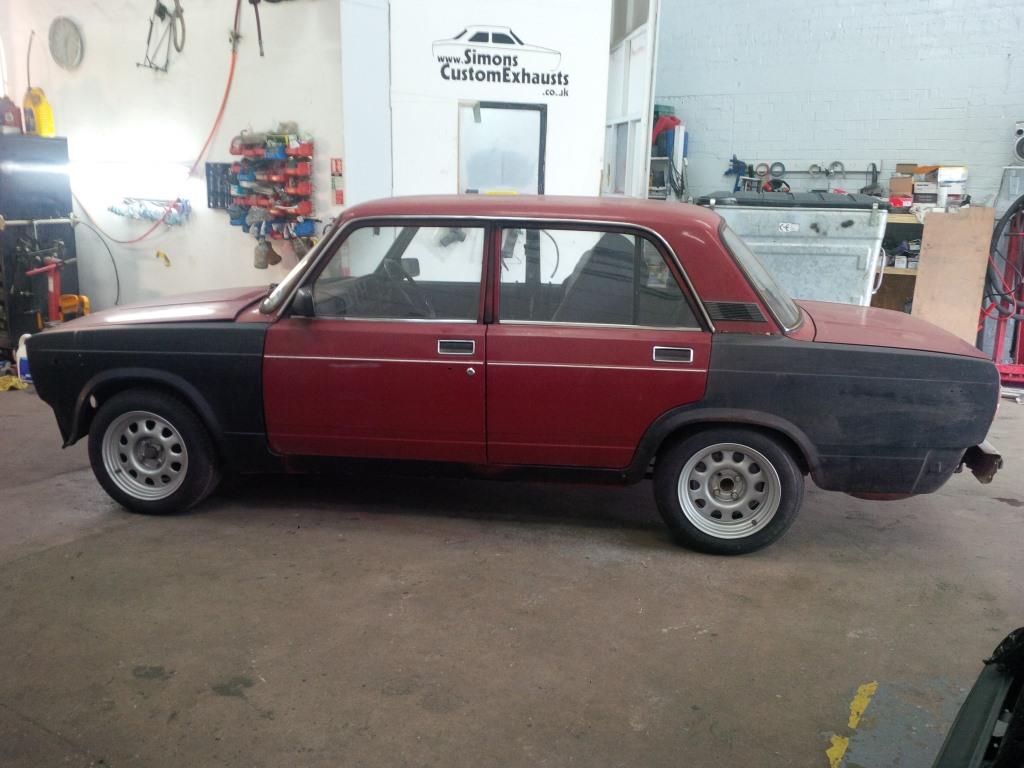
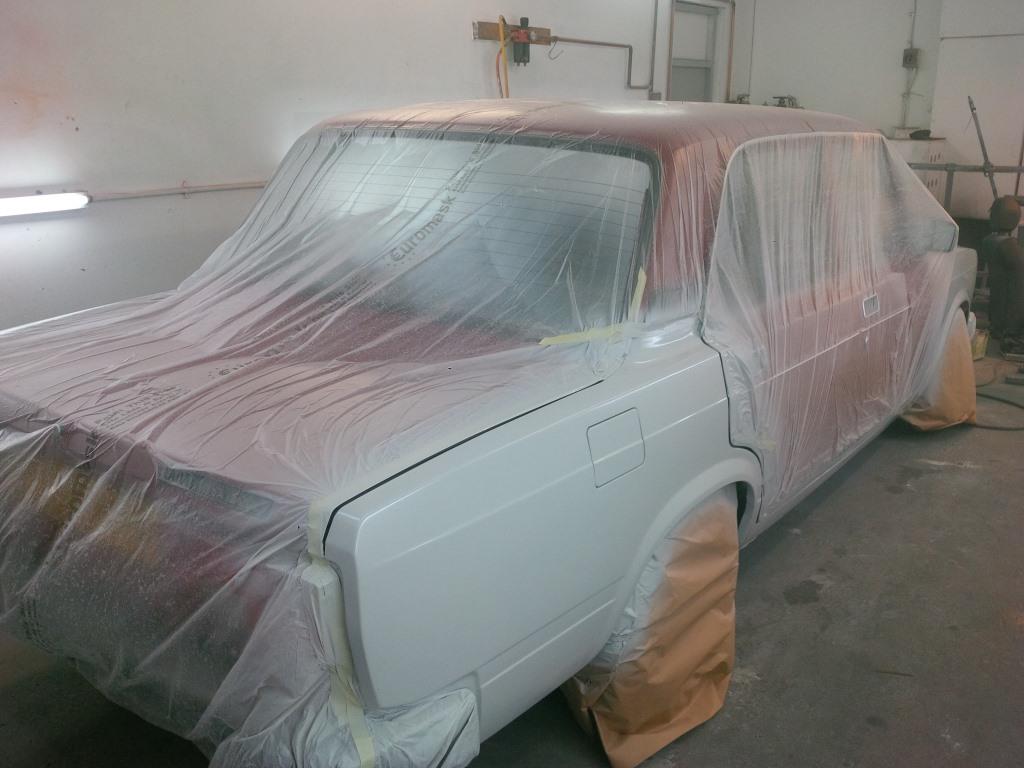
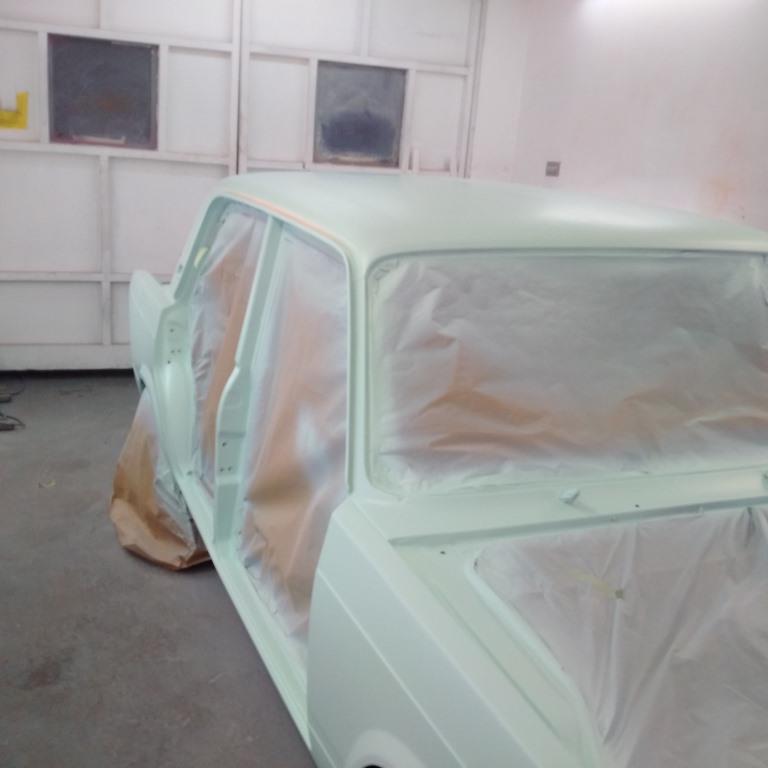
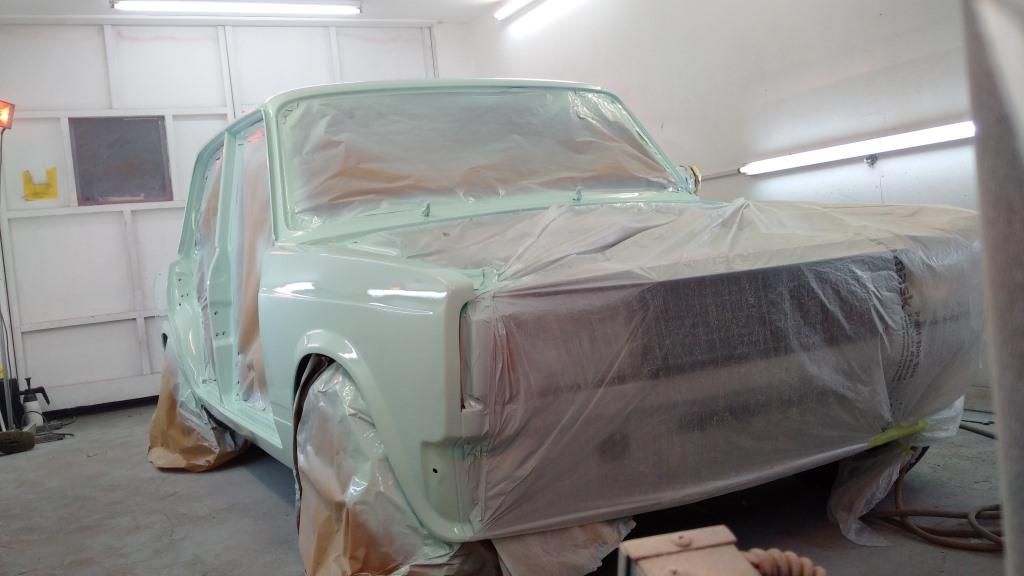
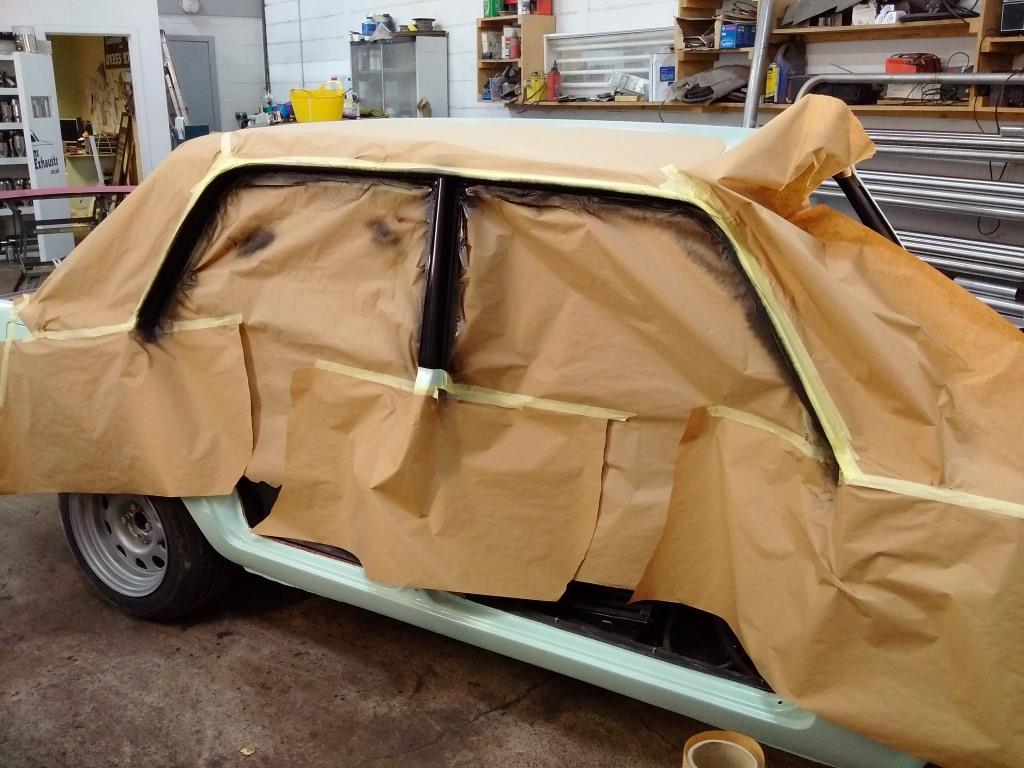
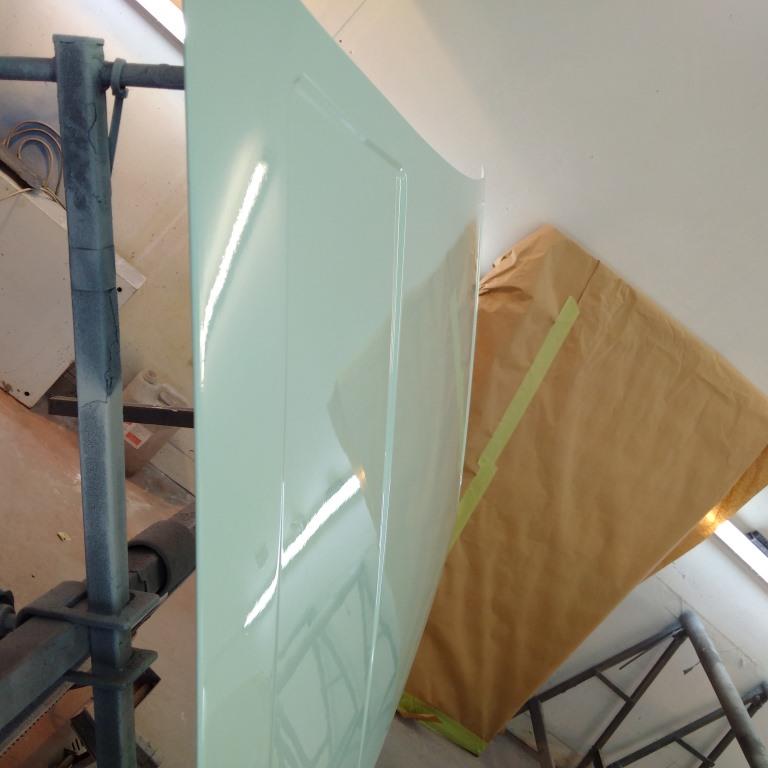
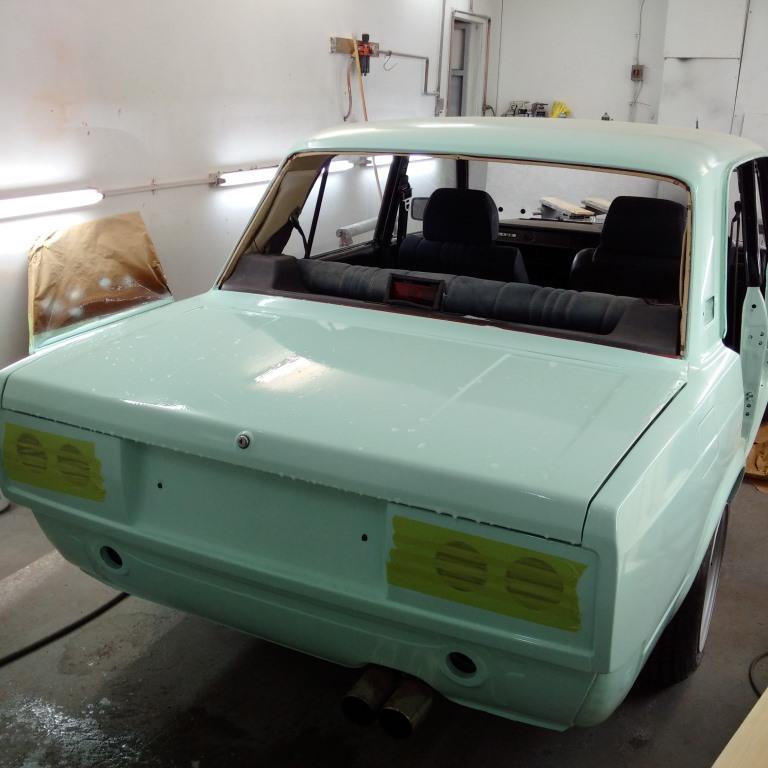
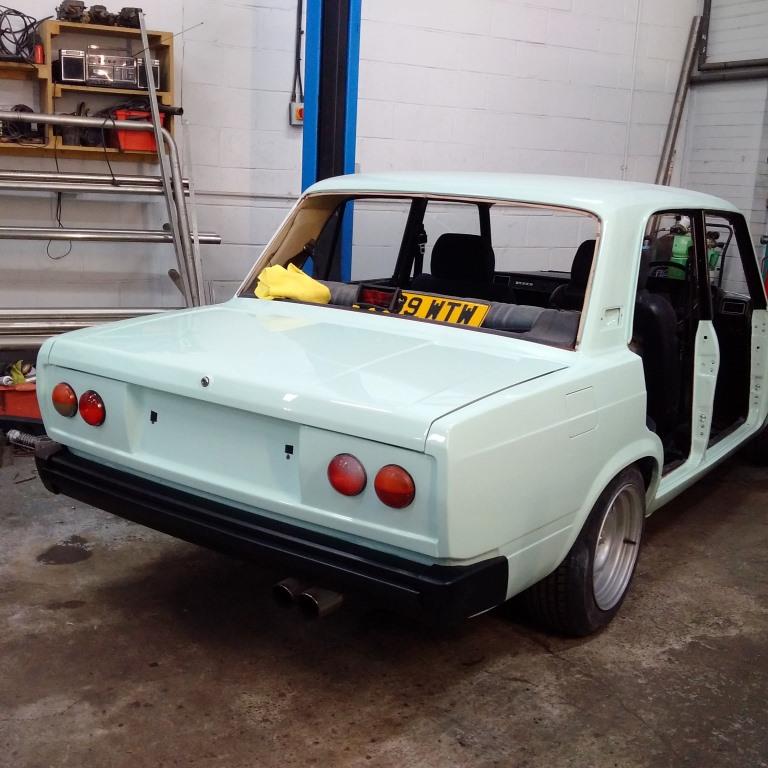
Got the screens out to make sure there was no hidden rust which thankfully there wasn't and then got some Fiat 500 Lattementa Green on. Was overtaken by a 500 on the way back from Retro rides in this colour and it looked like it would suit the Lada. Had to chase it to get the registration number so I could find out the colour code. The old Riva managed 80mph without exploding so it was obviously meant to be! Etch primed the stainless/ chrome strip around the roof gutter and painted it body colour.
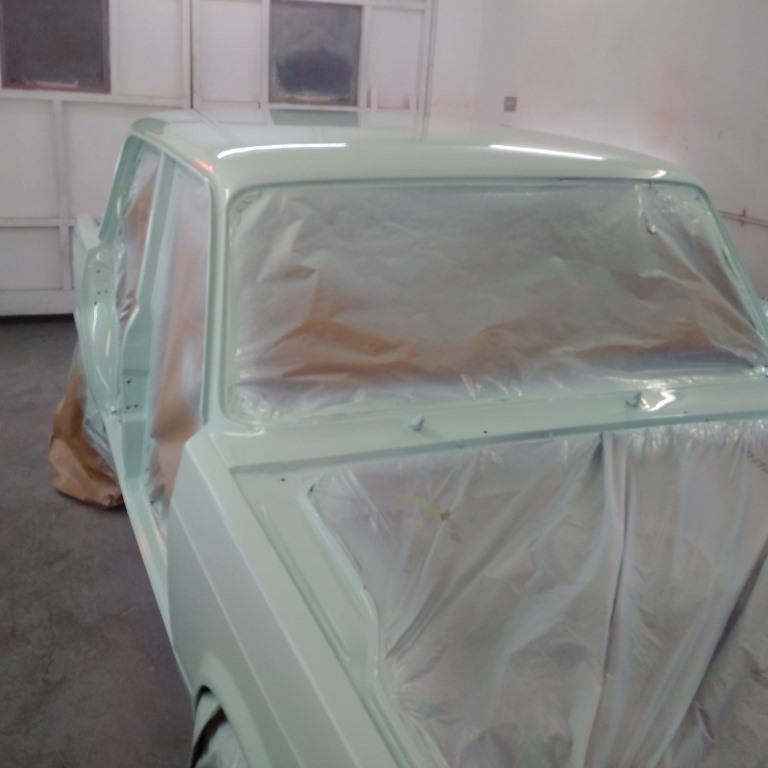
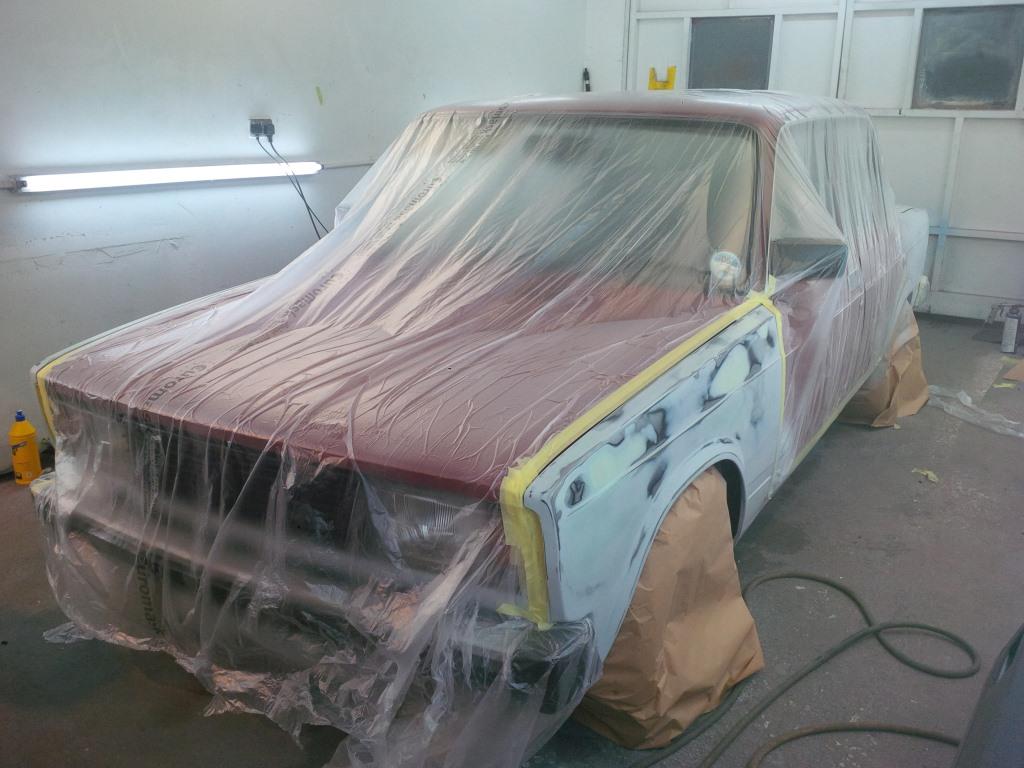
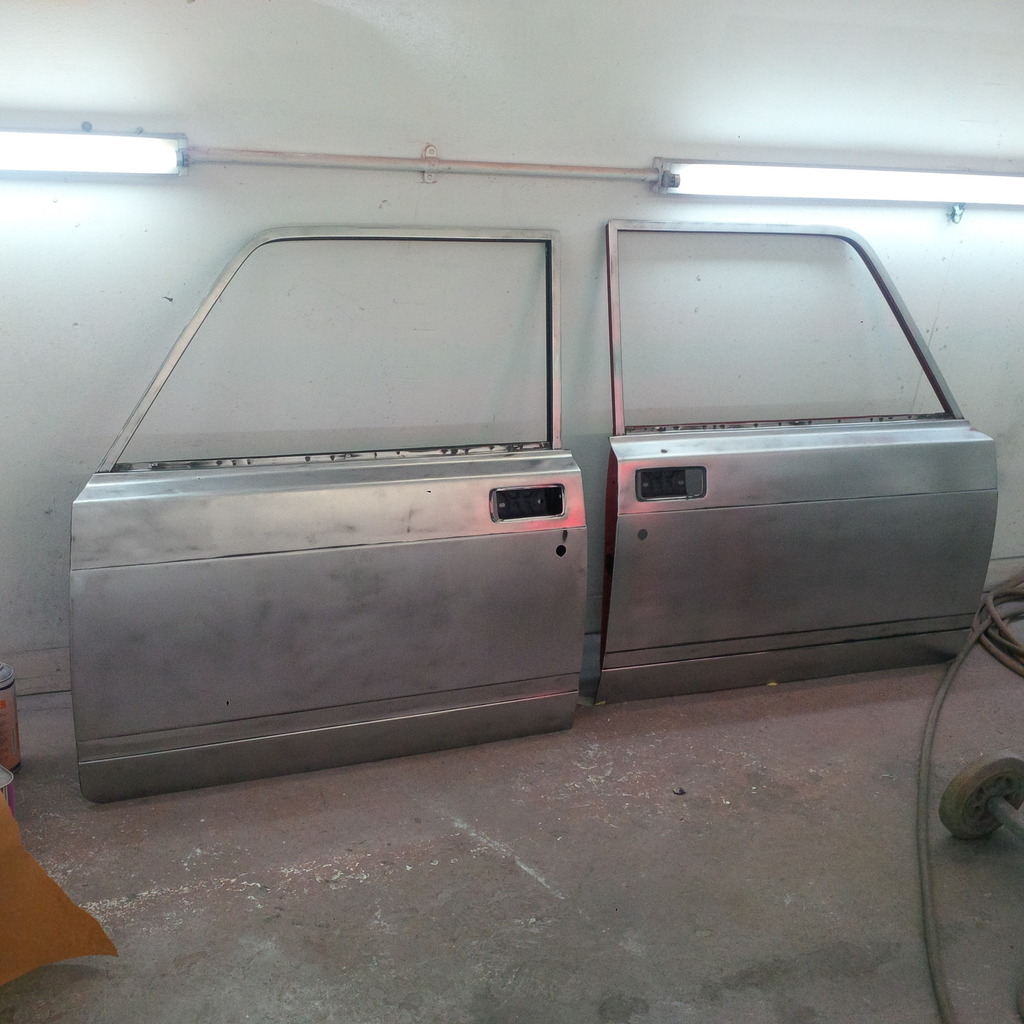
Bare metalled the new doors and painted the insides with construction primer and the outsides with an epoxy primer to hopefully seal them and slow down future rust.
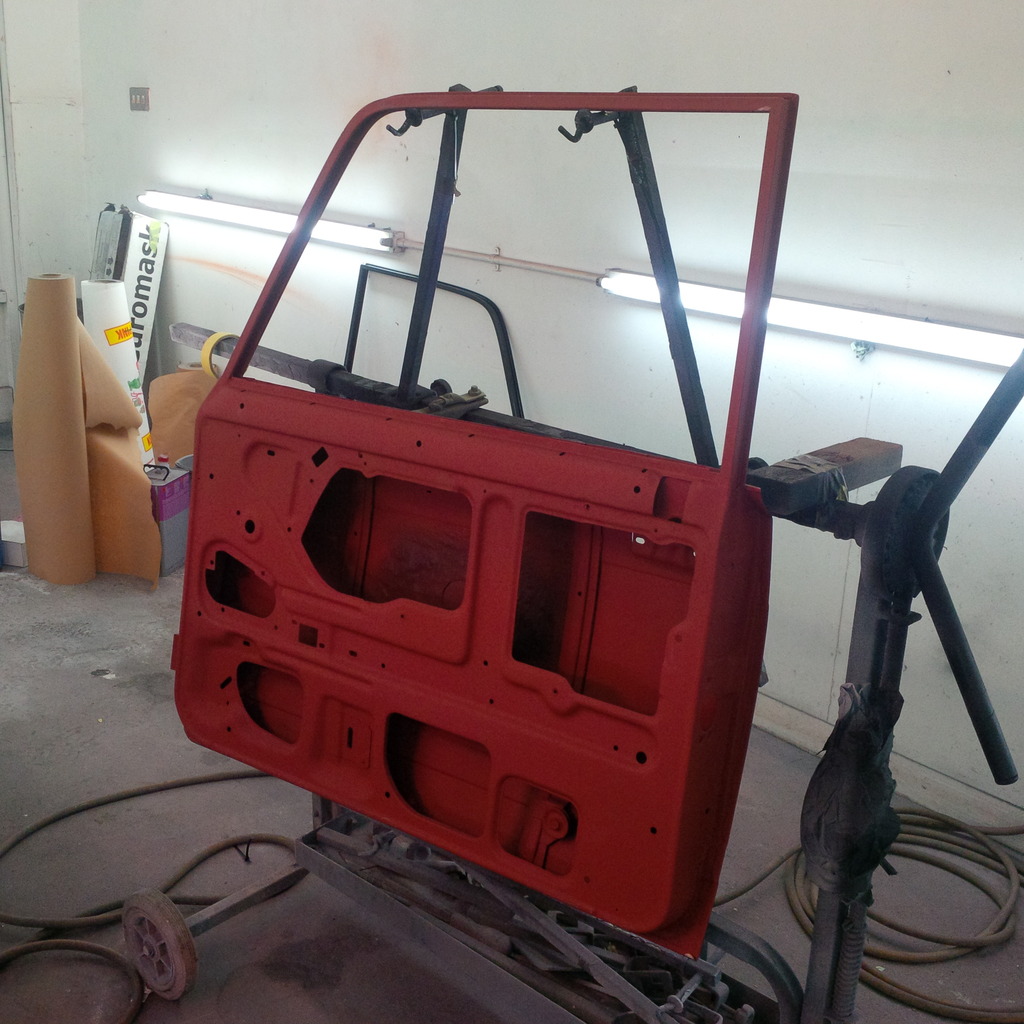
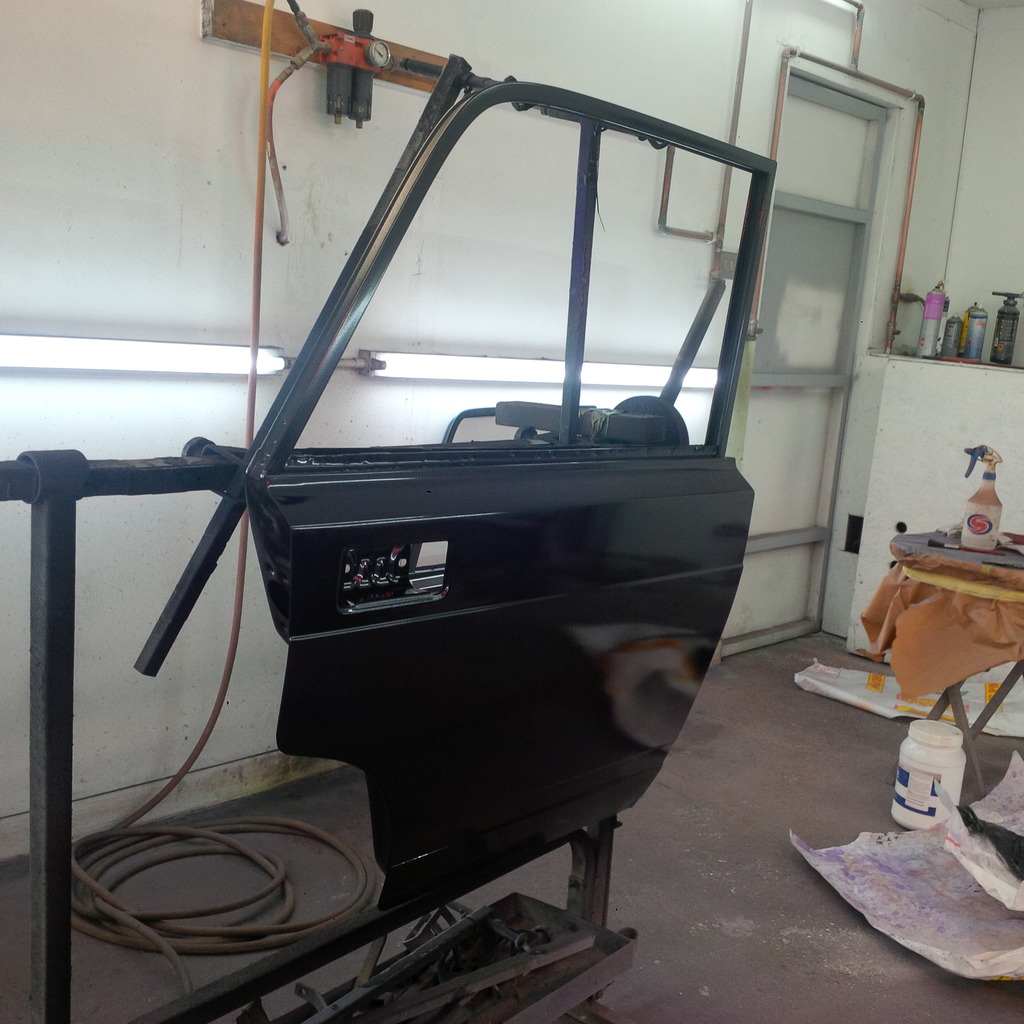
Painted the surrounds black, should help discuise the fact that the doors just don't seem to line up evenly!
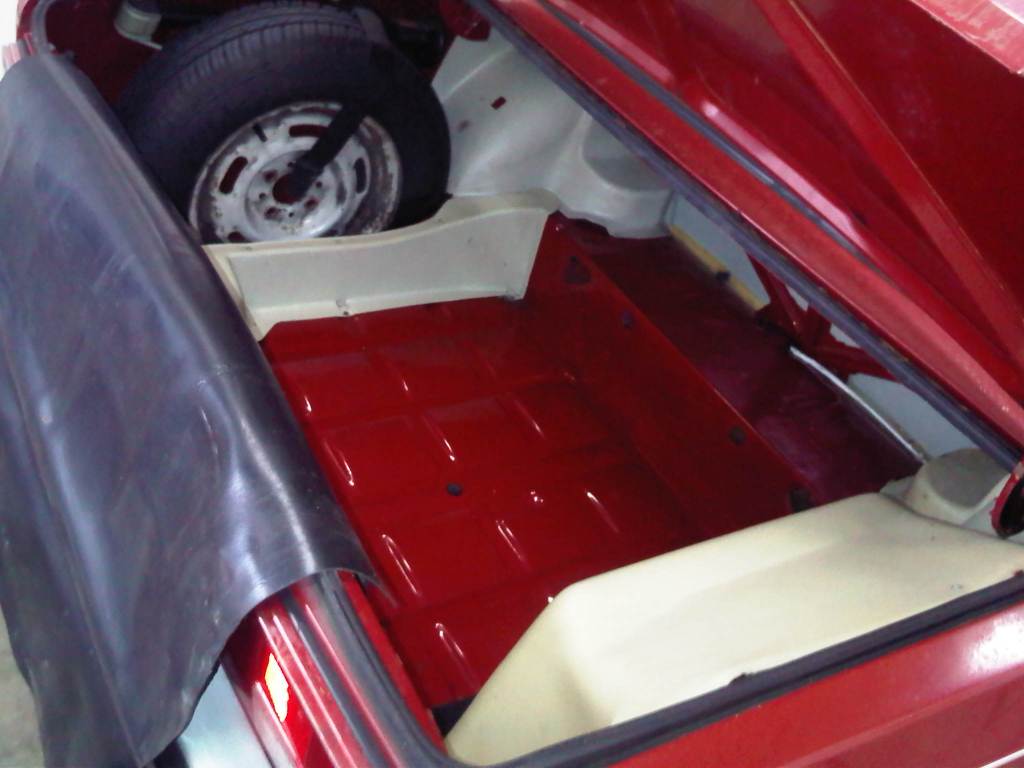
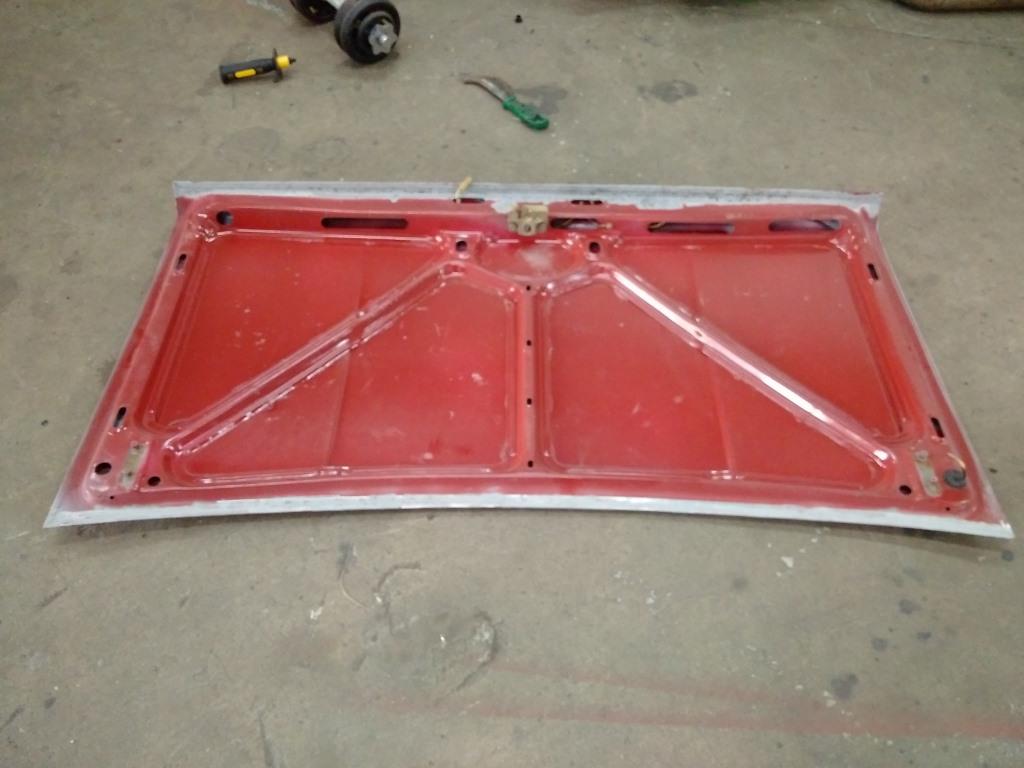
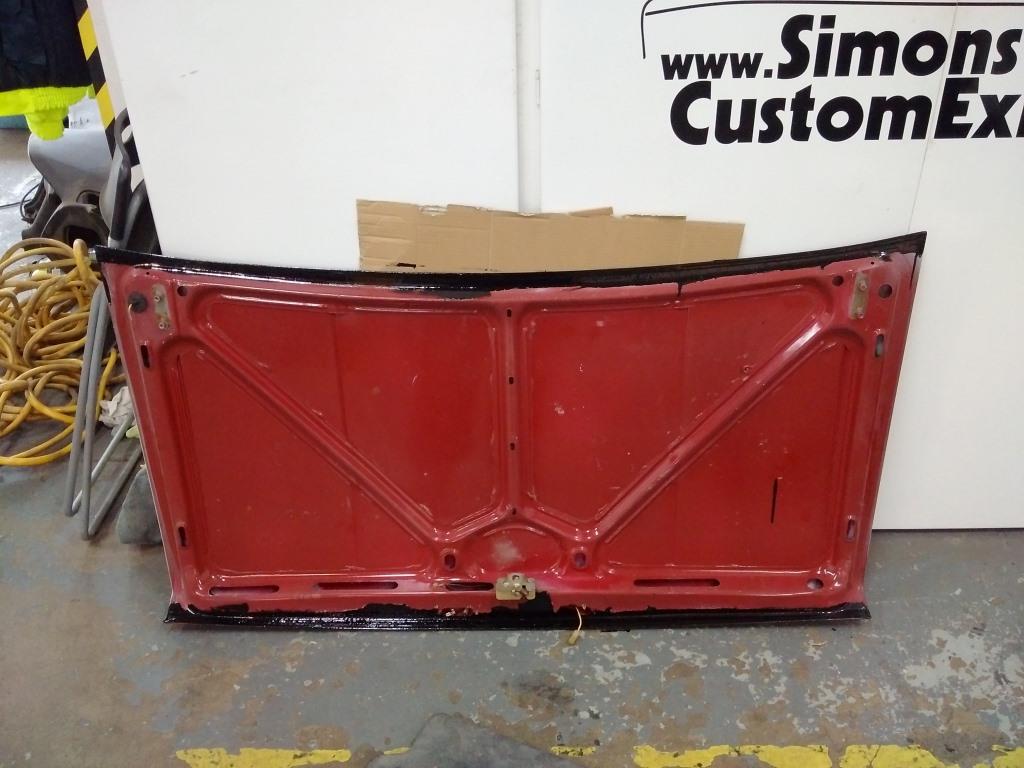
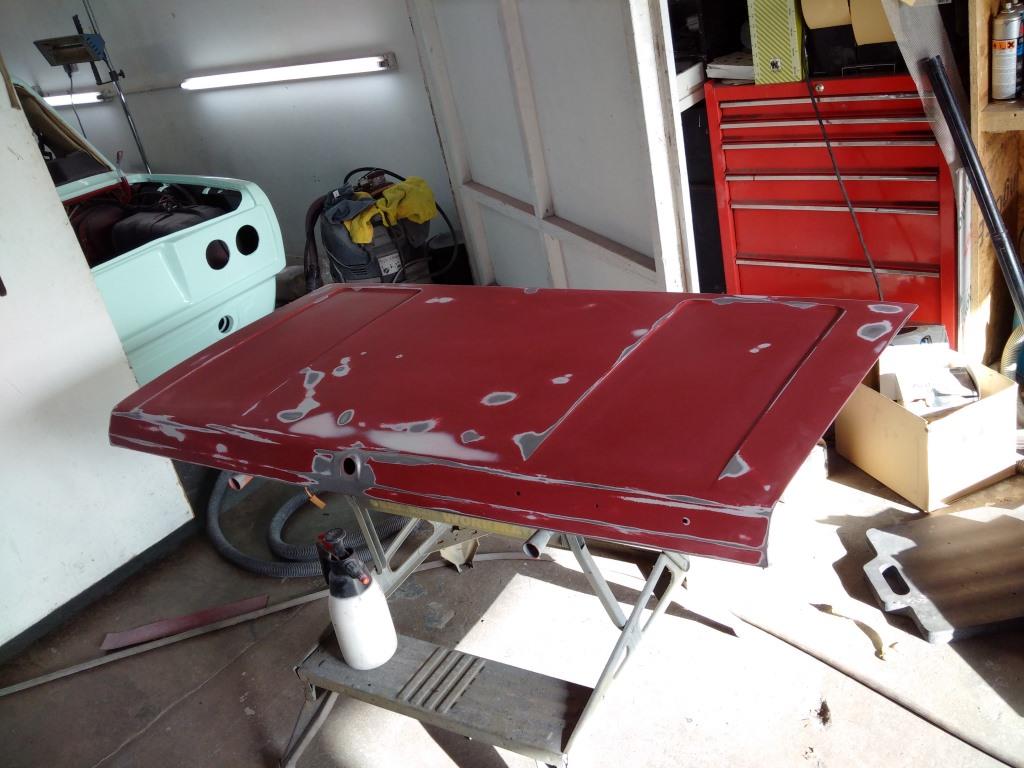
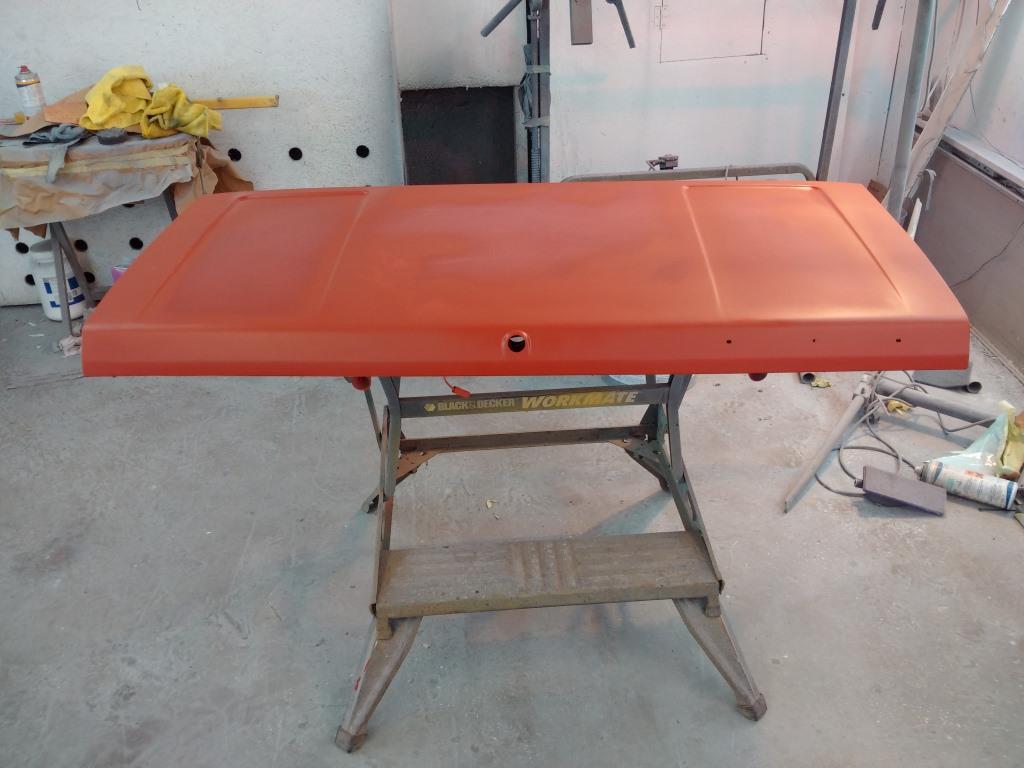
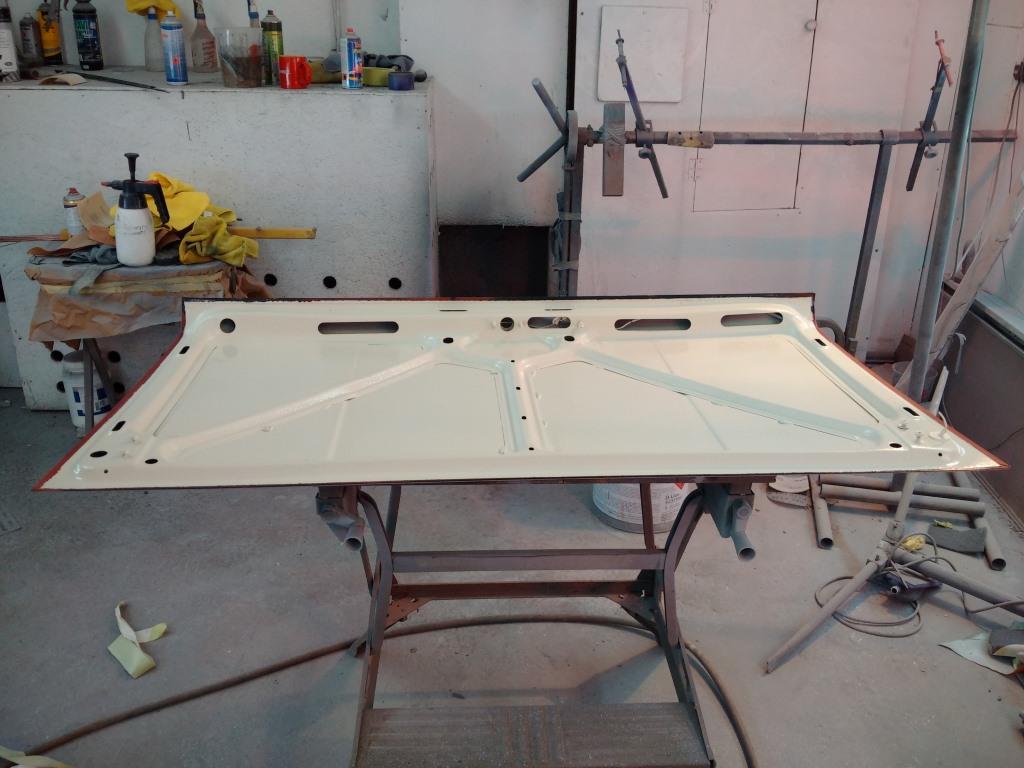
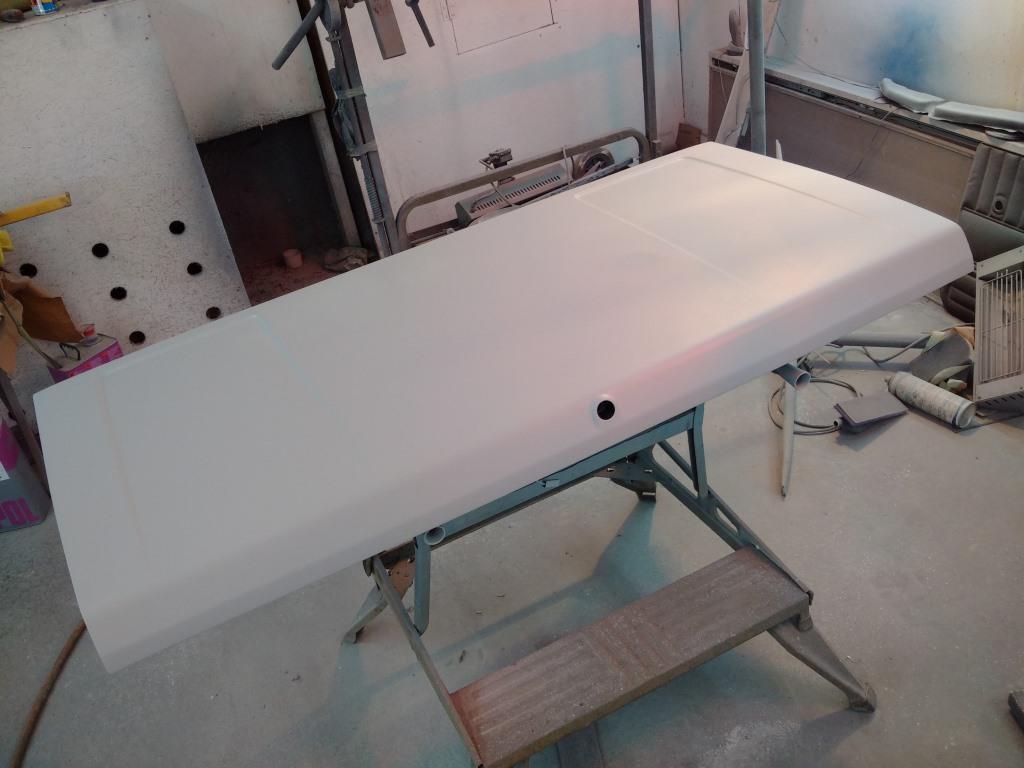
Blasted the bootlid edges with a 'blast starter kit' from Frost. Worked really well but makes loads of mess. Put plenty of POR15 around the inner edges and let it run into the seams as much as possible. Construction primer for protection again and stonechipped the underside to help deaden the panel a bit. Loads of high build primer and sanding then finally painted. Got rid of the badge holes to make everything a bit cleaner looking at the back.
Dad flatted and buffed the back end, wired up the lights and trial fitted them.
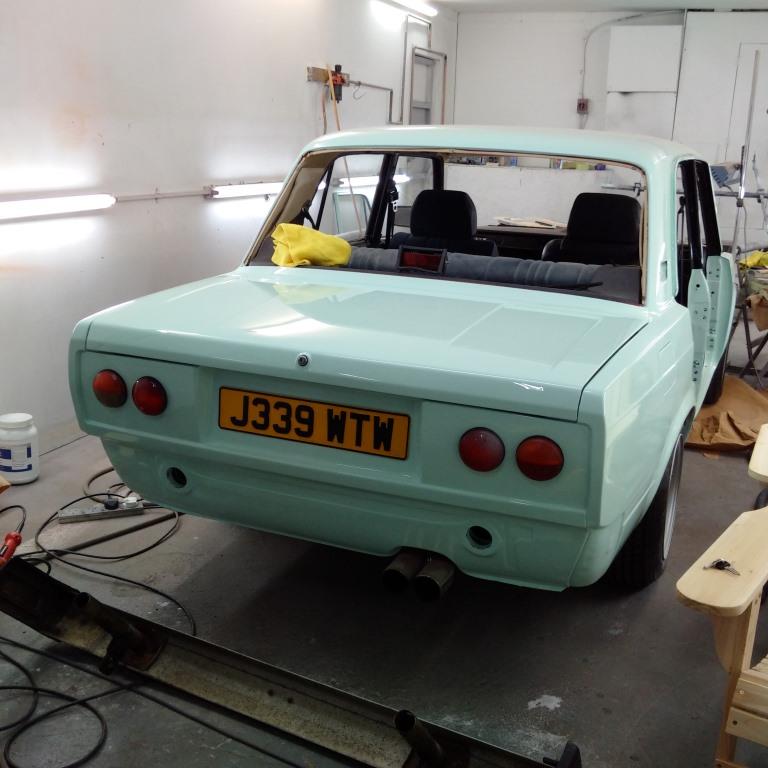
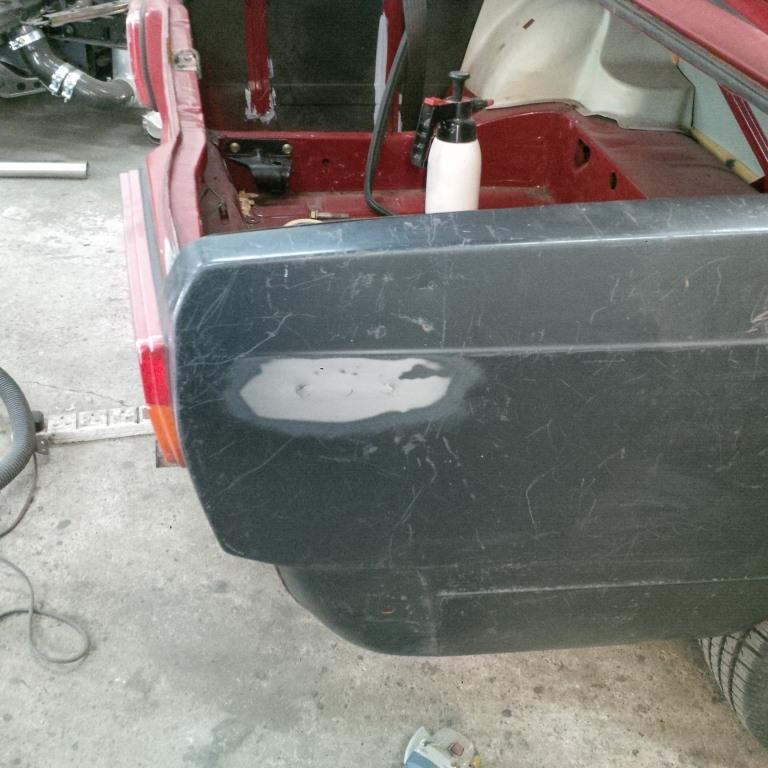
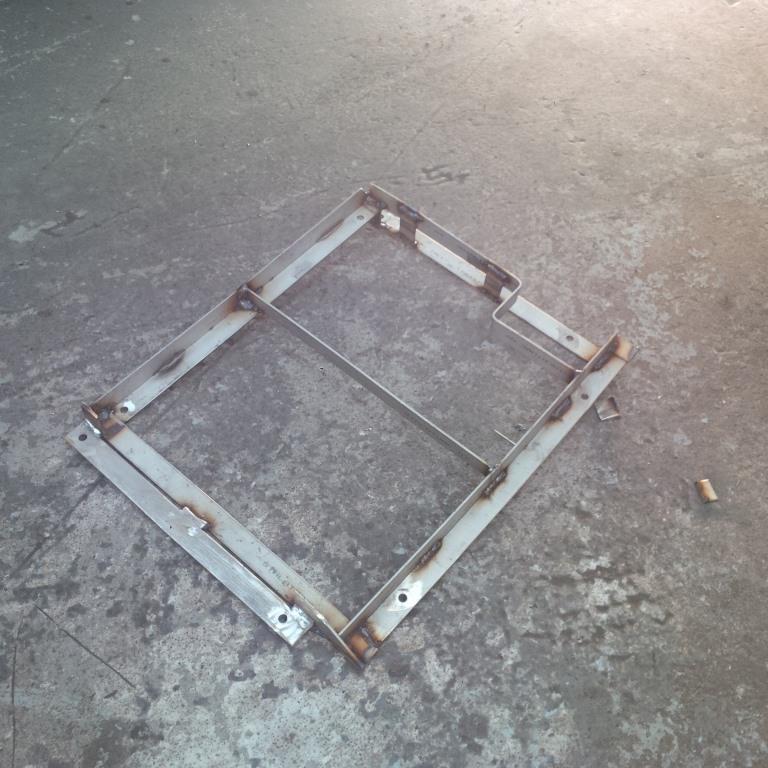
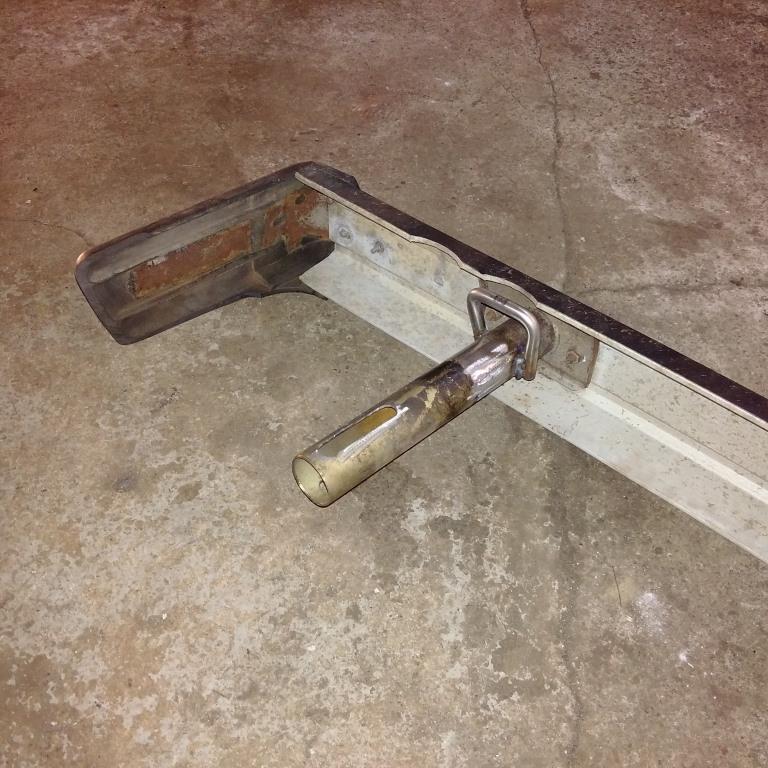
I made some modifications to the rear bumper to get it to sit closer to the body and trimmed the inside of the end caps so they didn't hit the quarters.
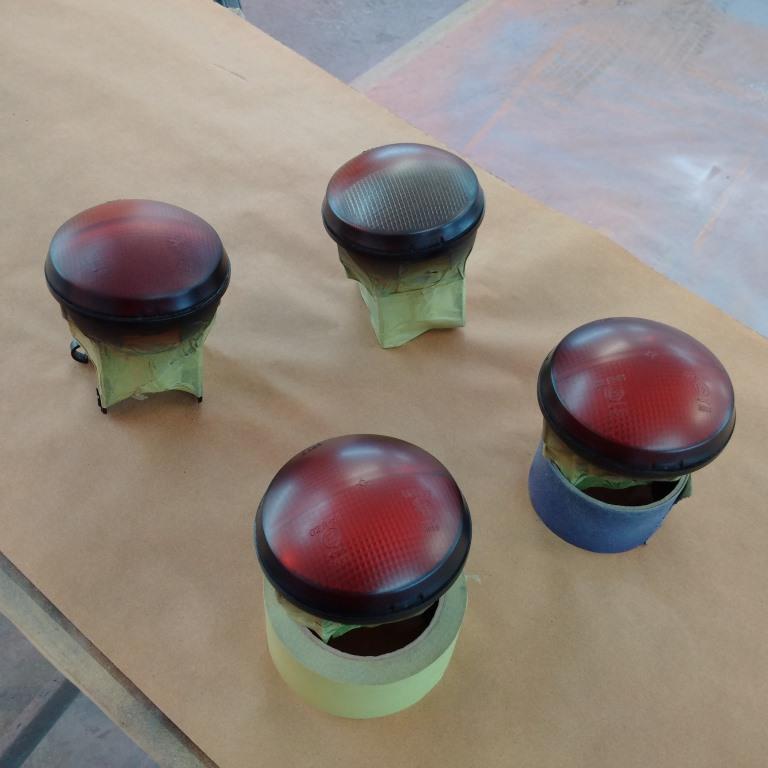
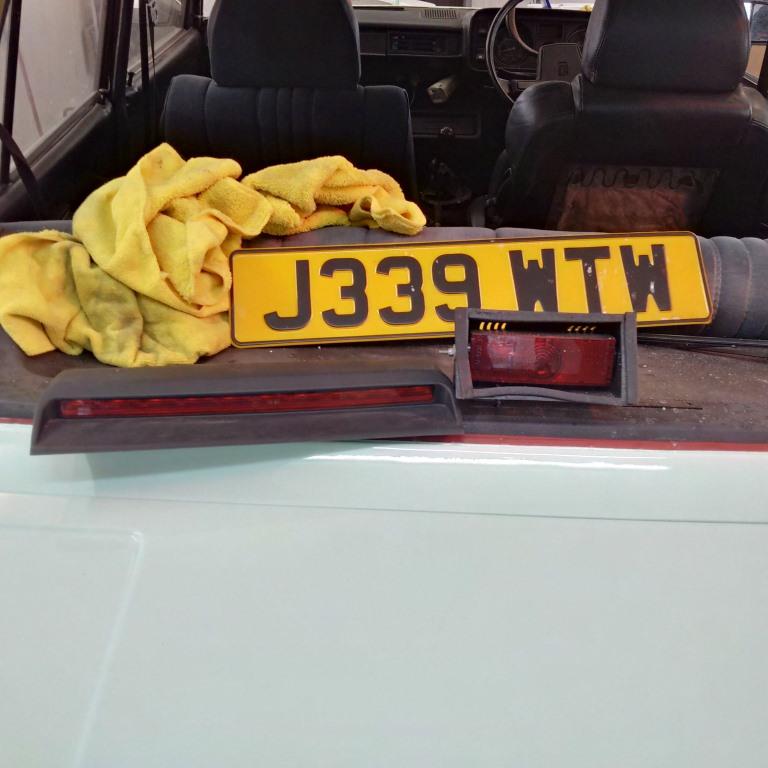
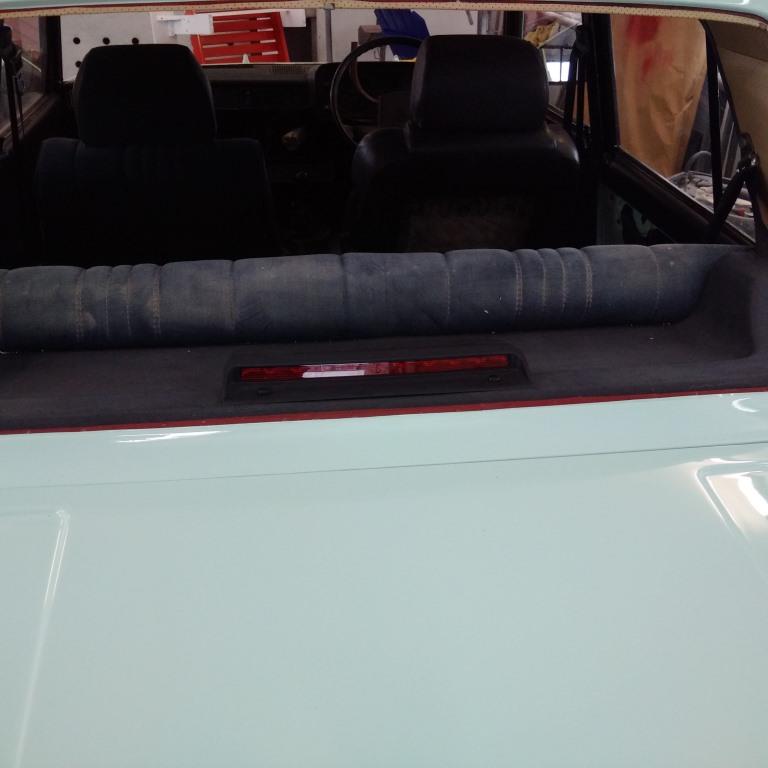
Tinted the rear lights and changed the universal high level brake light to a Fiat Coupe one as well as it's much better looking,
And that's it up to real time now.


 Απάντηση με παράθεση


 συμφωνώ απόλυτα!
